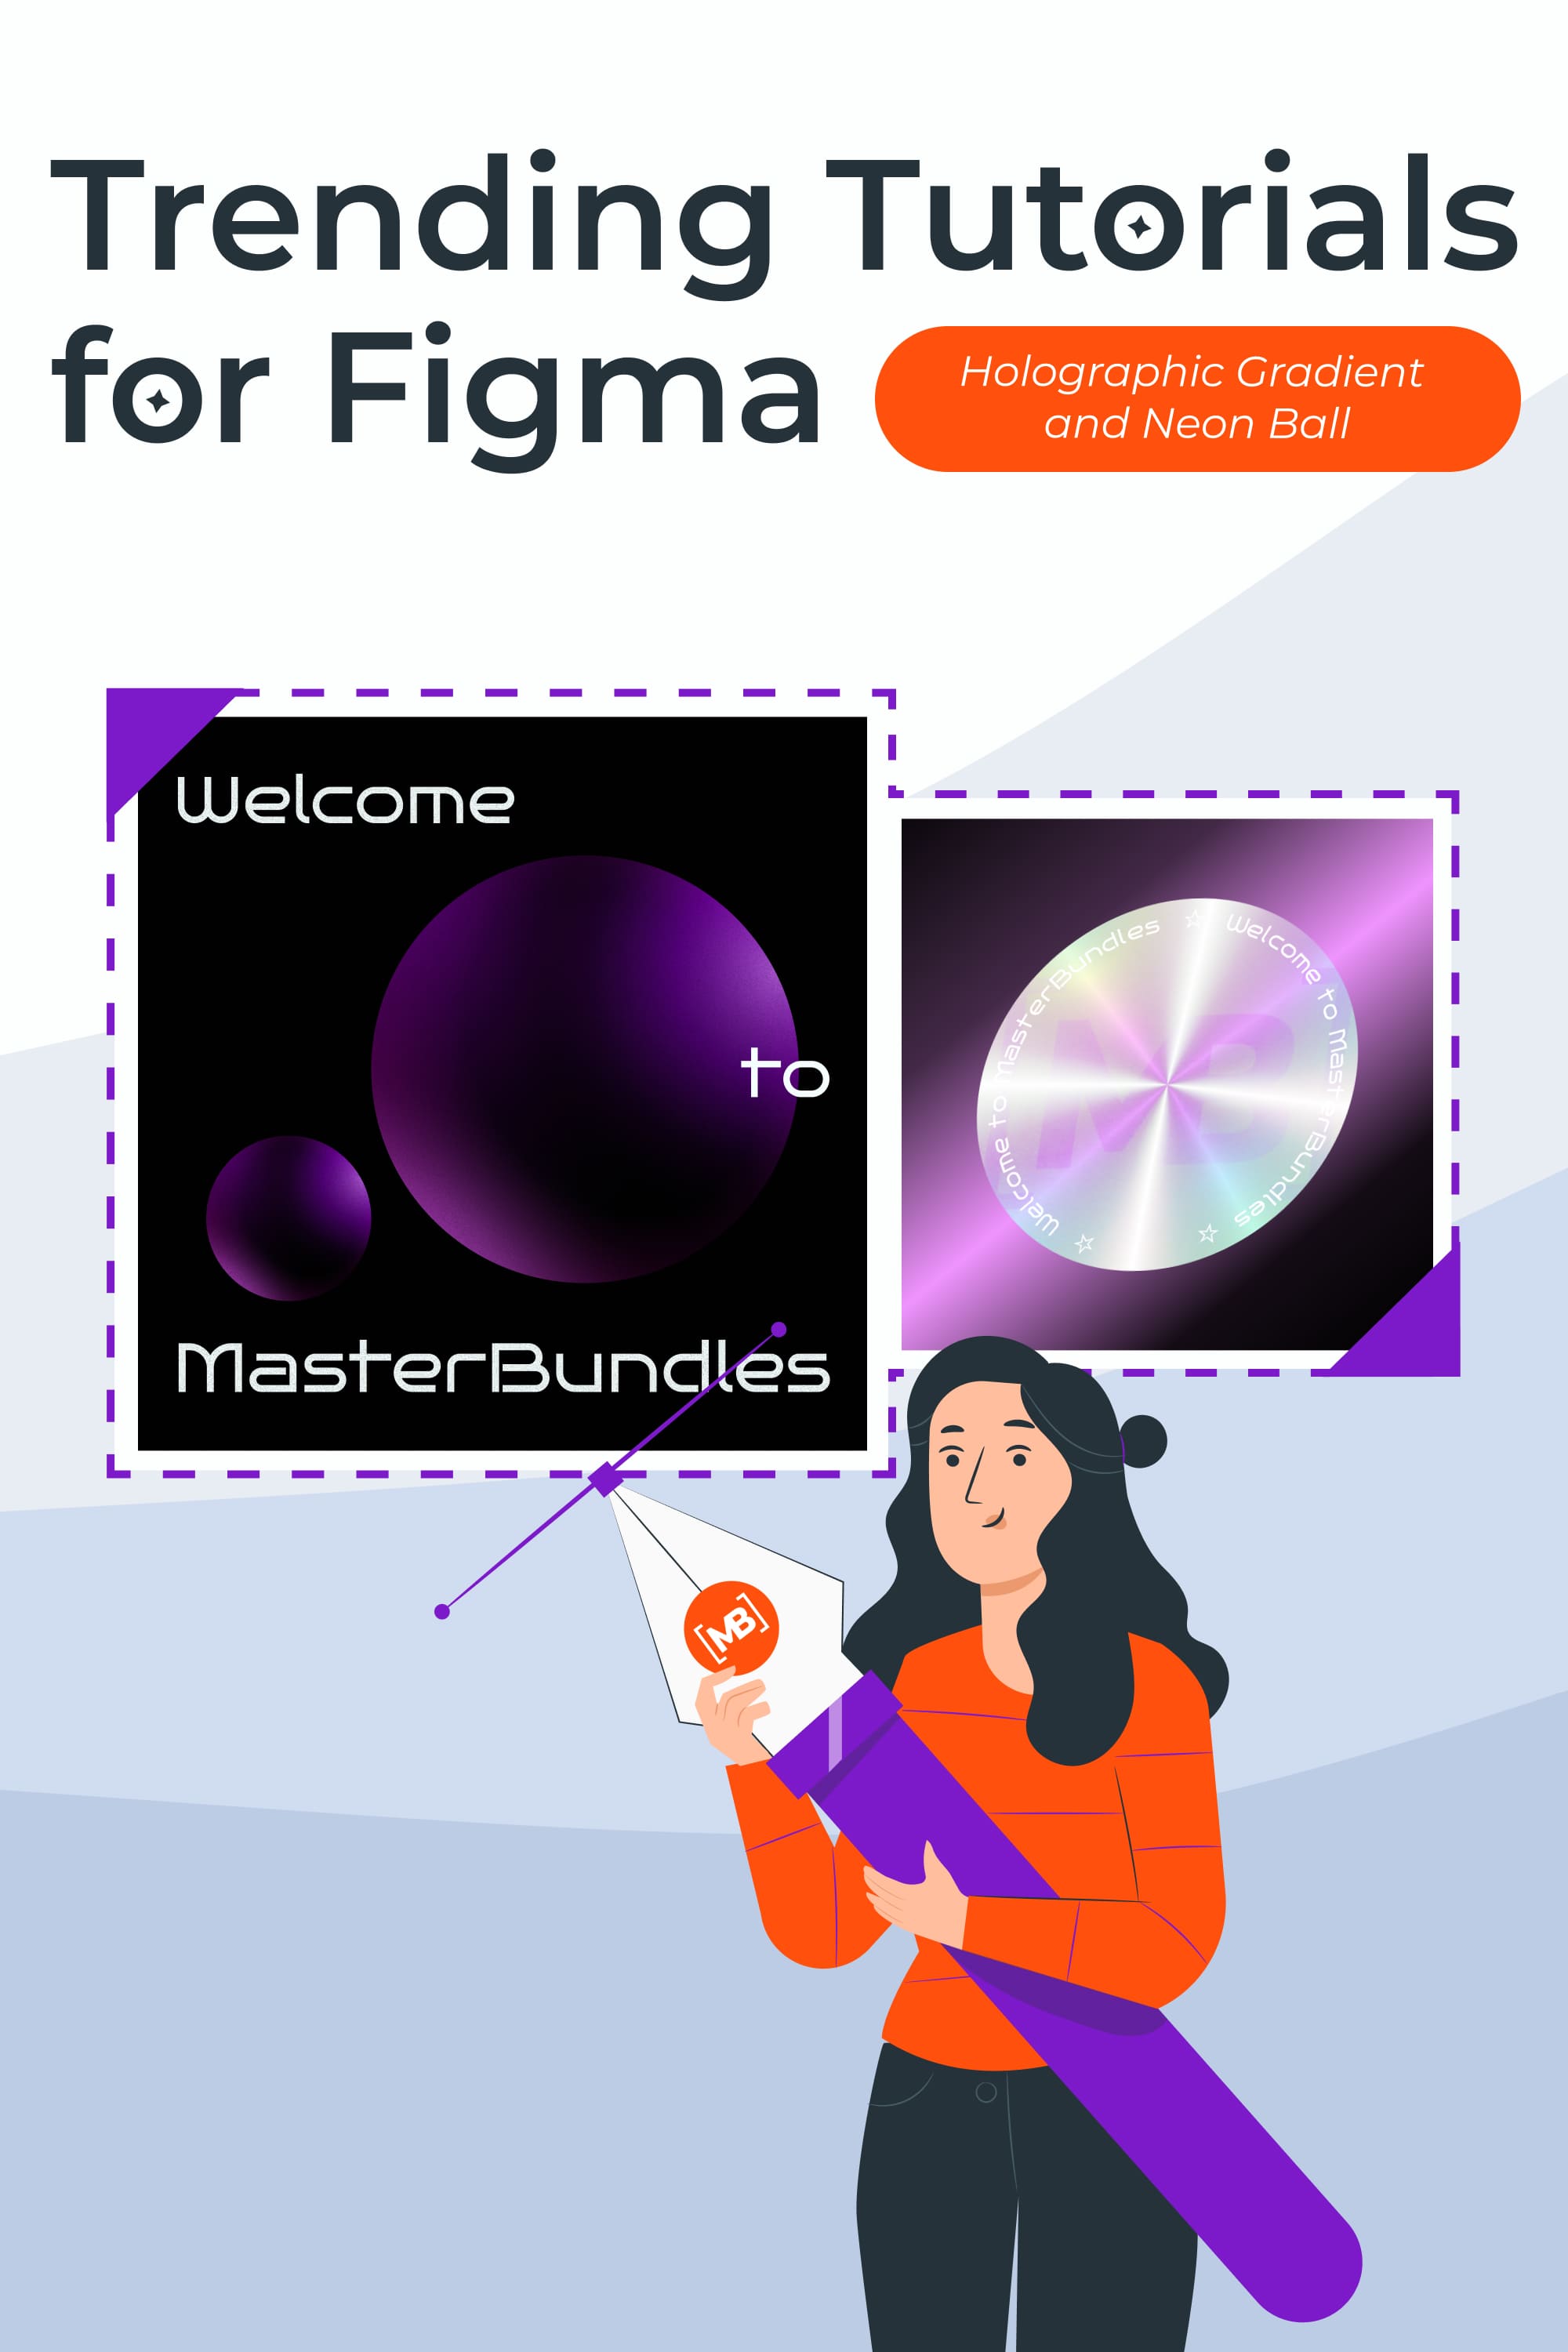
Holographic Gradient & Neon Ball: Step-by-Step Figma Tutorial
You’ve probably noticed that 2022 has trends in design like holographic effects, nostalgic design of the 70s-90s, neon and space gradients, brutalism, and references to nature. We can’t stand aside and decided to create trendy effects in Figma and not show the process. We already showed the implementation of neon and space gradients. Today we have prepared a tutorial for you on how to create a neon ball and a holographic gradient.
To create these elements, you will need: a new project in Figma, Arc and LASER plugins, and a working attitude. You can install plugins in the Figma community—just follow the links above.
In this article, we will also share with you a few products that can come in handy when you create futuristic designs.
By the way, if you create futuristic designs (actually, any kinds of designs), become our vendor and upload your works to MasterBundles! You will need only 5 minutes to upload the products. Just use our convenient Sell Your Deal form and that’s it. There is a place for designers of different levels and styles.
Are you ready? Then let’s get started!
Best Related Deals
Creating with MasterBundles: Holographic Gradient and Neon Ball in Figma
Looking for a way to spice up your designs? Try adding some futuristic notes to your project – they are super trending now!
Our designer created a step-by-step tutorial on how to create a holographic gradient and neon ball in Figma.
How to Create a Hologram
This digital holographic trend fits well with the era of the metaverse, VR, and hologram interfaces. The direction is characterized by bright, luminous colors, abstract rounded shapes, and textures similar to holograms.
It is also widely used in the crypto space to emphasize futuristic interfaces. Let’s learn how to make a hologram effect in Figma.
Create a Holographic Gradient in Figma Manually
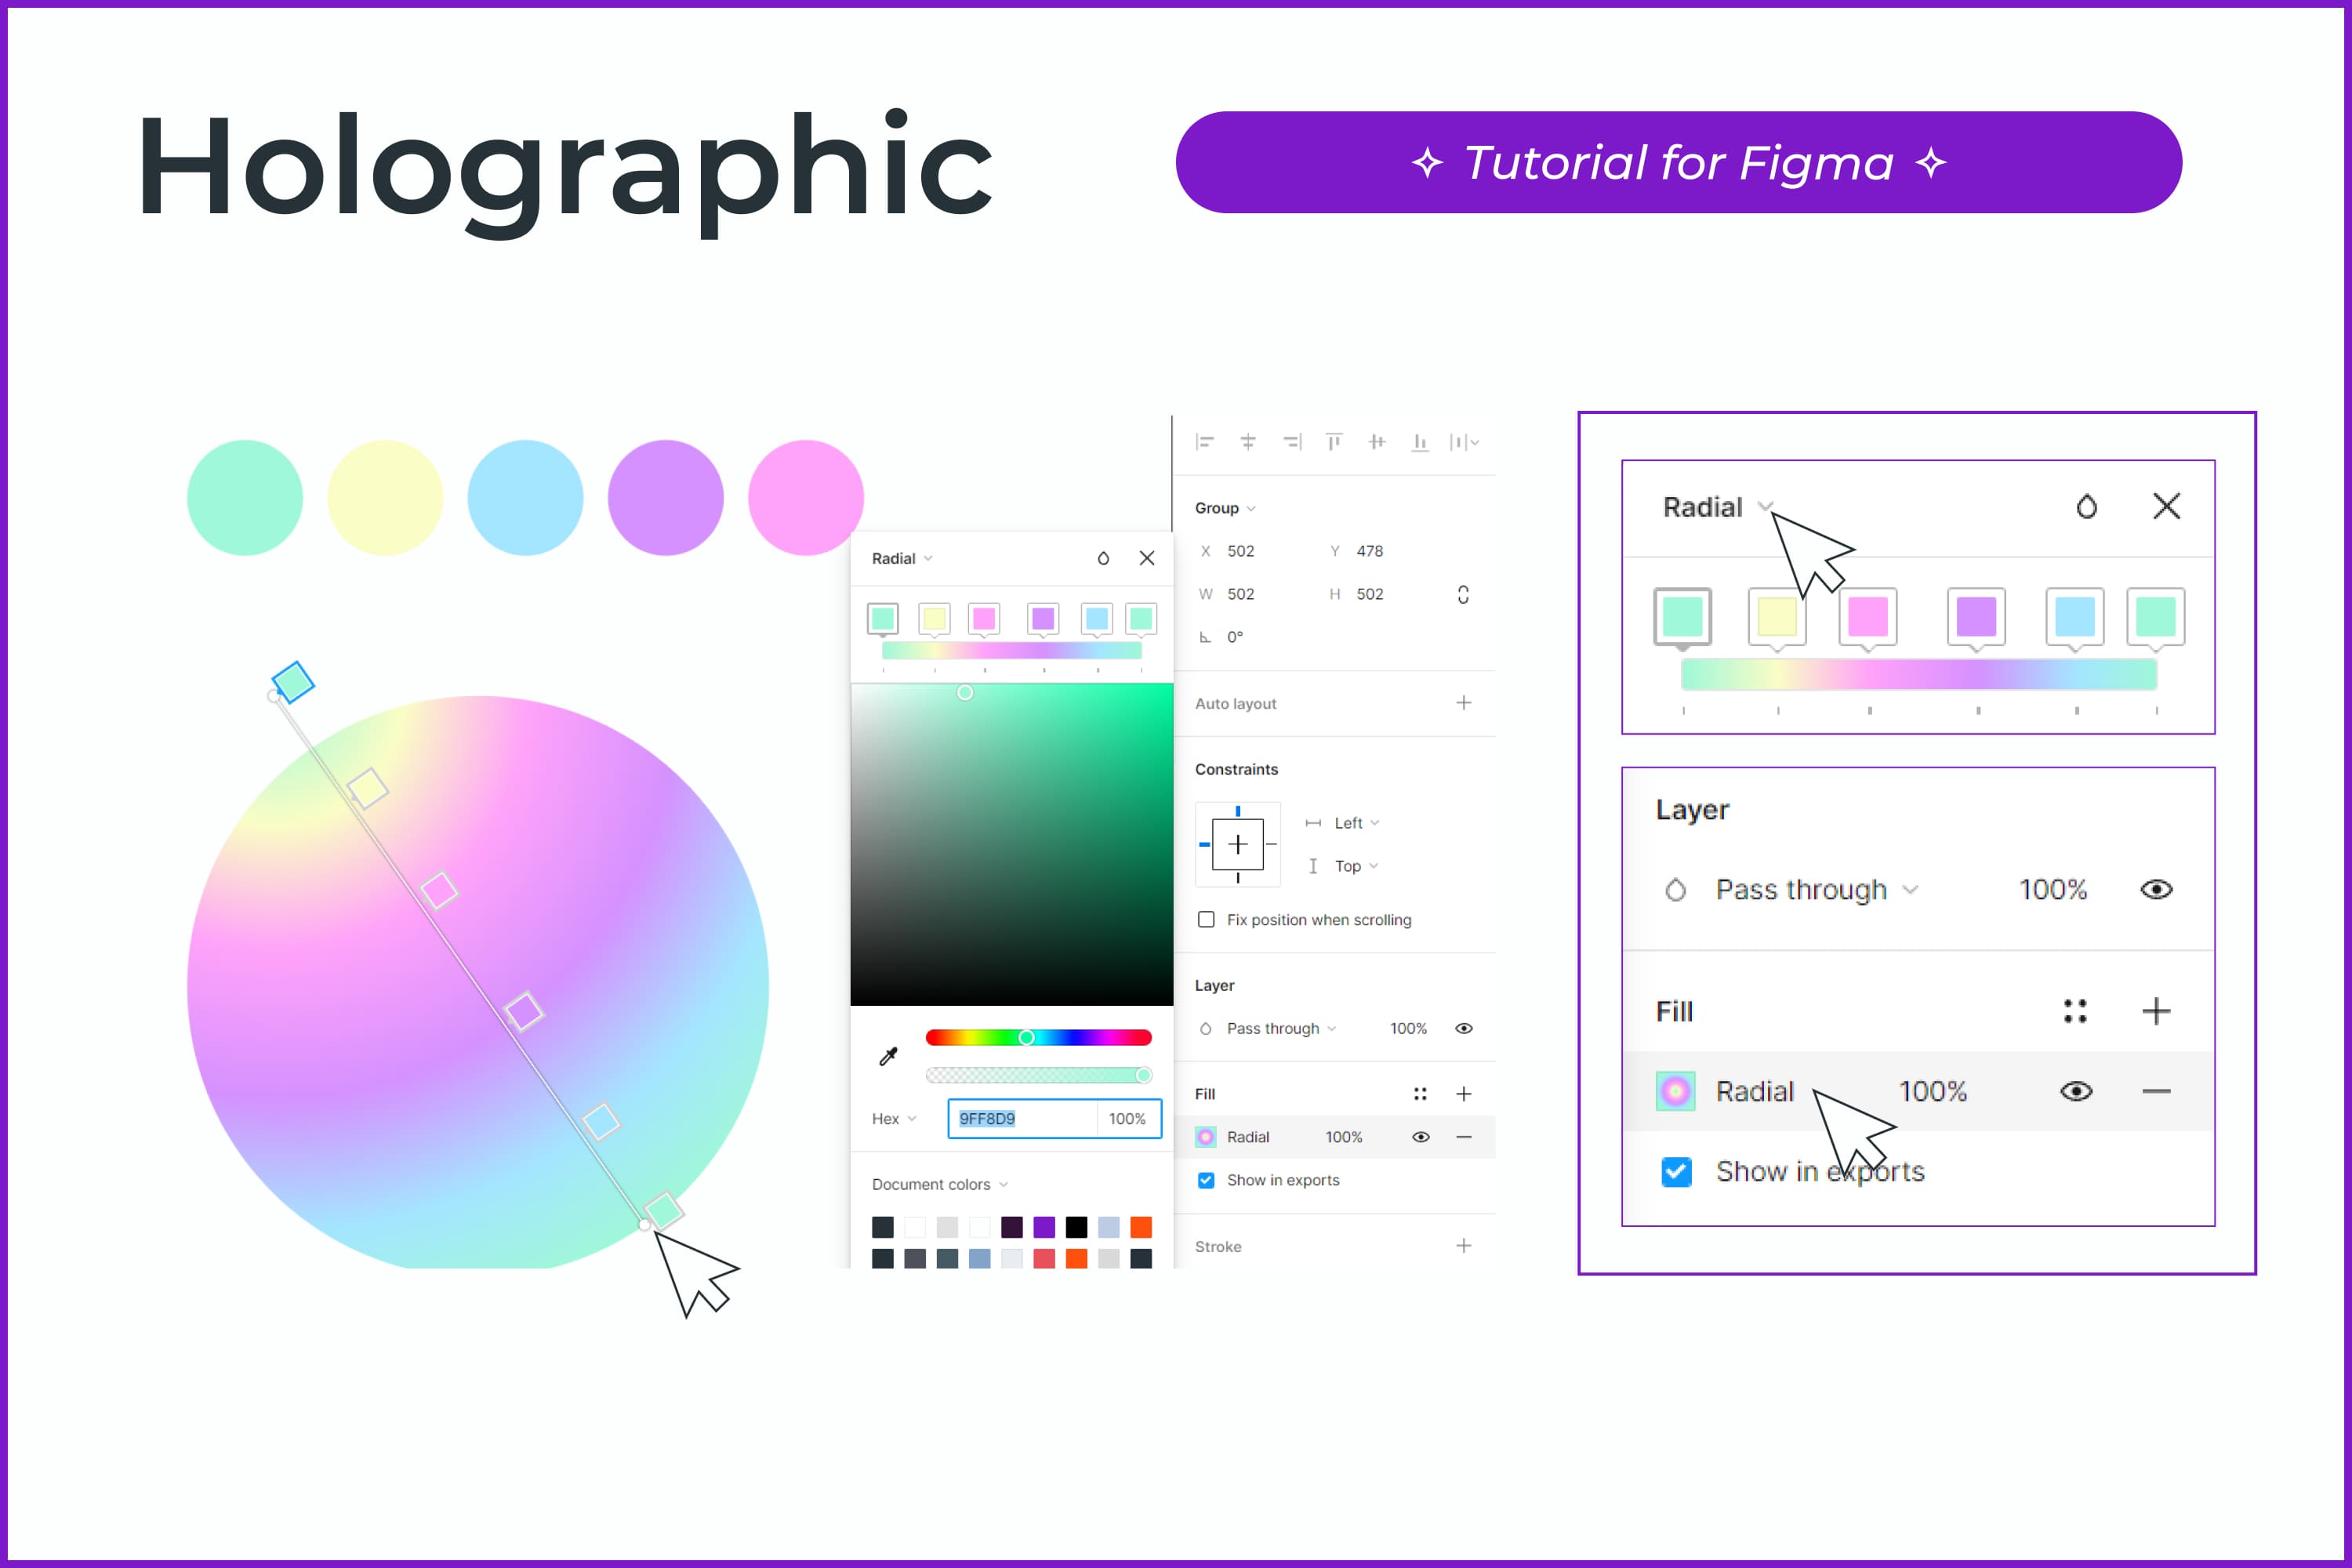
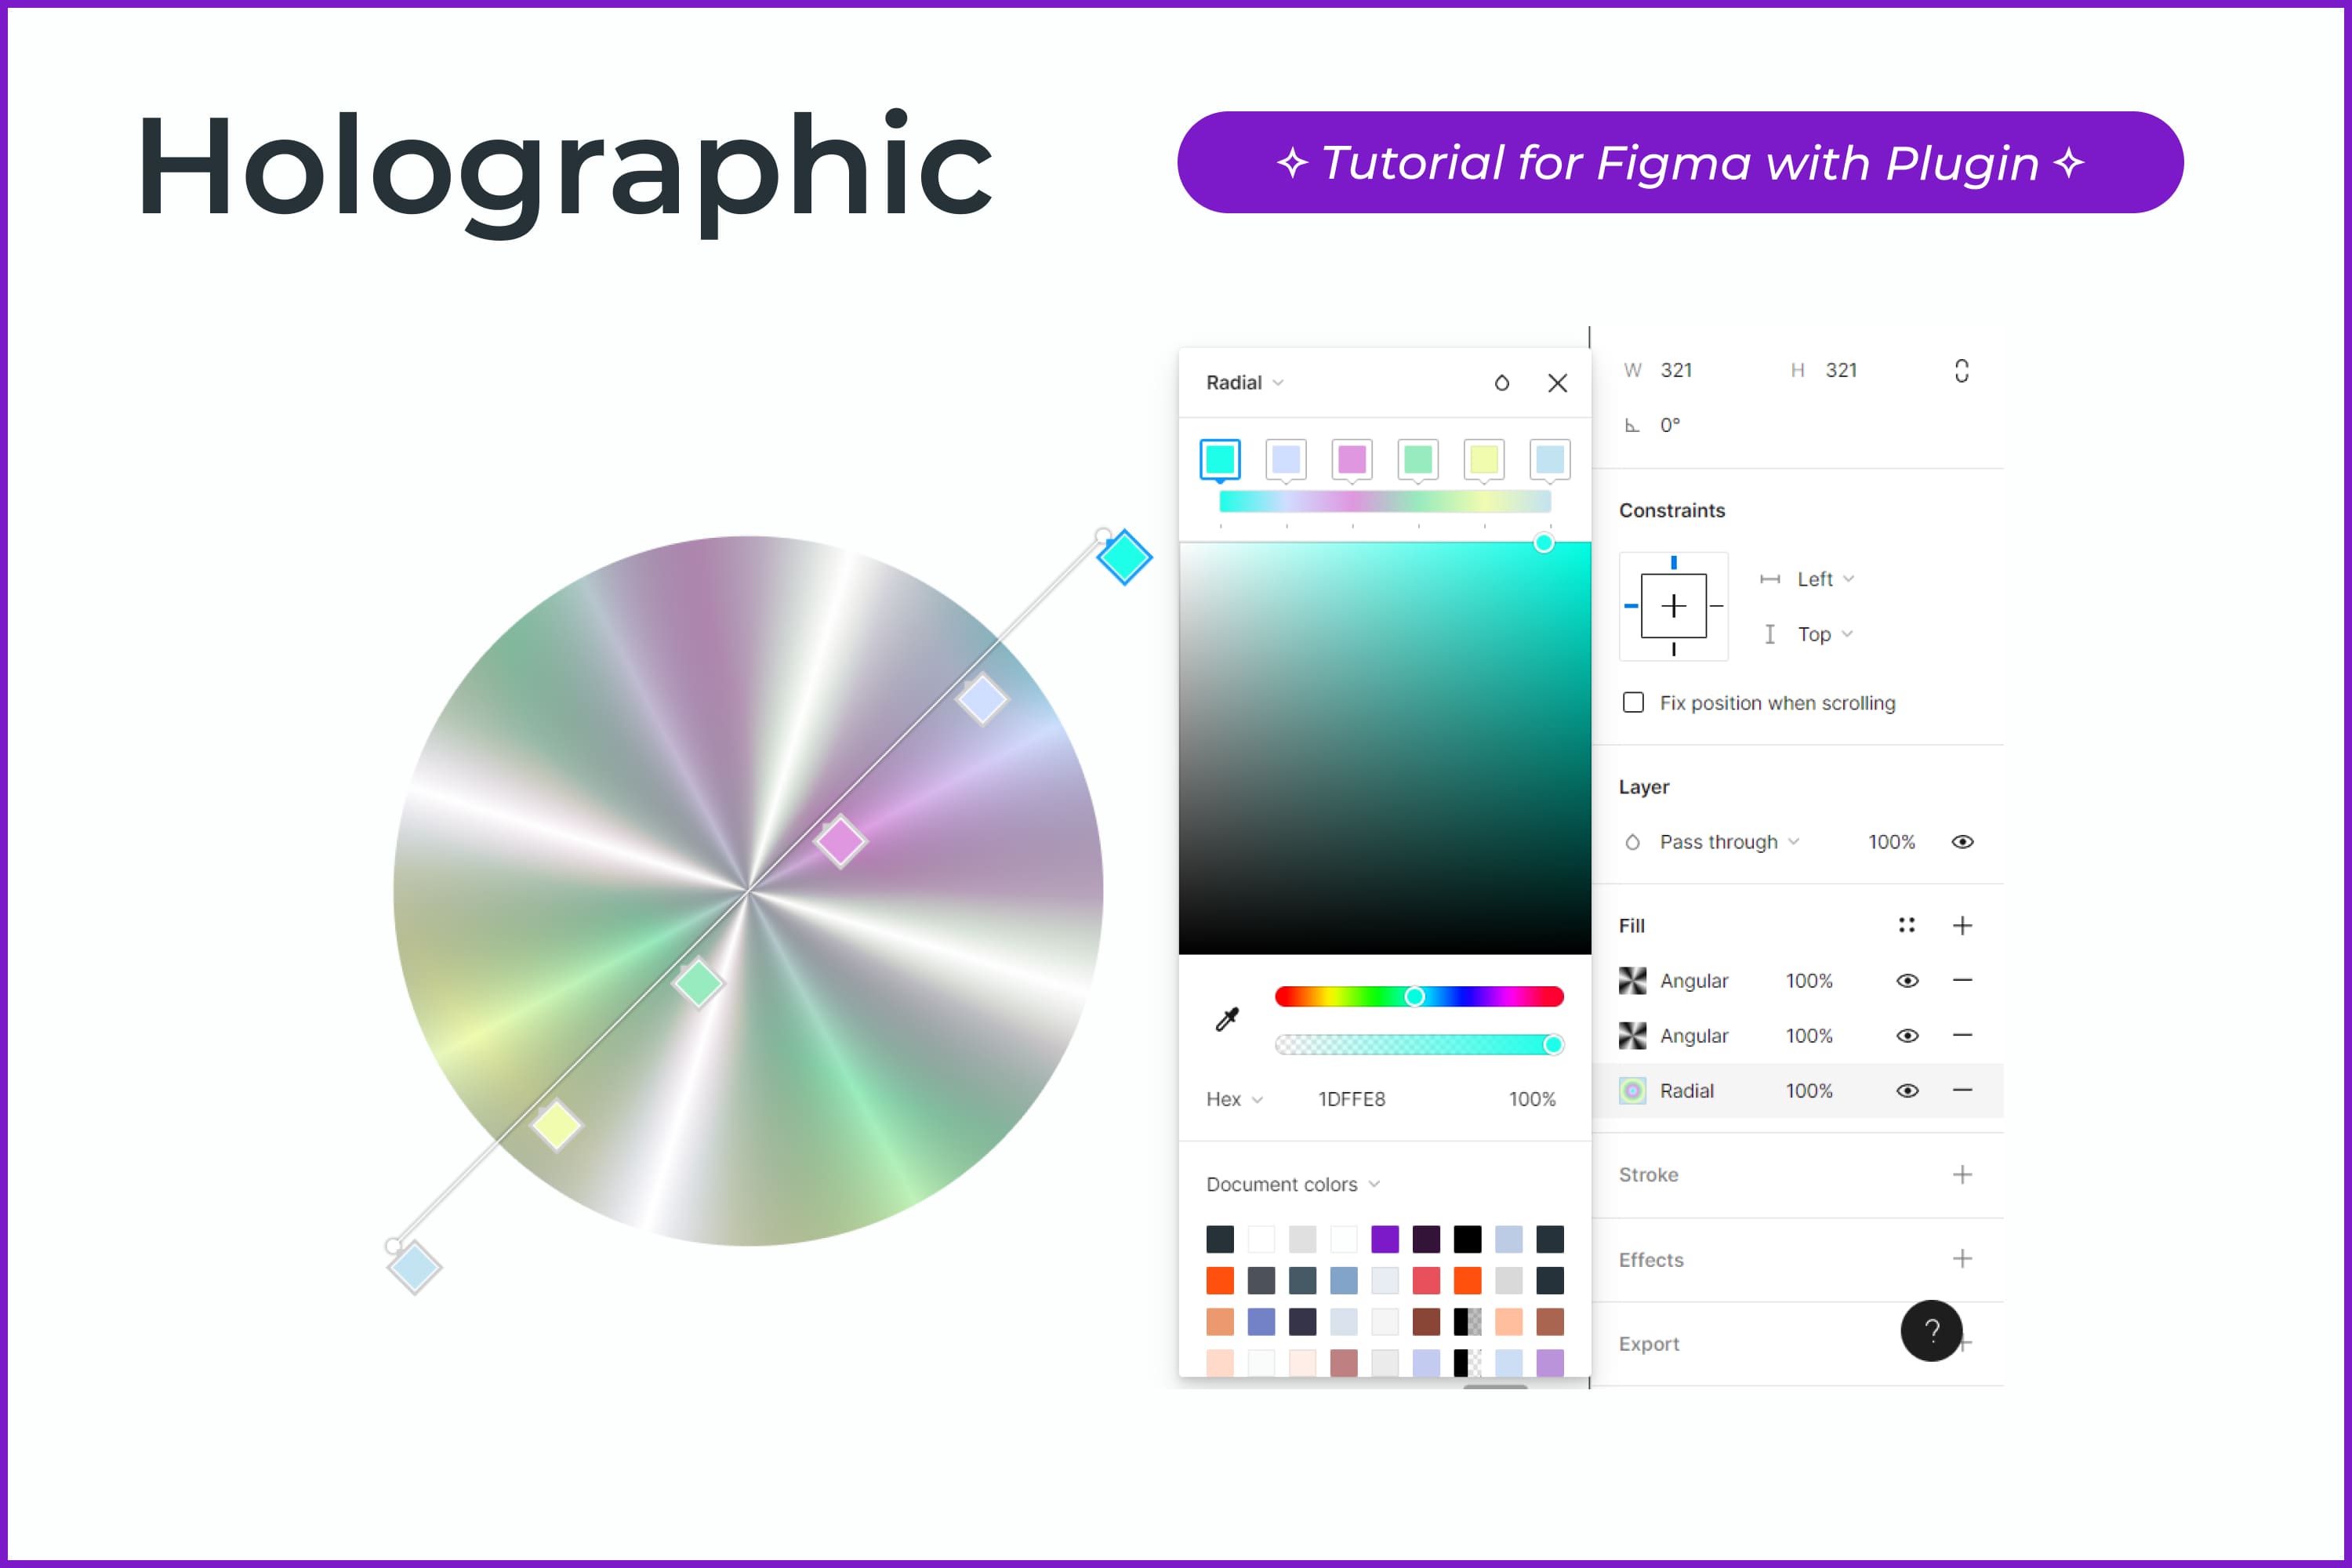
- Create an ellipse with a radial fill. Choose any bright colors and, for convenience, create a palette for yourself before starting your work. We are using the colors #9FF8D9, #FAFDC5, #A4E5FF, #D591FF, and #FFA3F9.
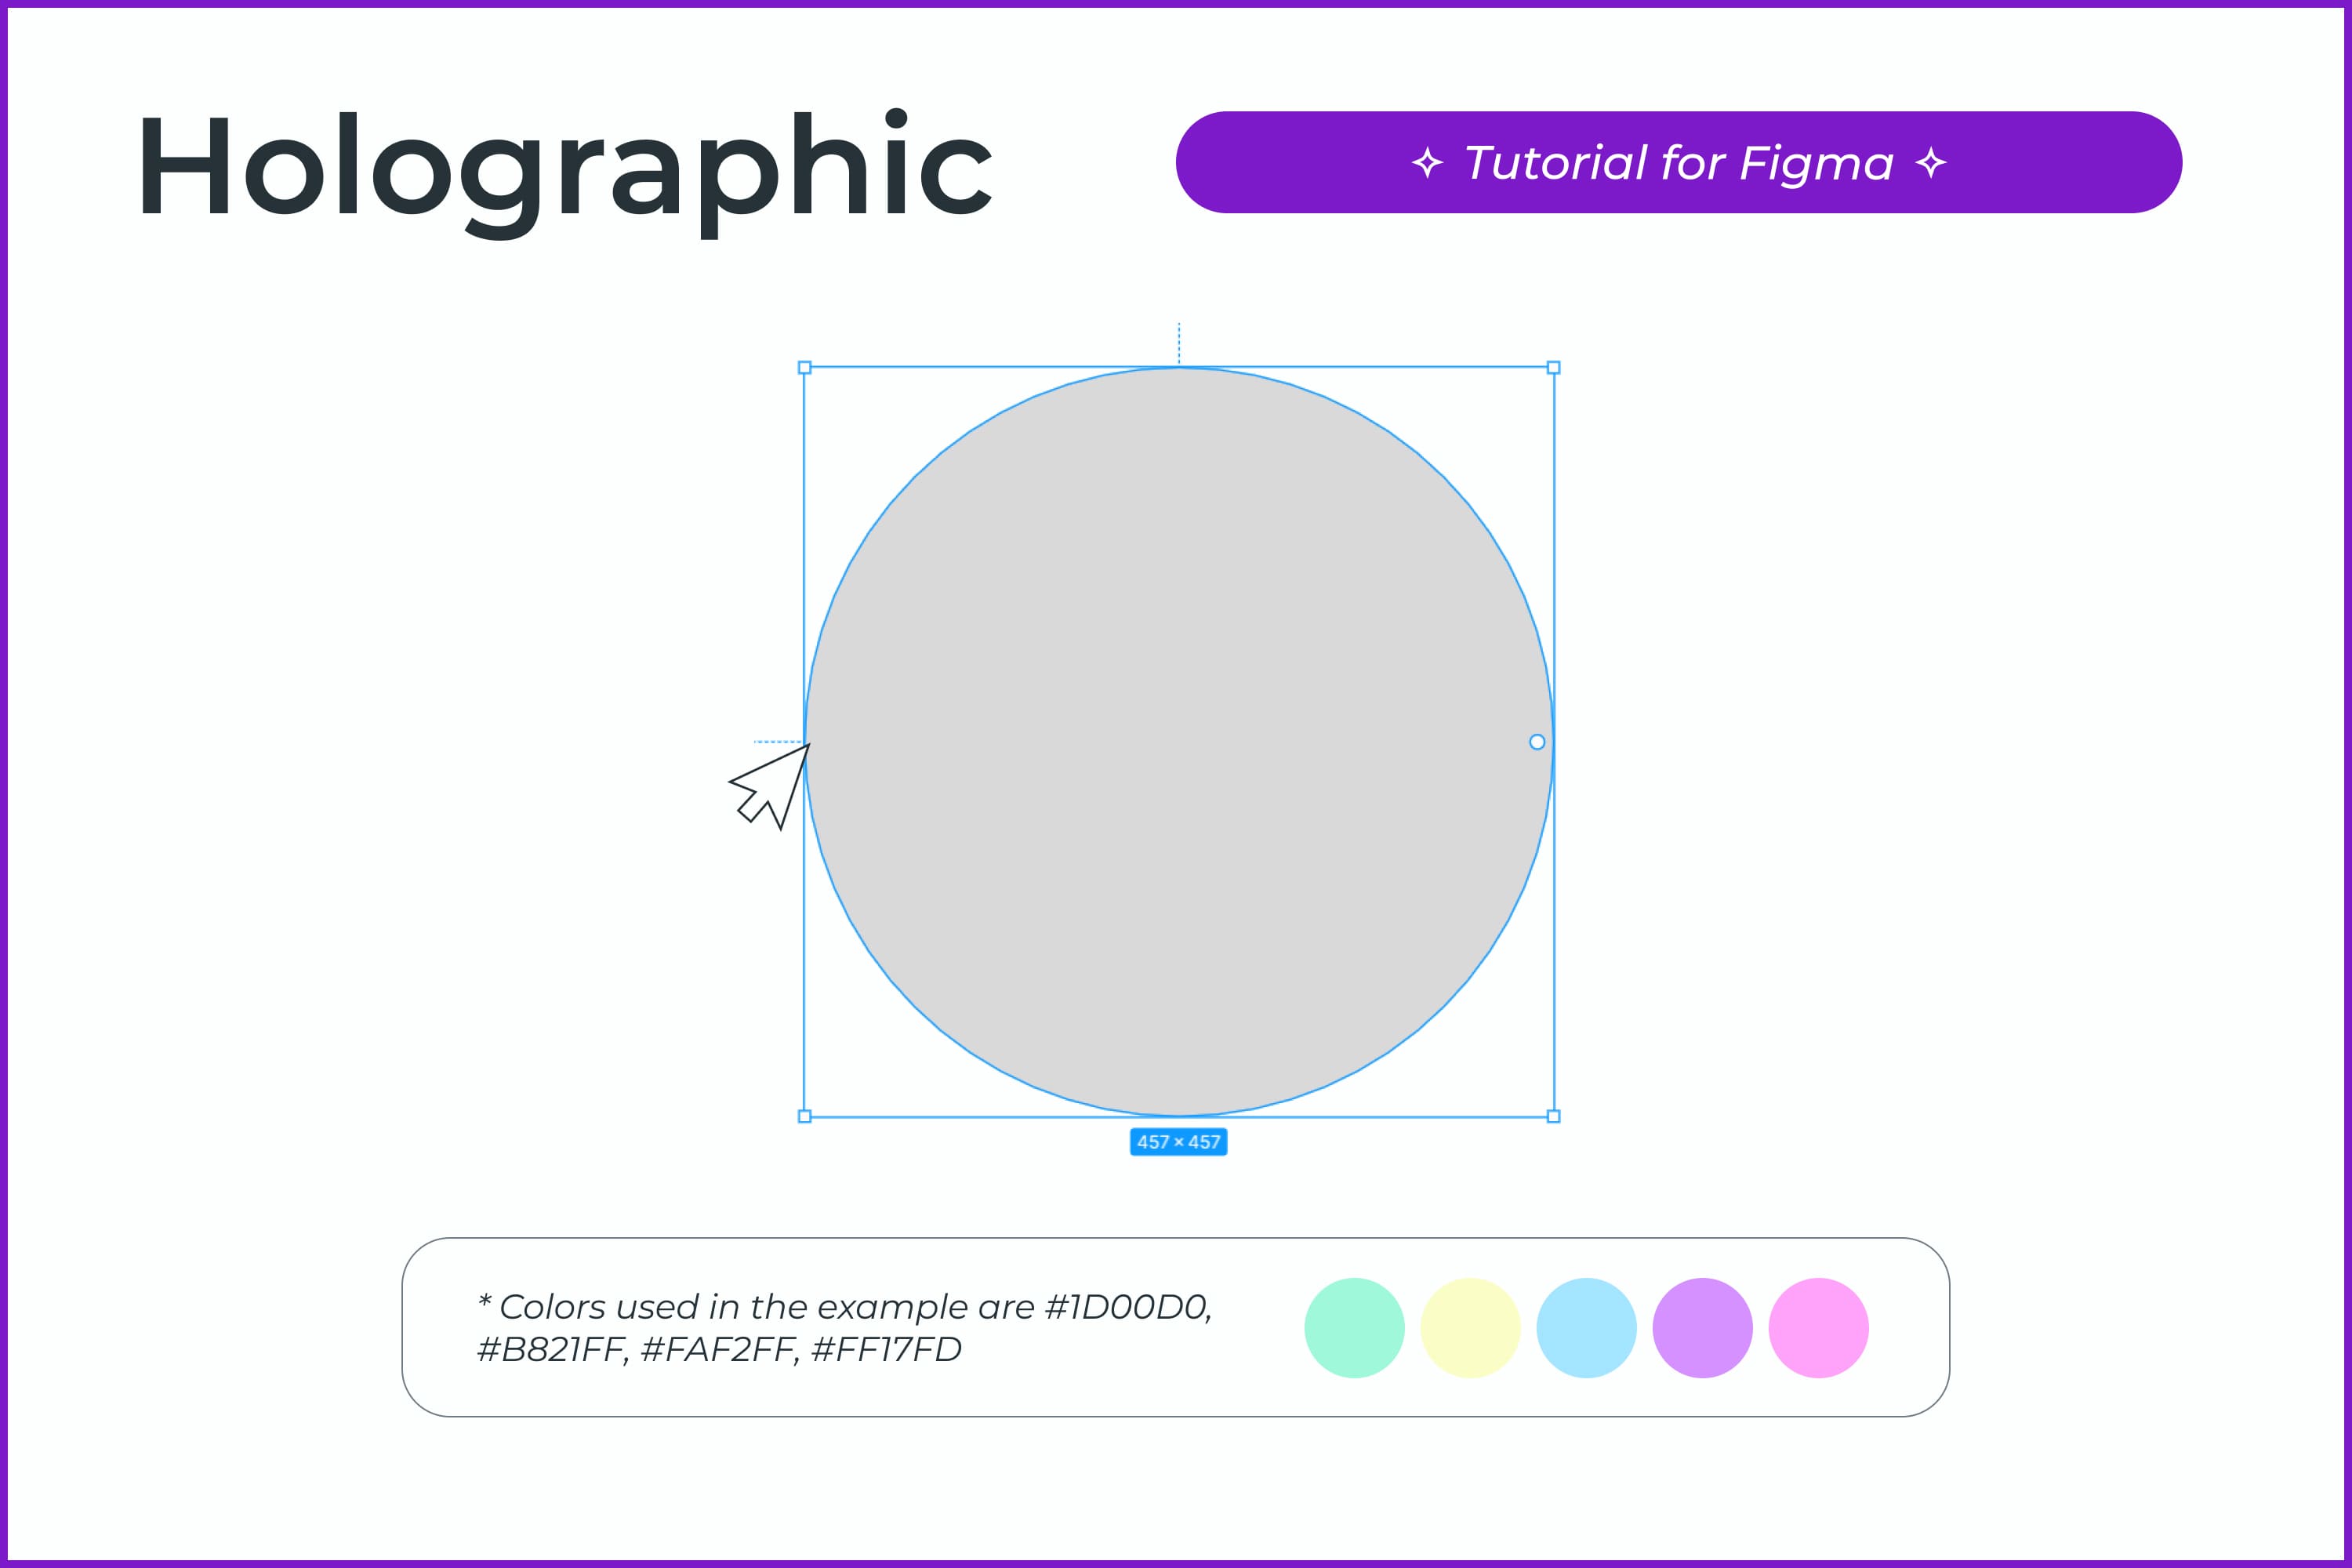
- Use the manipulators and move the gradient line as shown in the example.
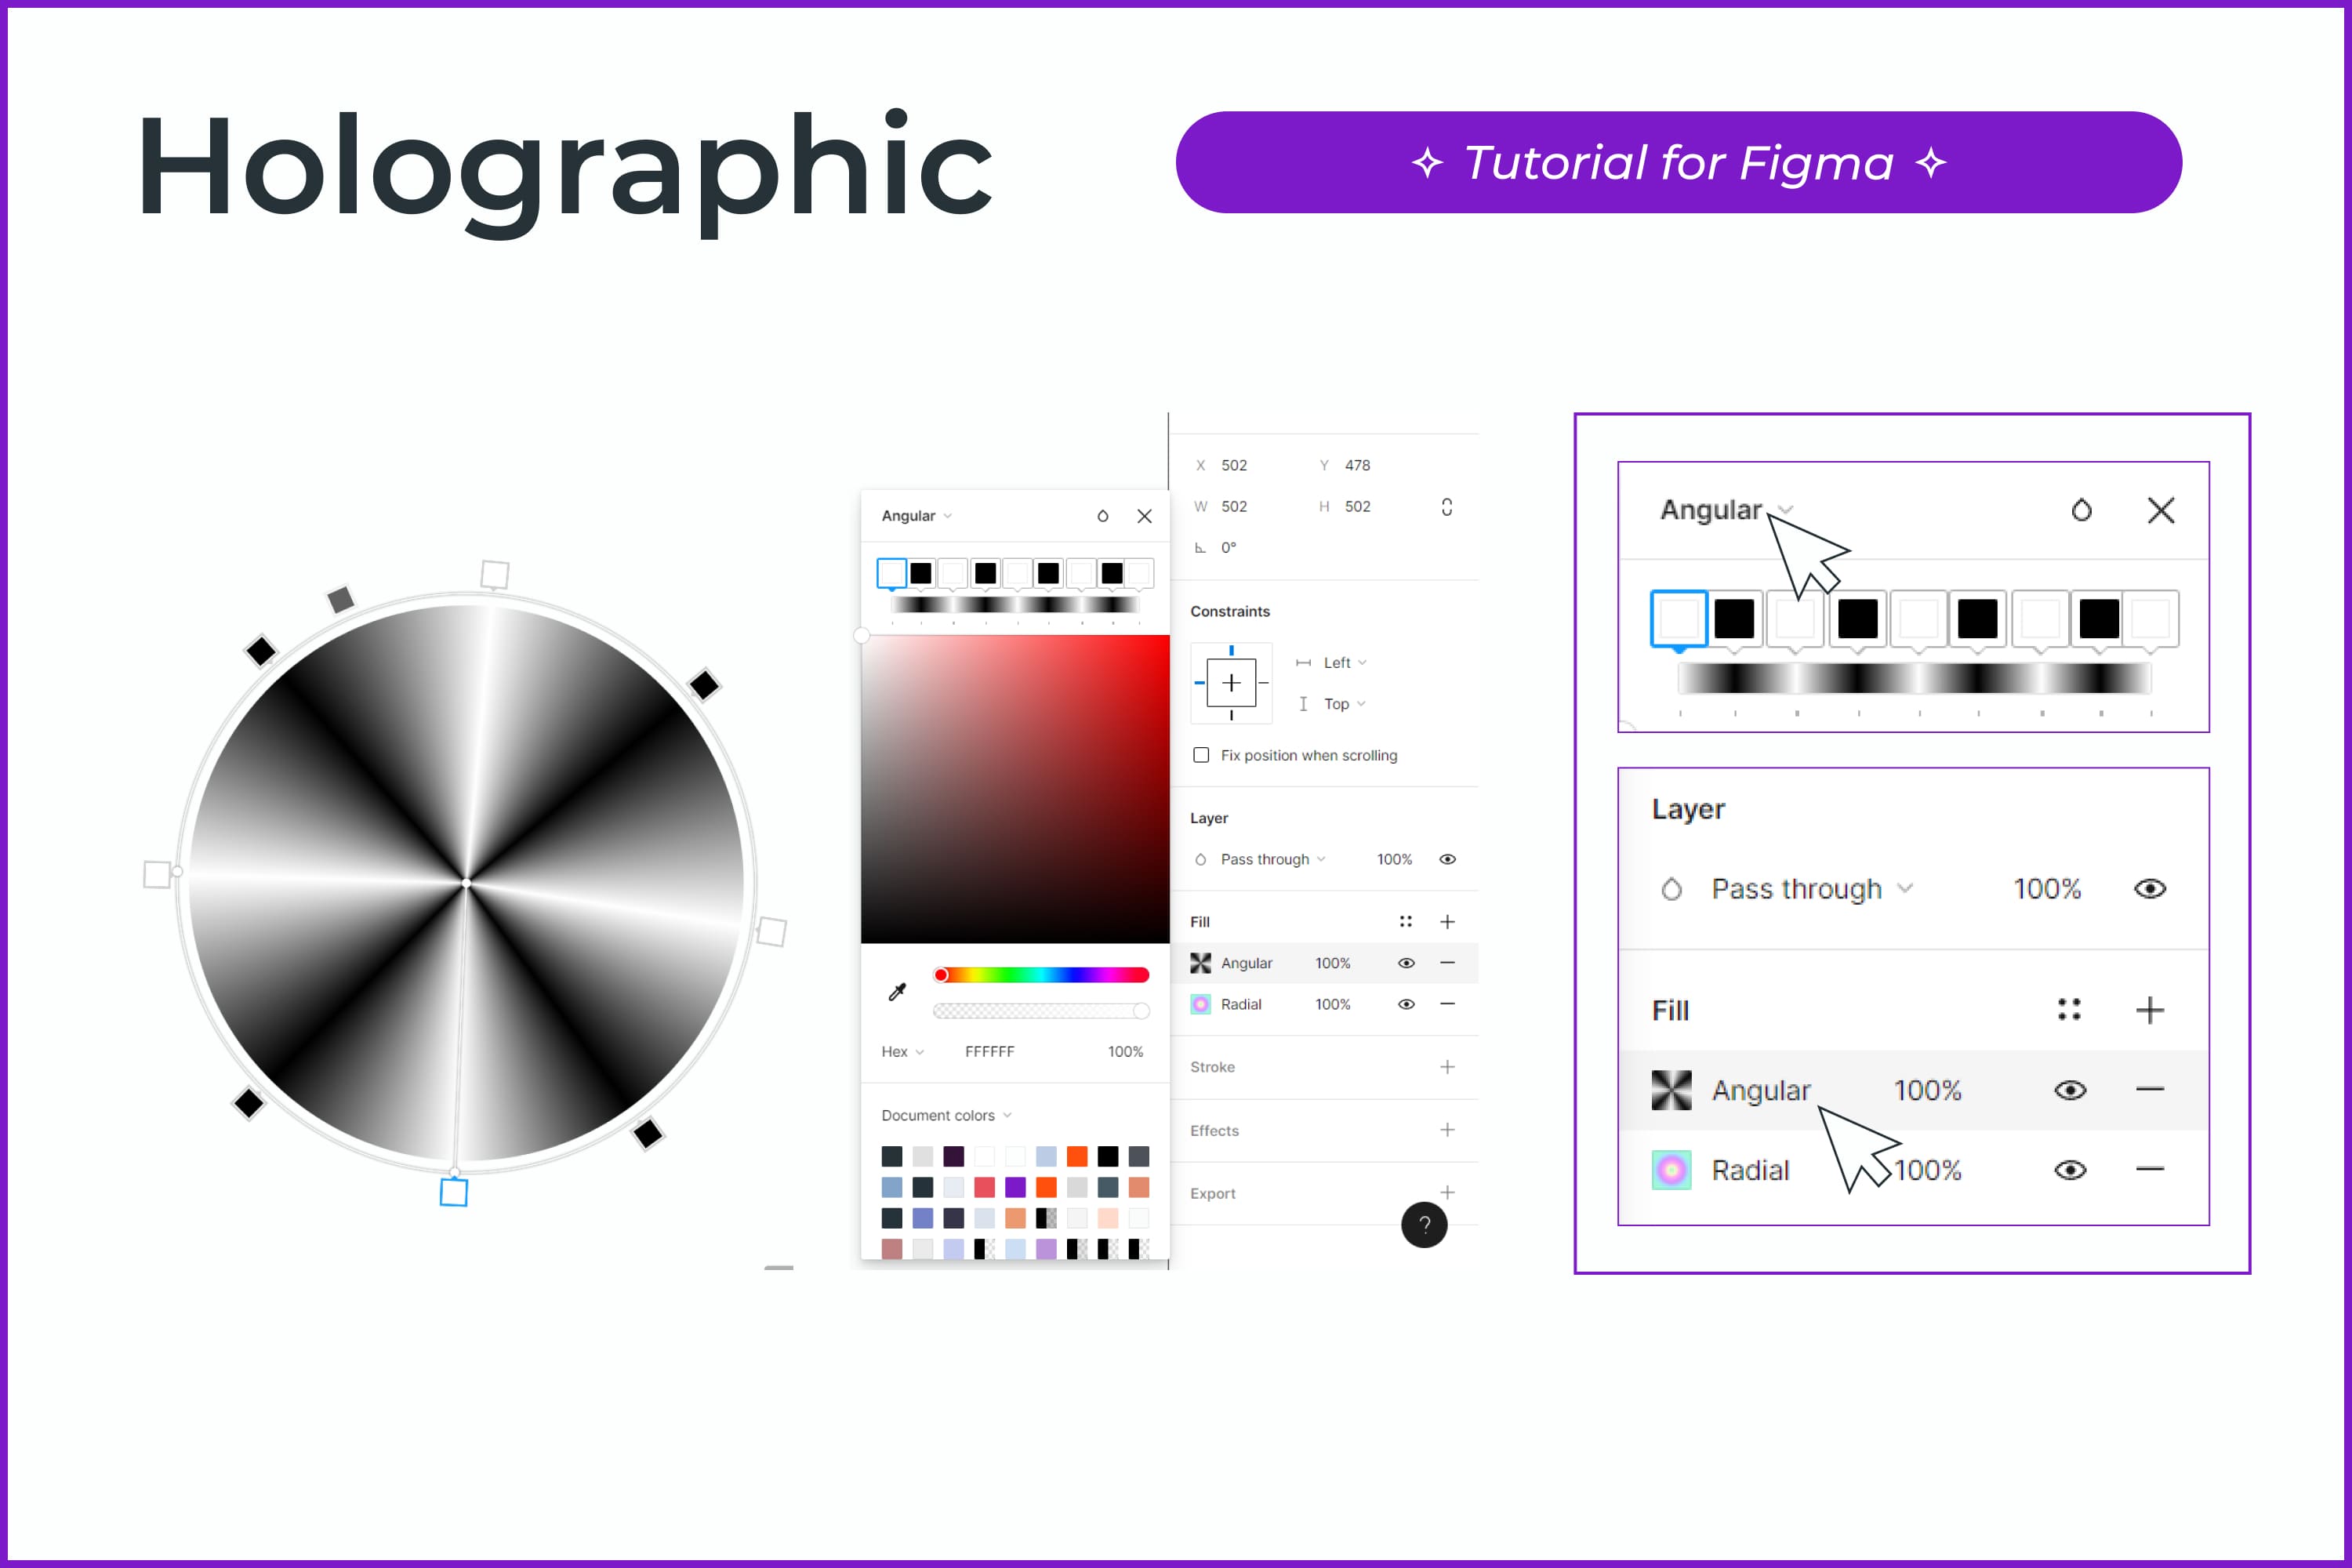
- Add an Angular gradient to your shape. Click on + in the Fill section and change the fill type. Alternate black and white on the color line.
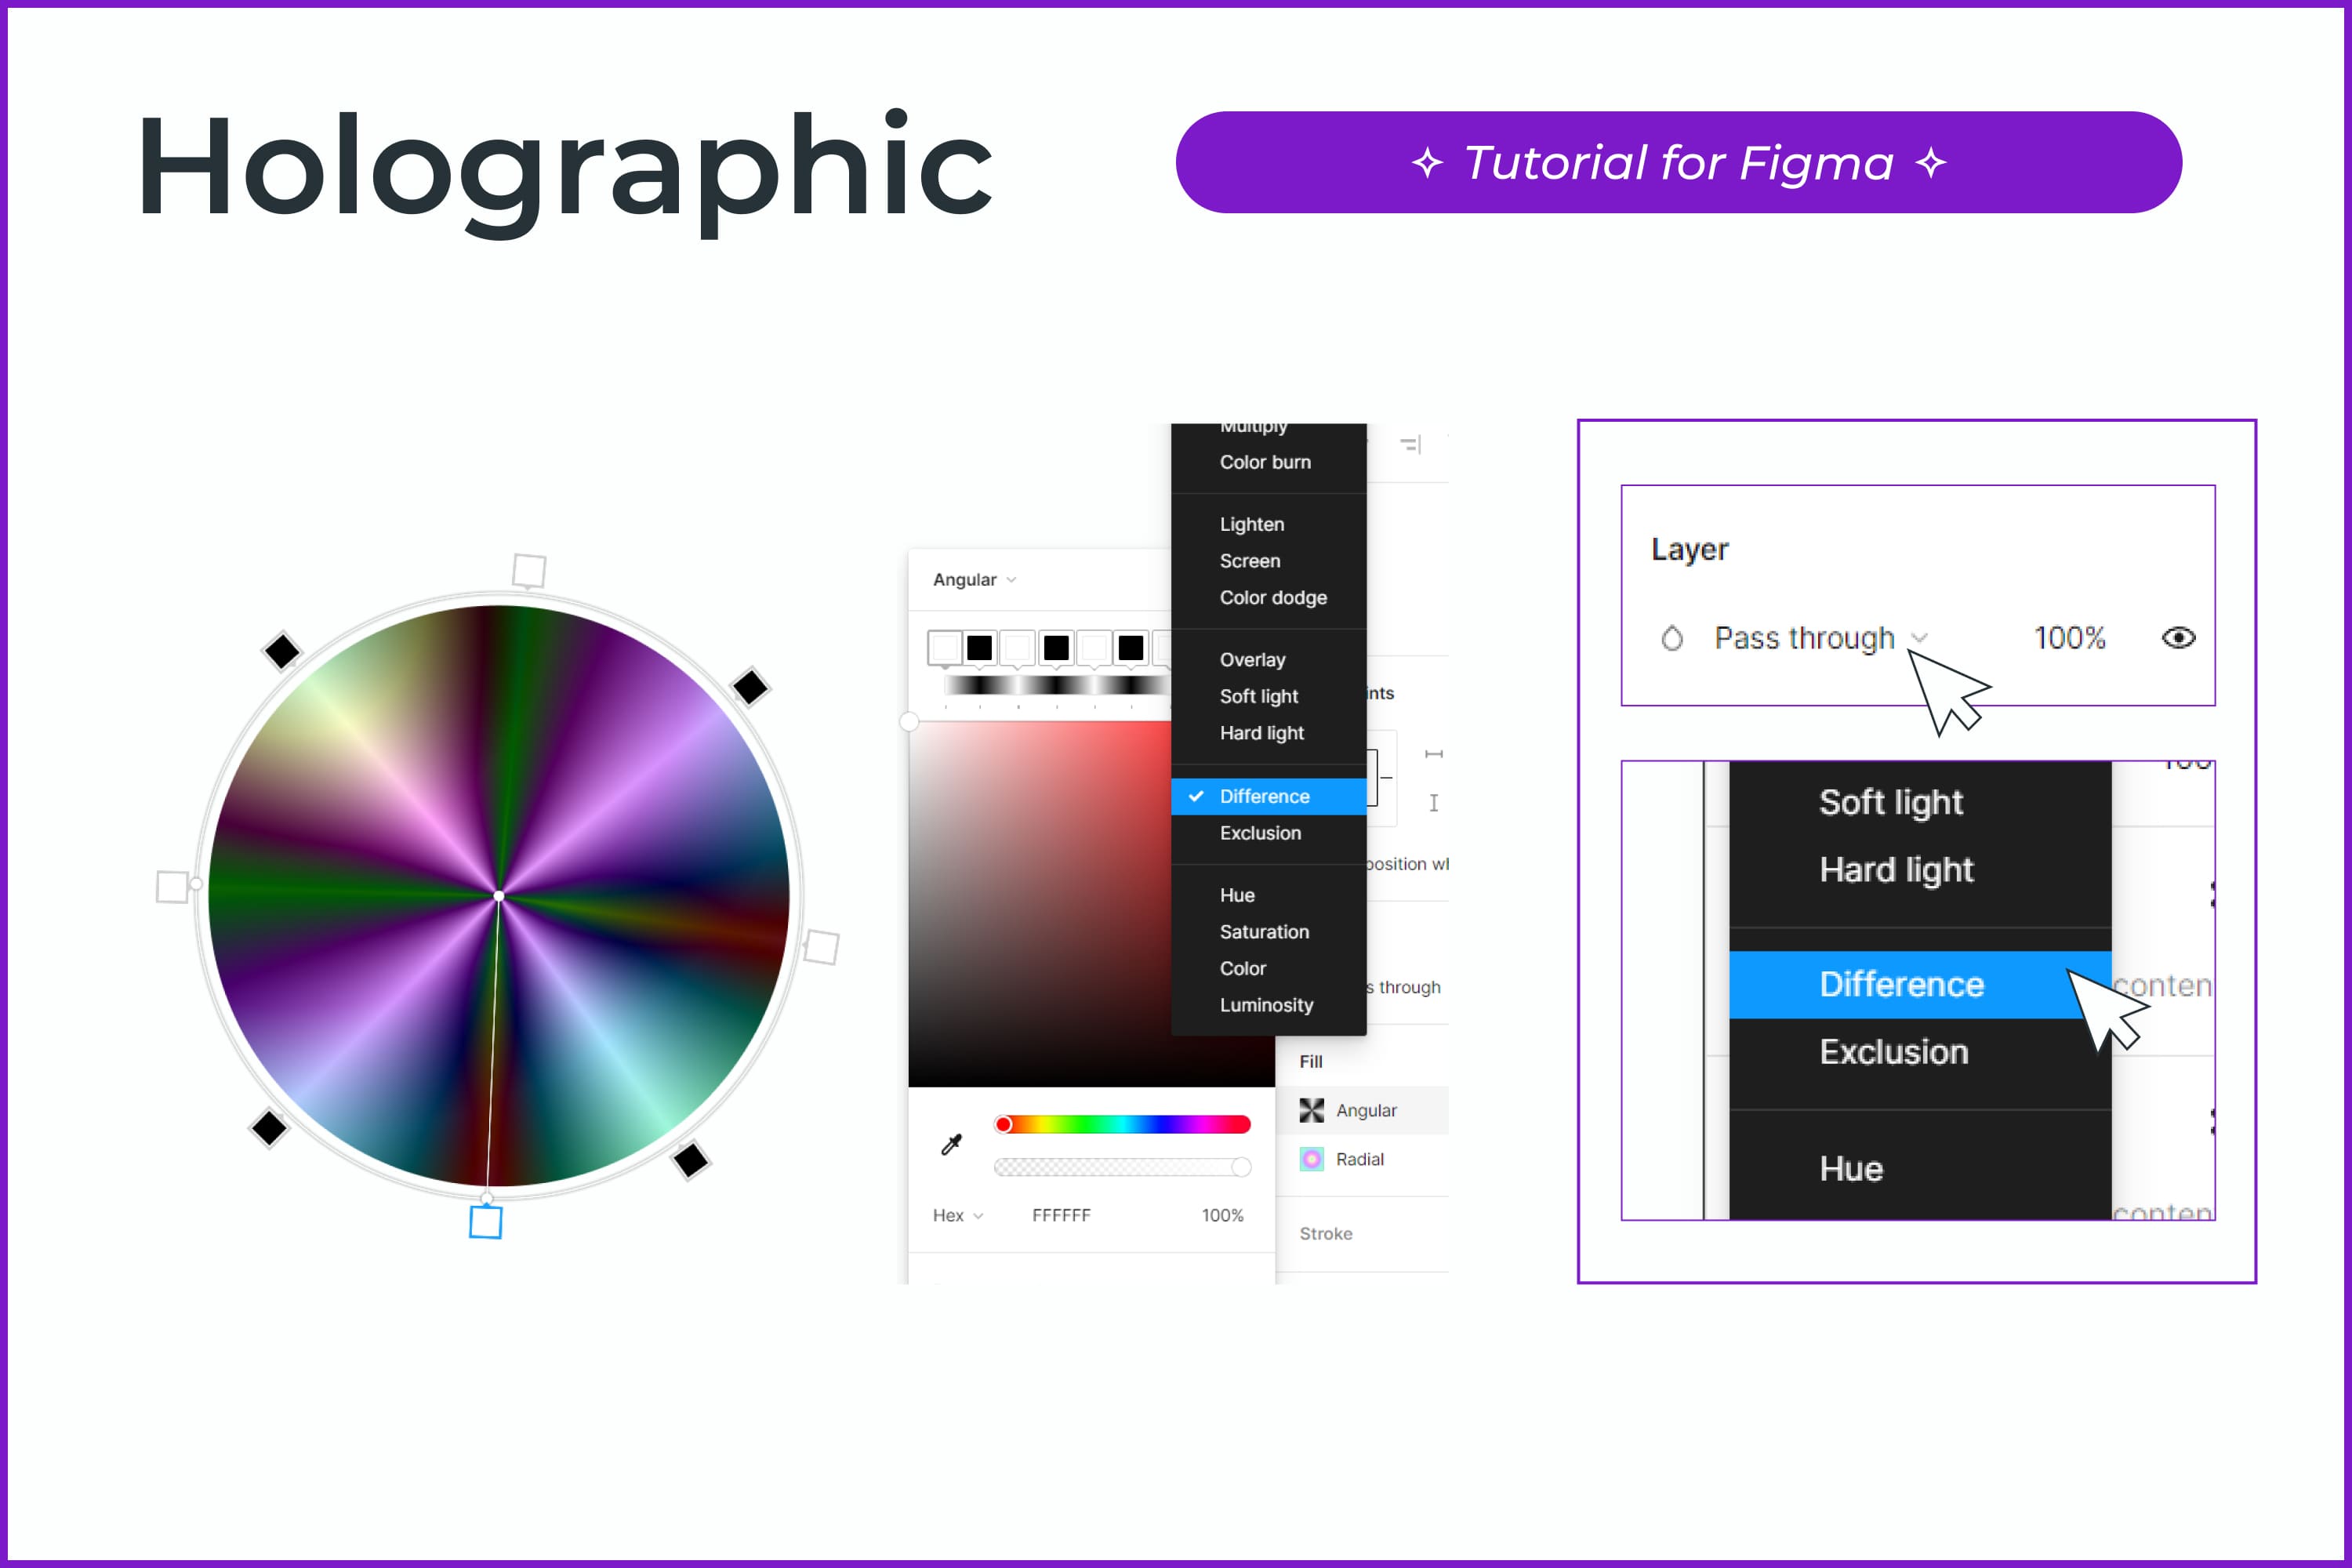
- Set the blending mode Difference for the angular gradient. If desired, the transparency of the gradient can be made less. We put 80%.
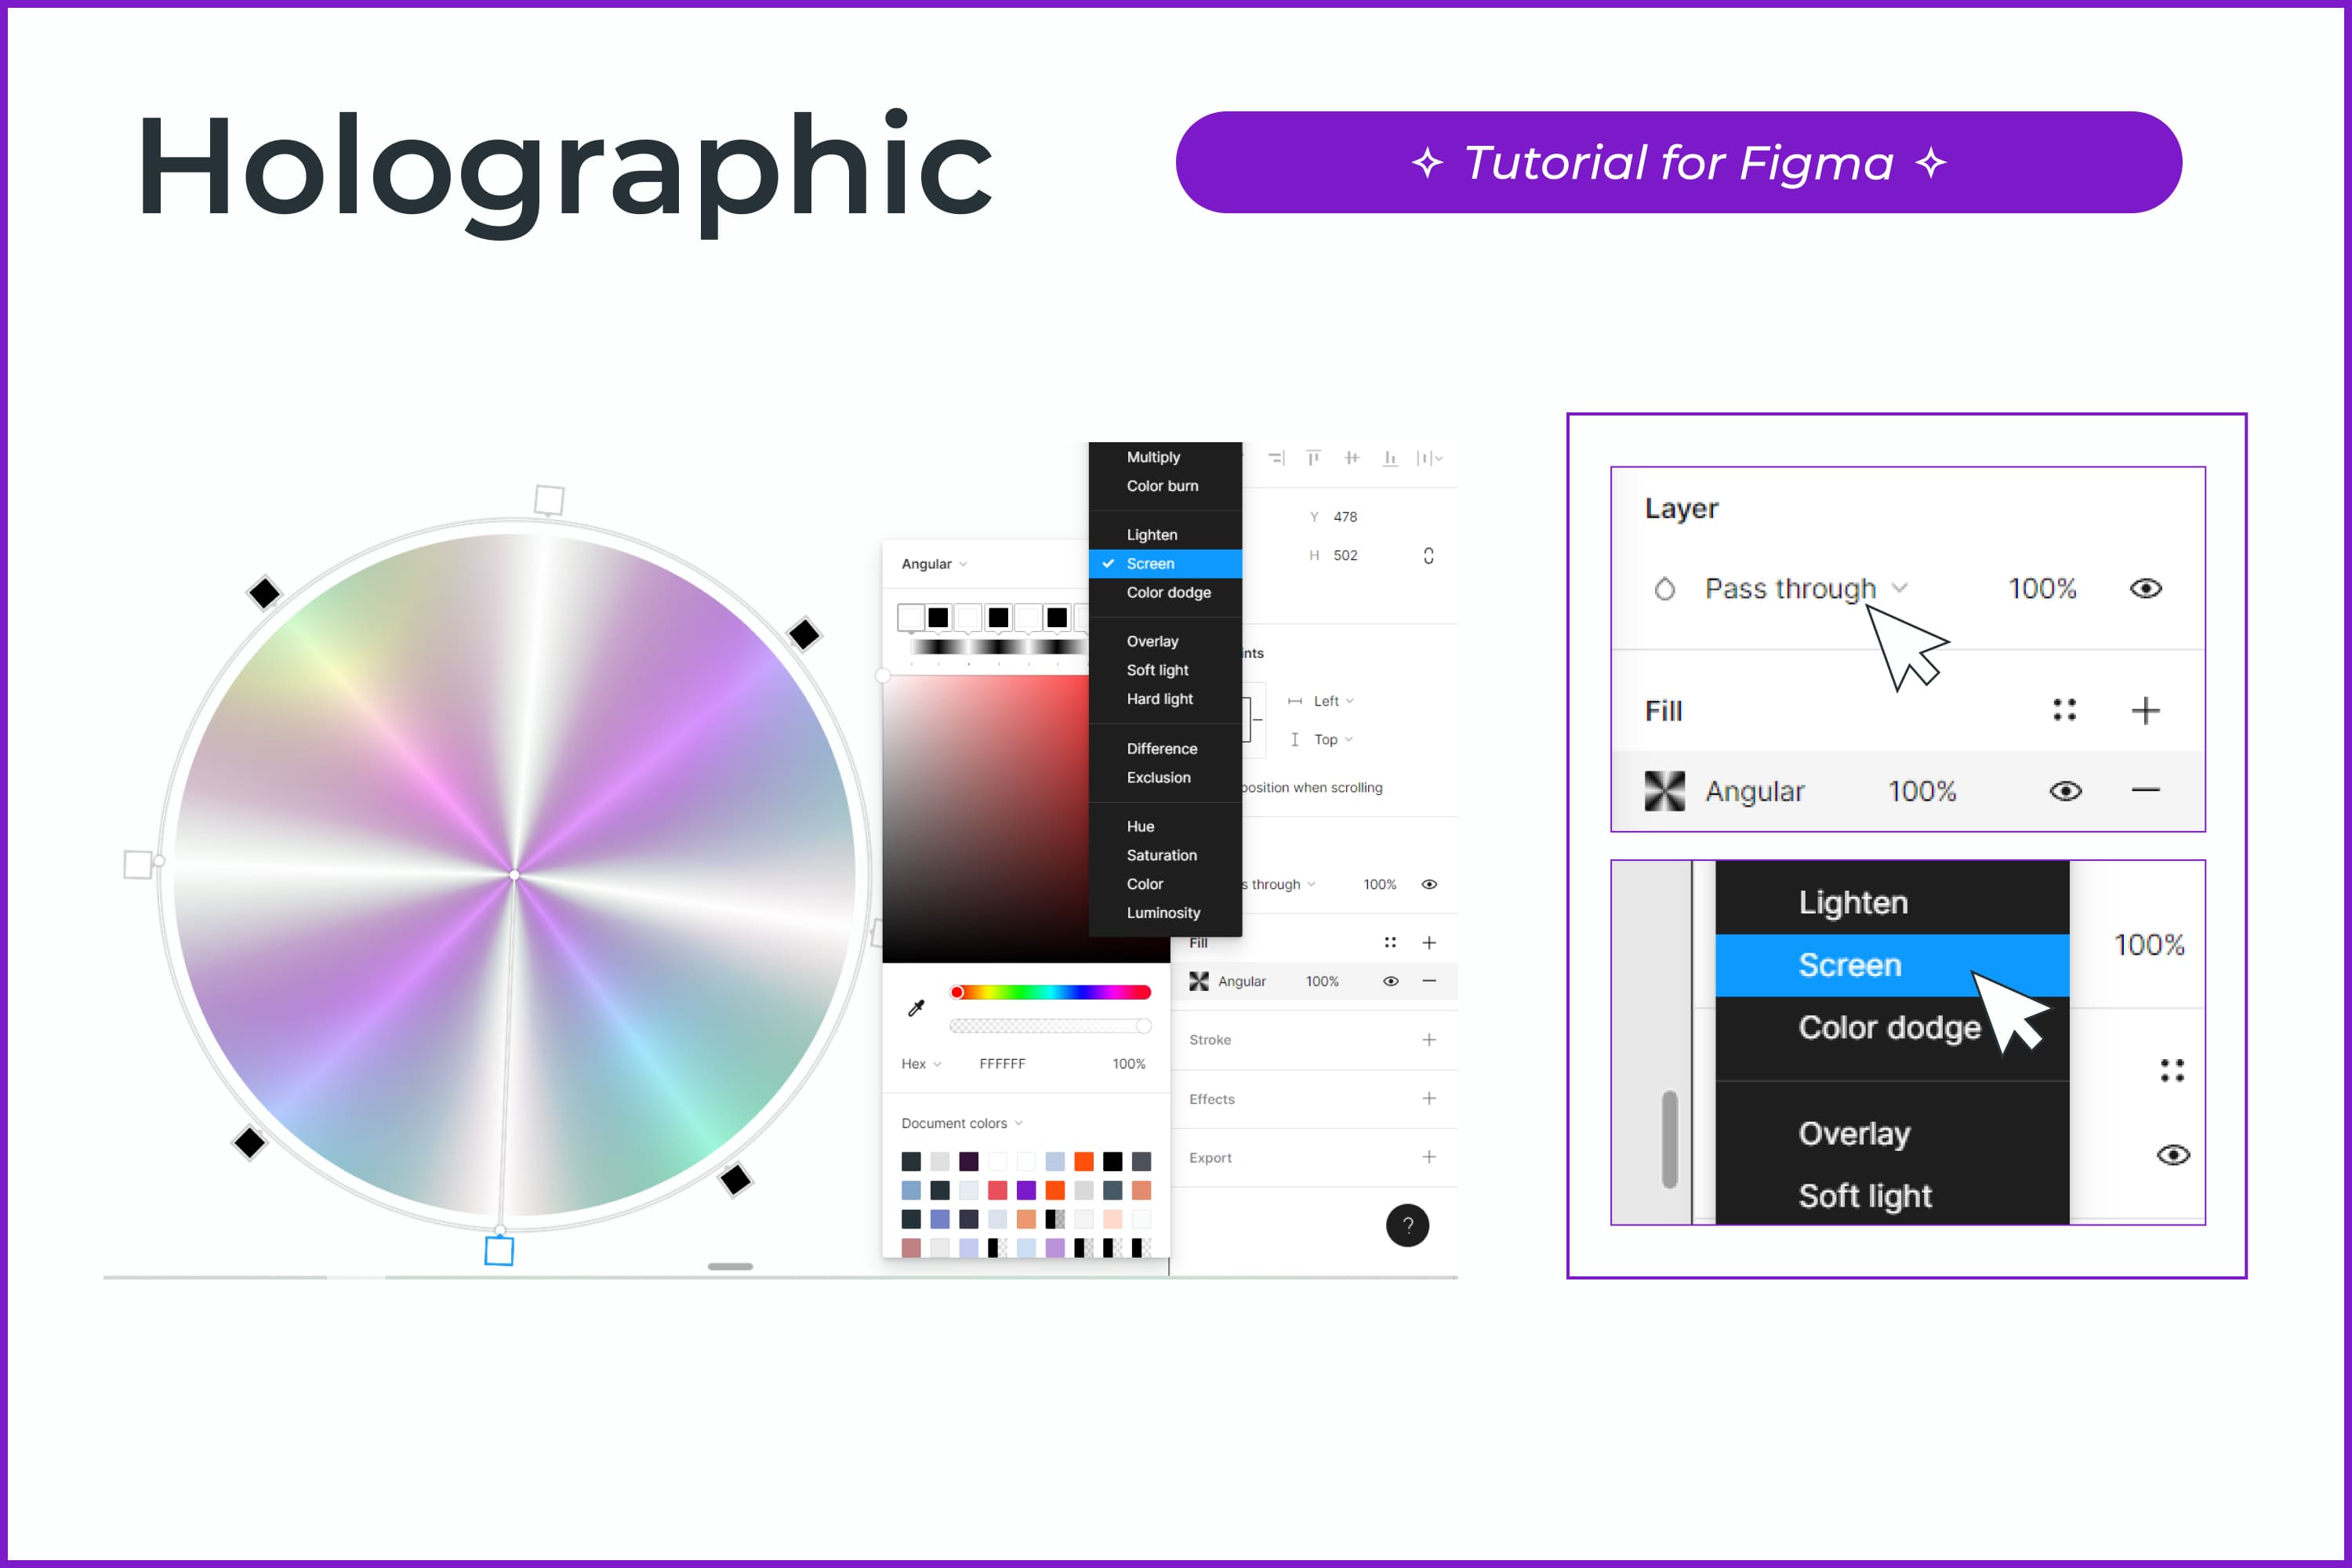
- Duplicate our object and leave only the angular fill.
- In the copy, change the blending mode of the gradient to Screen. Group the layers (Ctrl + G).
- Hooray, we made a hologram effect! Now let’s finish the design.
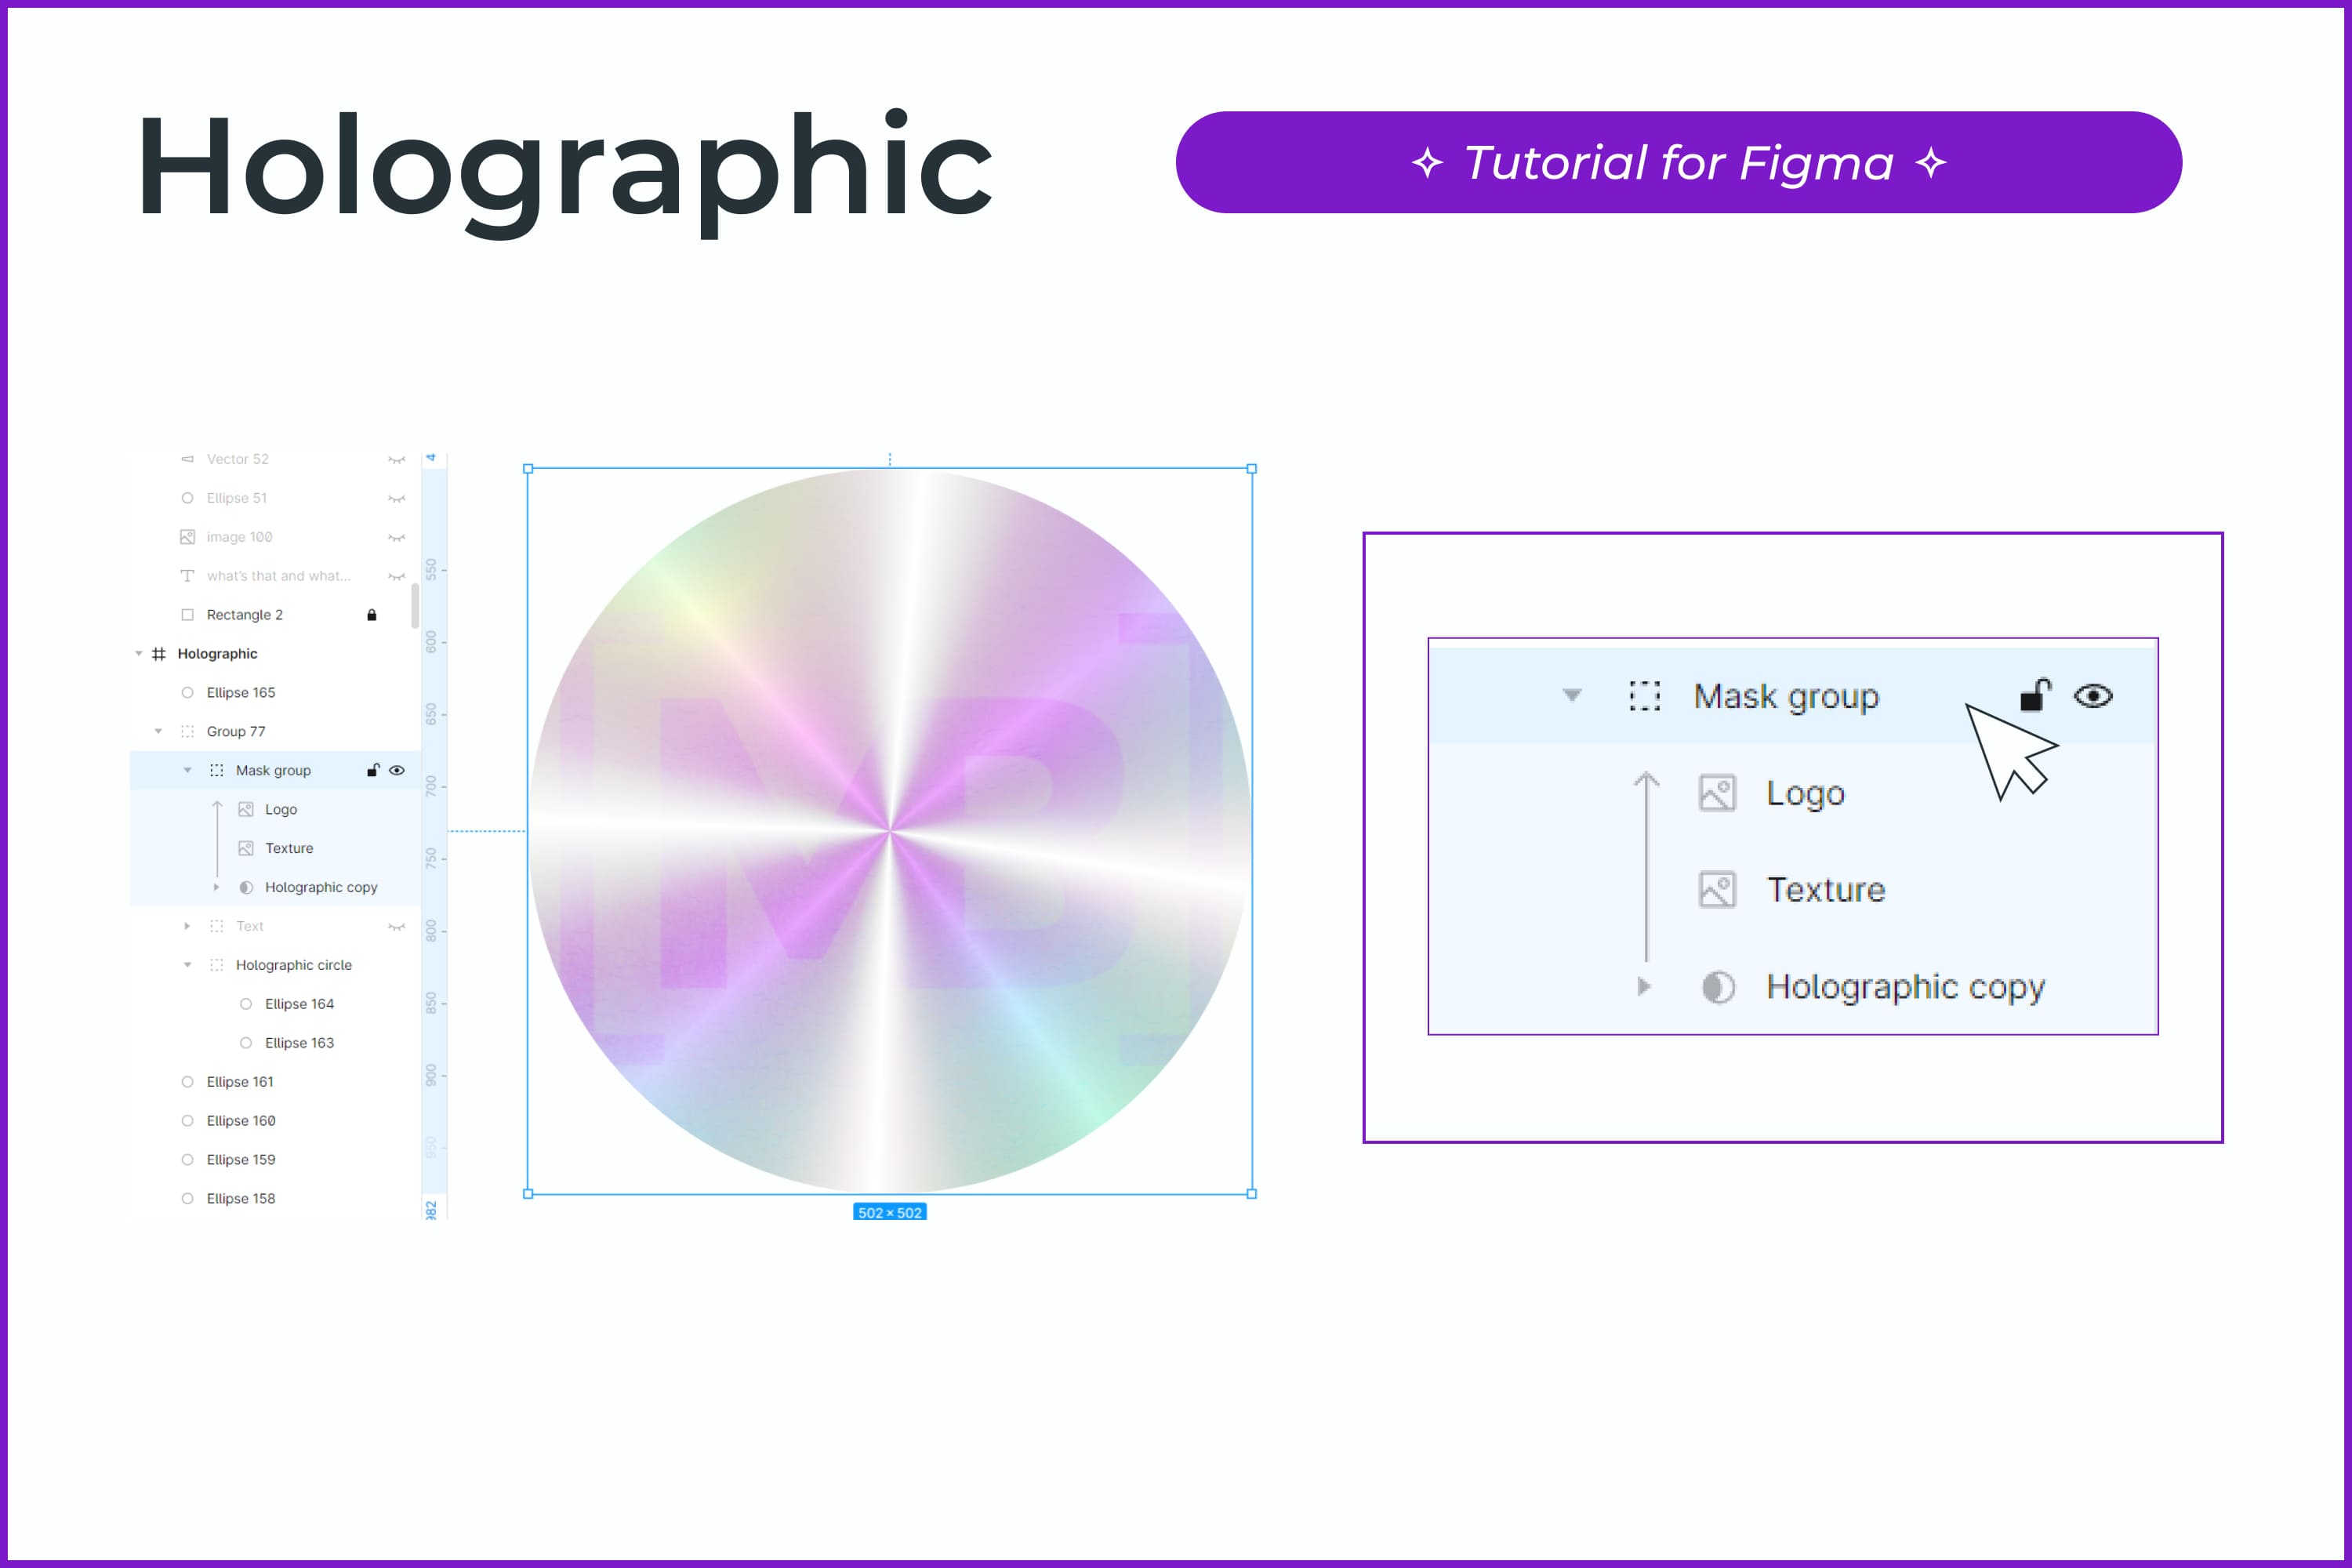
- Copy our holographic circle. We add texture on top with Overlay mode. Set the transparency of the texture itself to 30-50%.
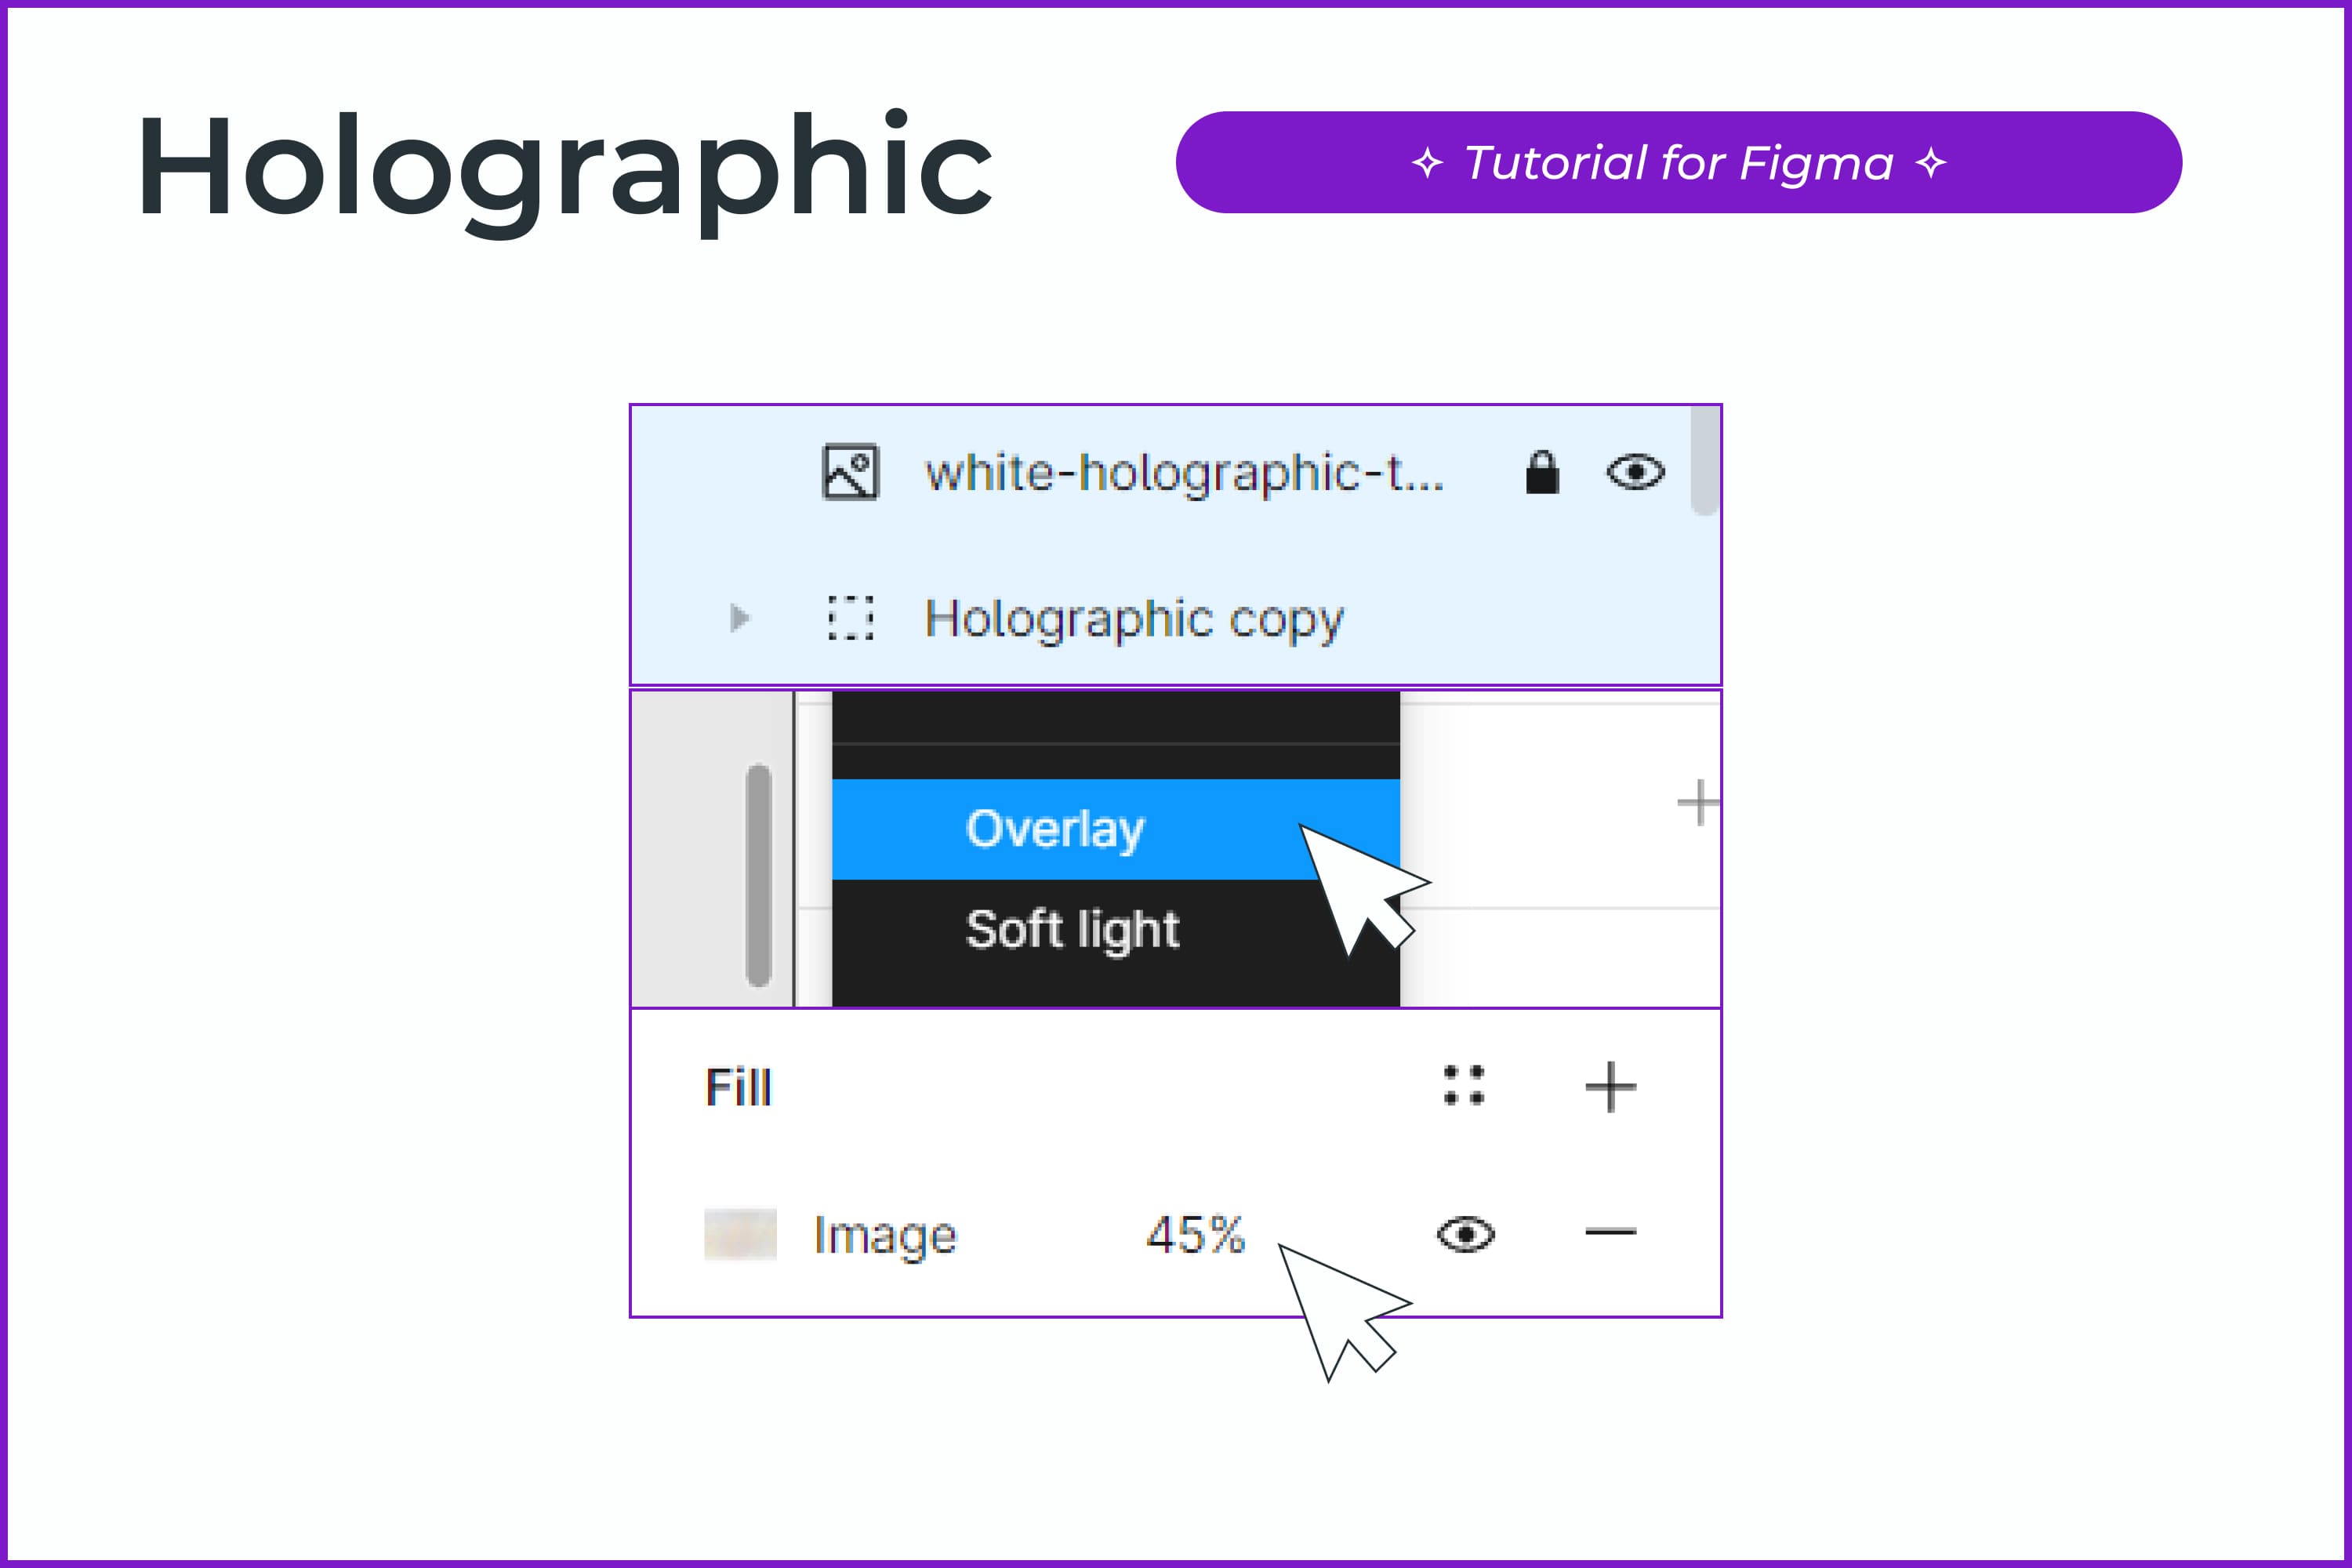
- Select the layer with the copy of the holographic circle and the layer with the texture. Apply a mask for them (Ctrl + Alt + M).
- Drag the logo into this mask layer. Set its blending mode to Overlay and set the opacity in the Fill section to 20-40%.
- Add text for your design and apply the Arc plugin to it. Adjust the curvature of the text so that it is round. The text should be under the texture layer.
- It’s better to use short phrases. To make your circle of text better, add spaces. If the circle didn’t turn out how you want it, then change the rounding value in the plugin.
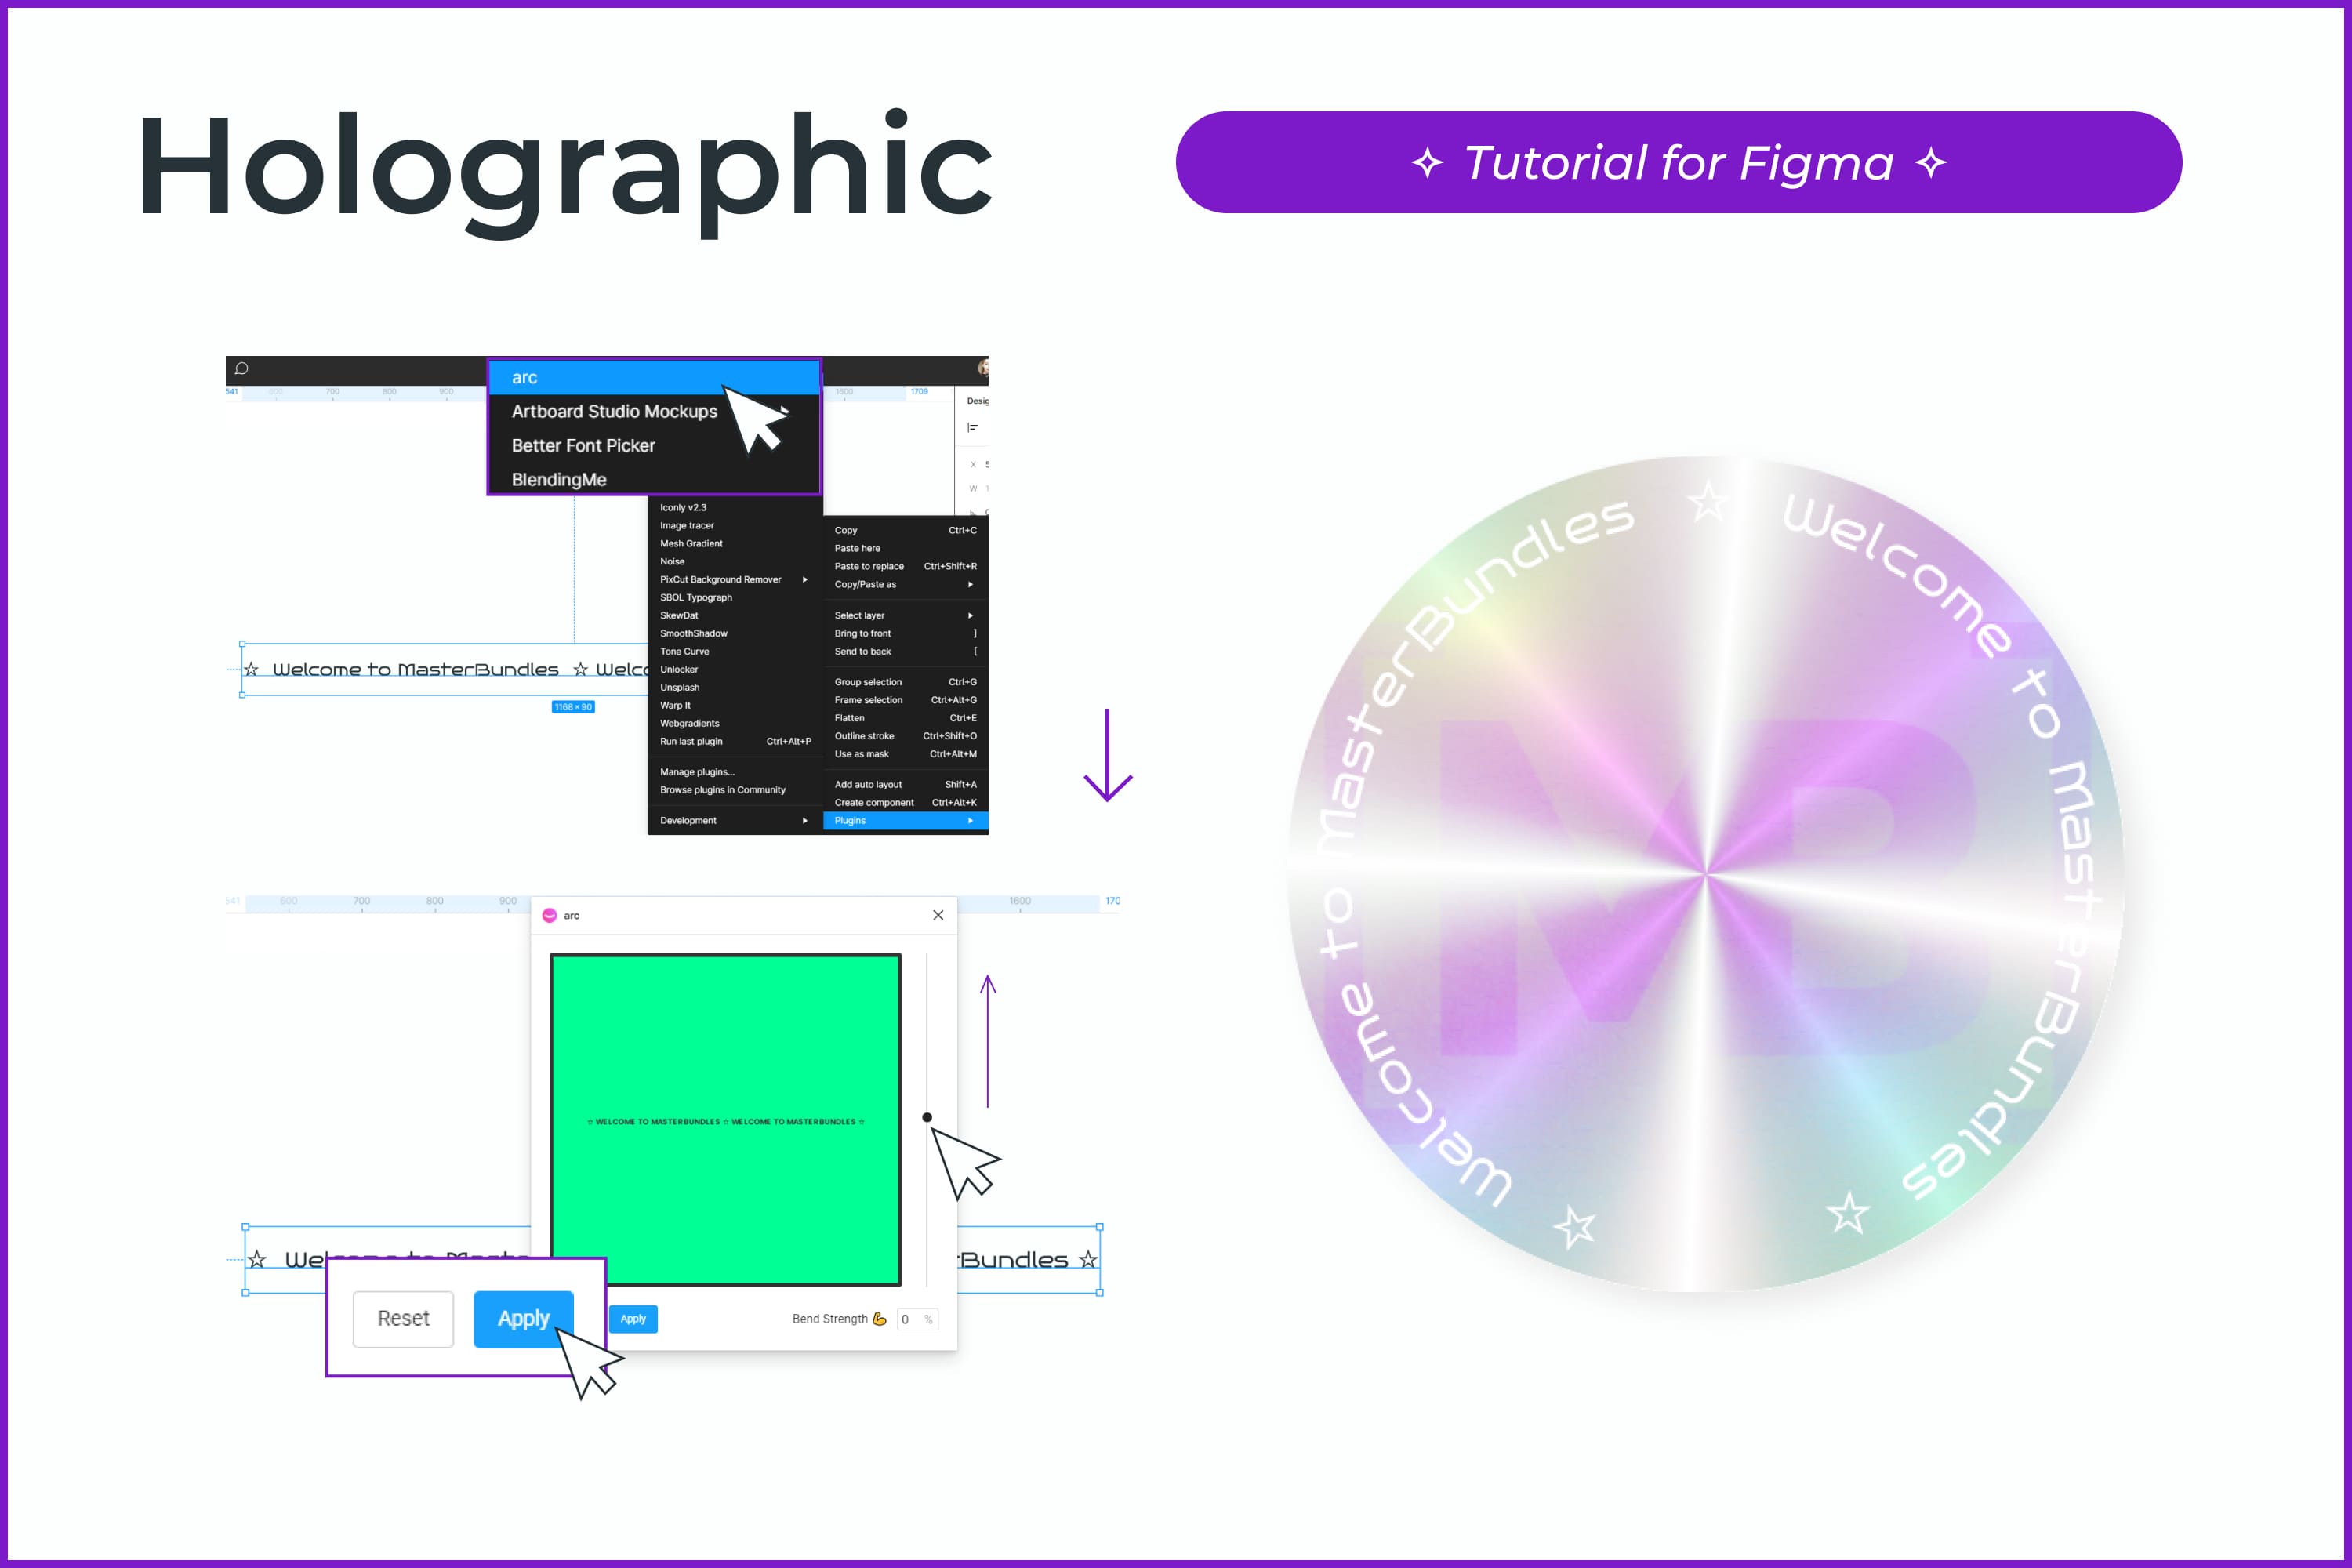
- Experiment with shape, size, colors, etc. Good luck!
Create a Holographic Effect in a Few Seconds
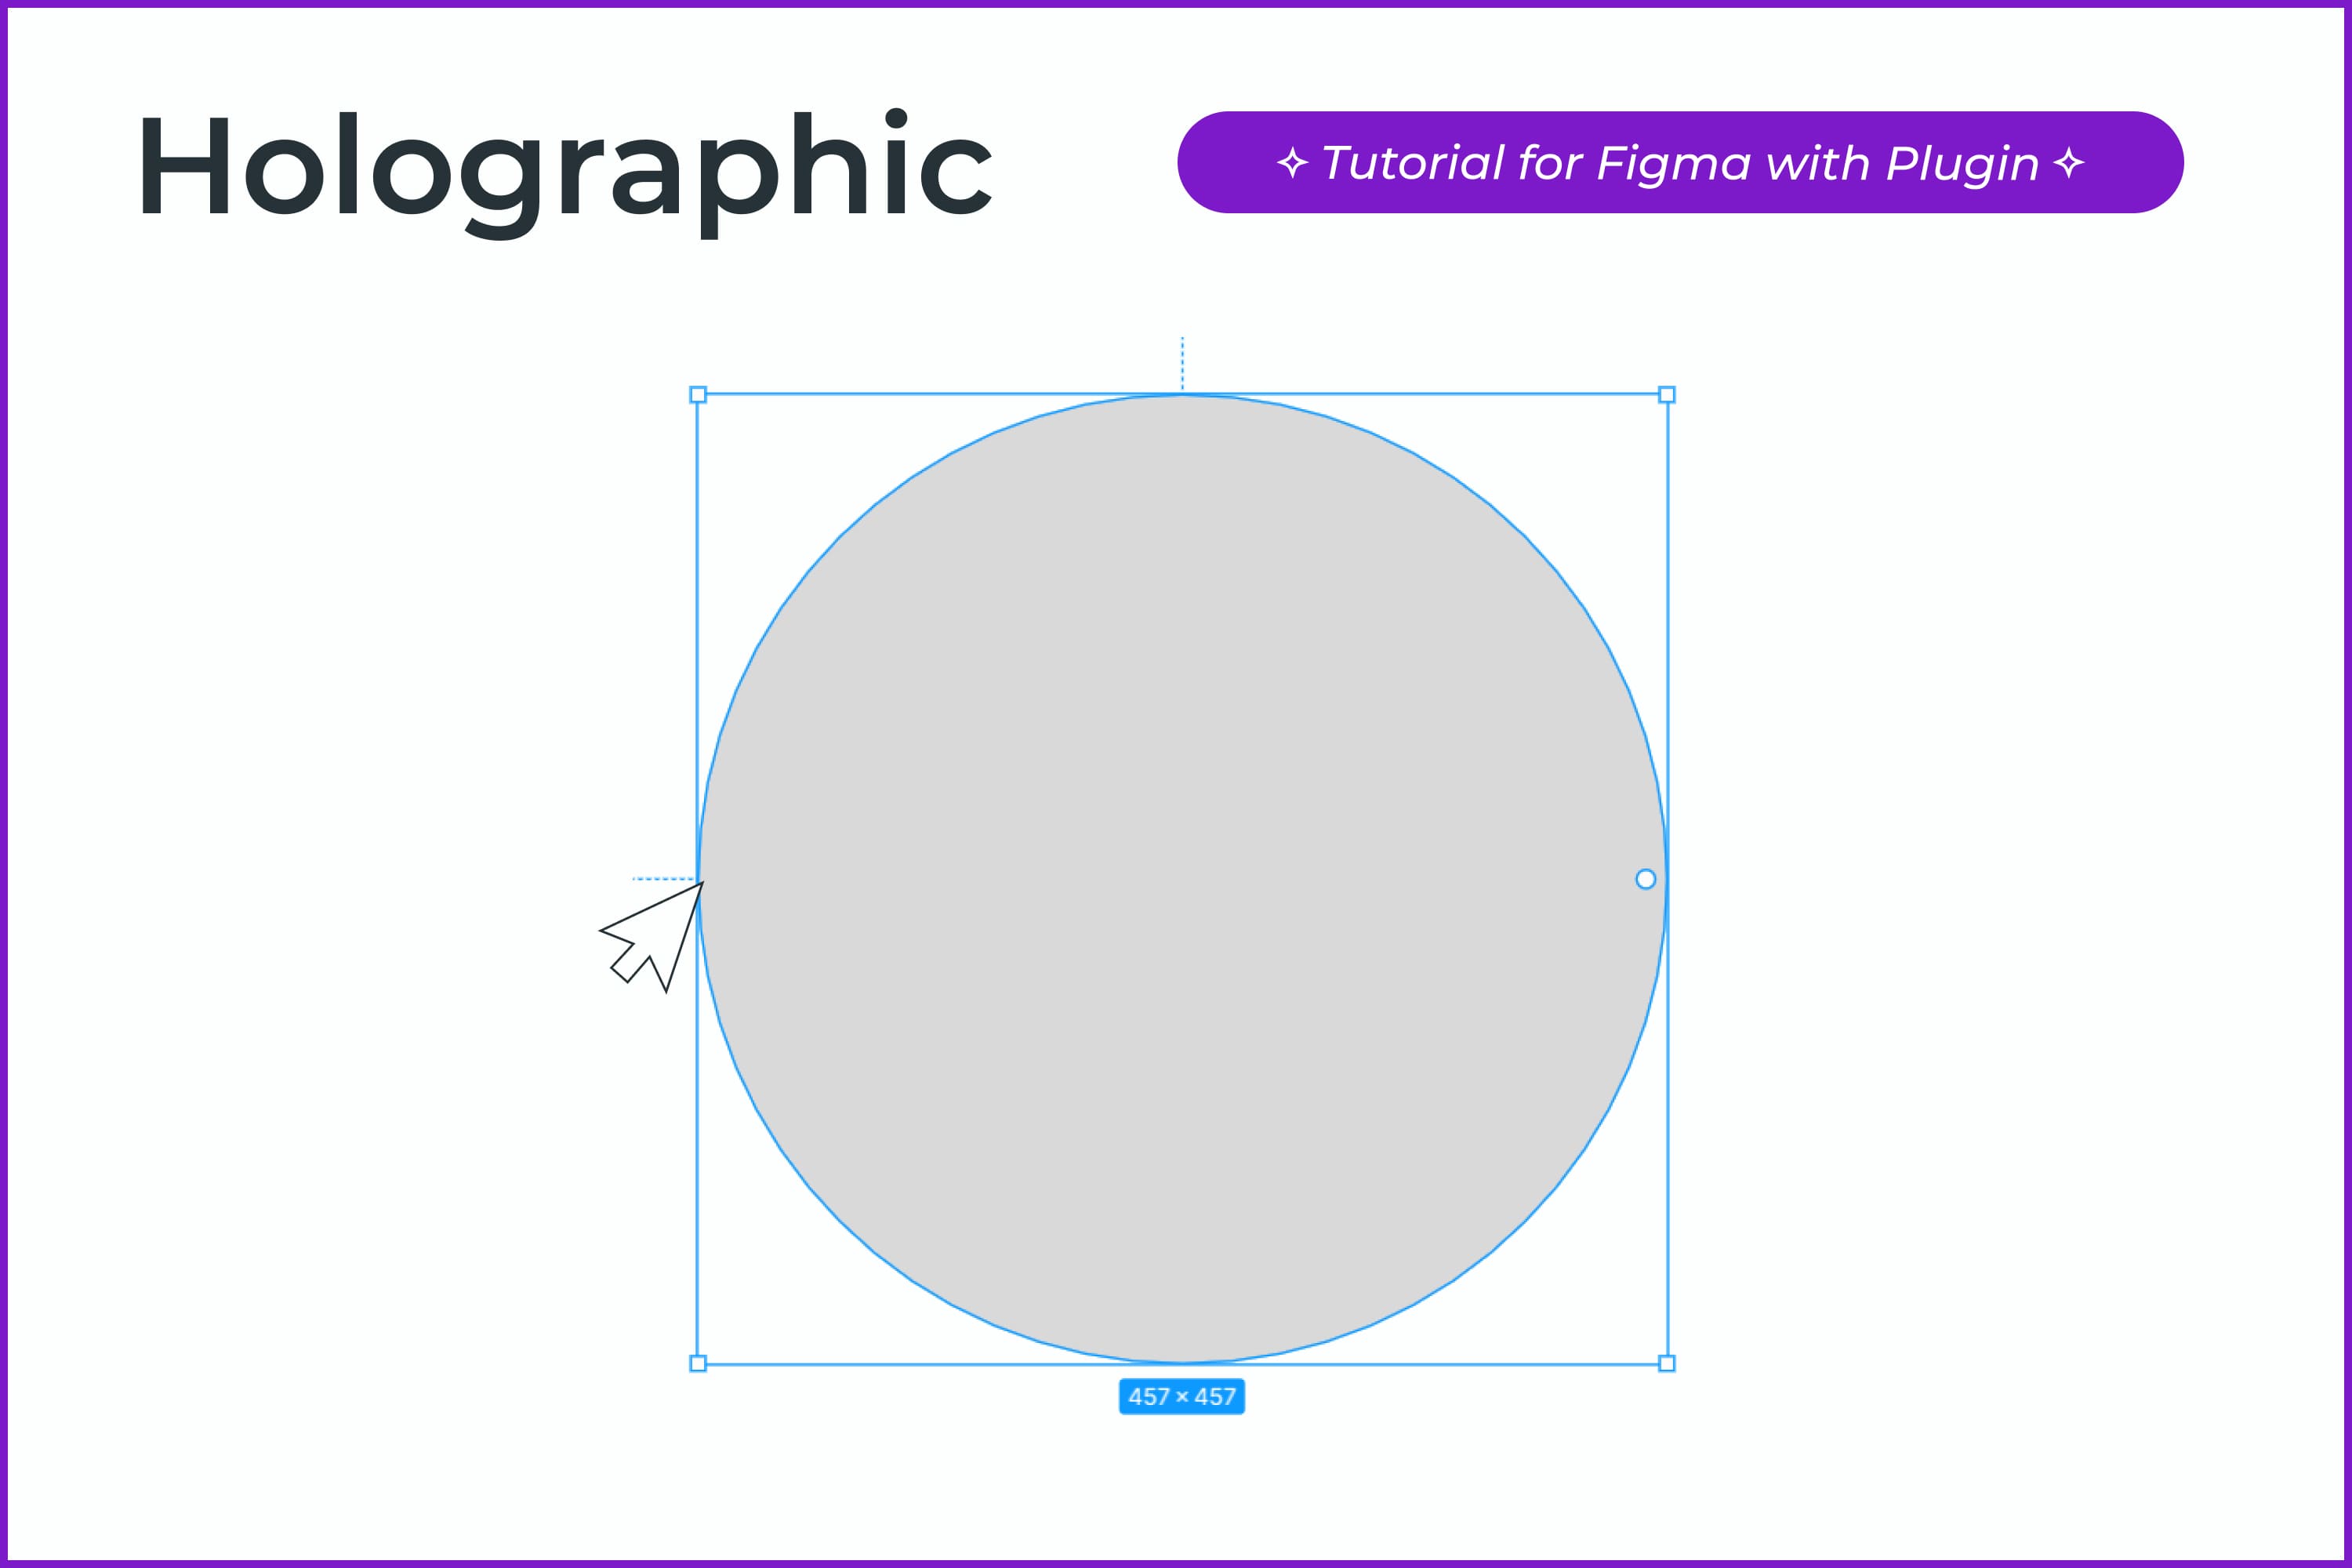
- Create an ellipse.
- Select the ellipse and launch the Laser plugin.
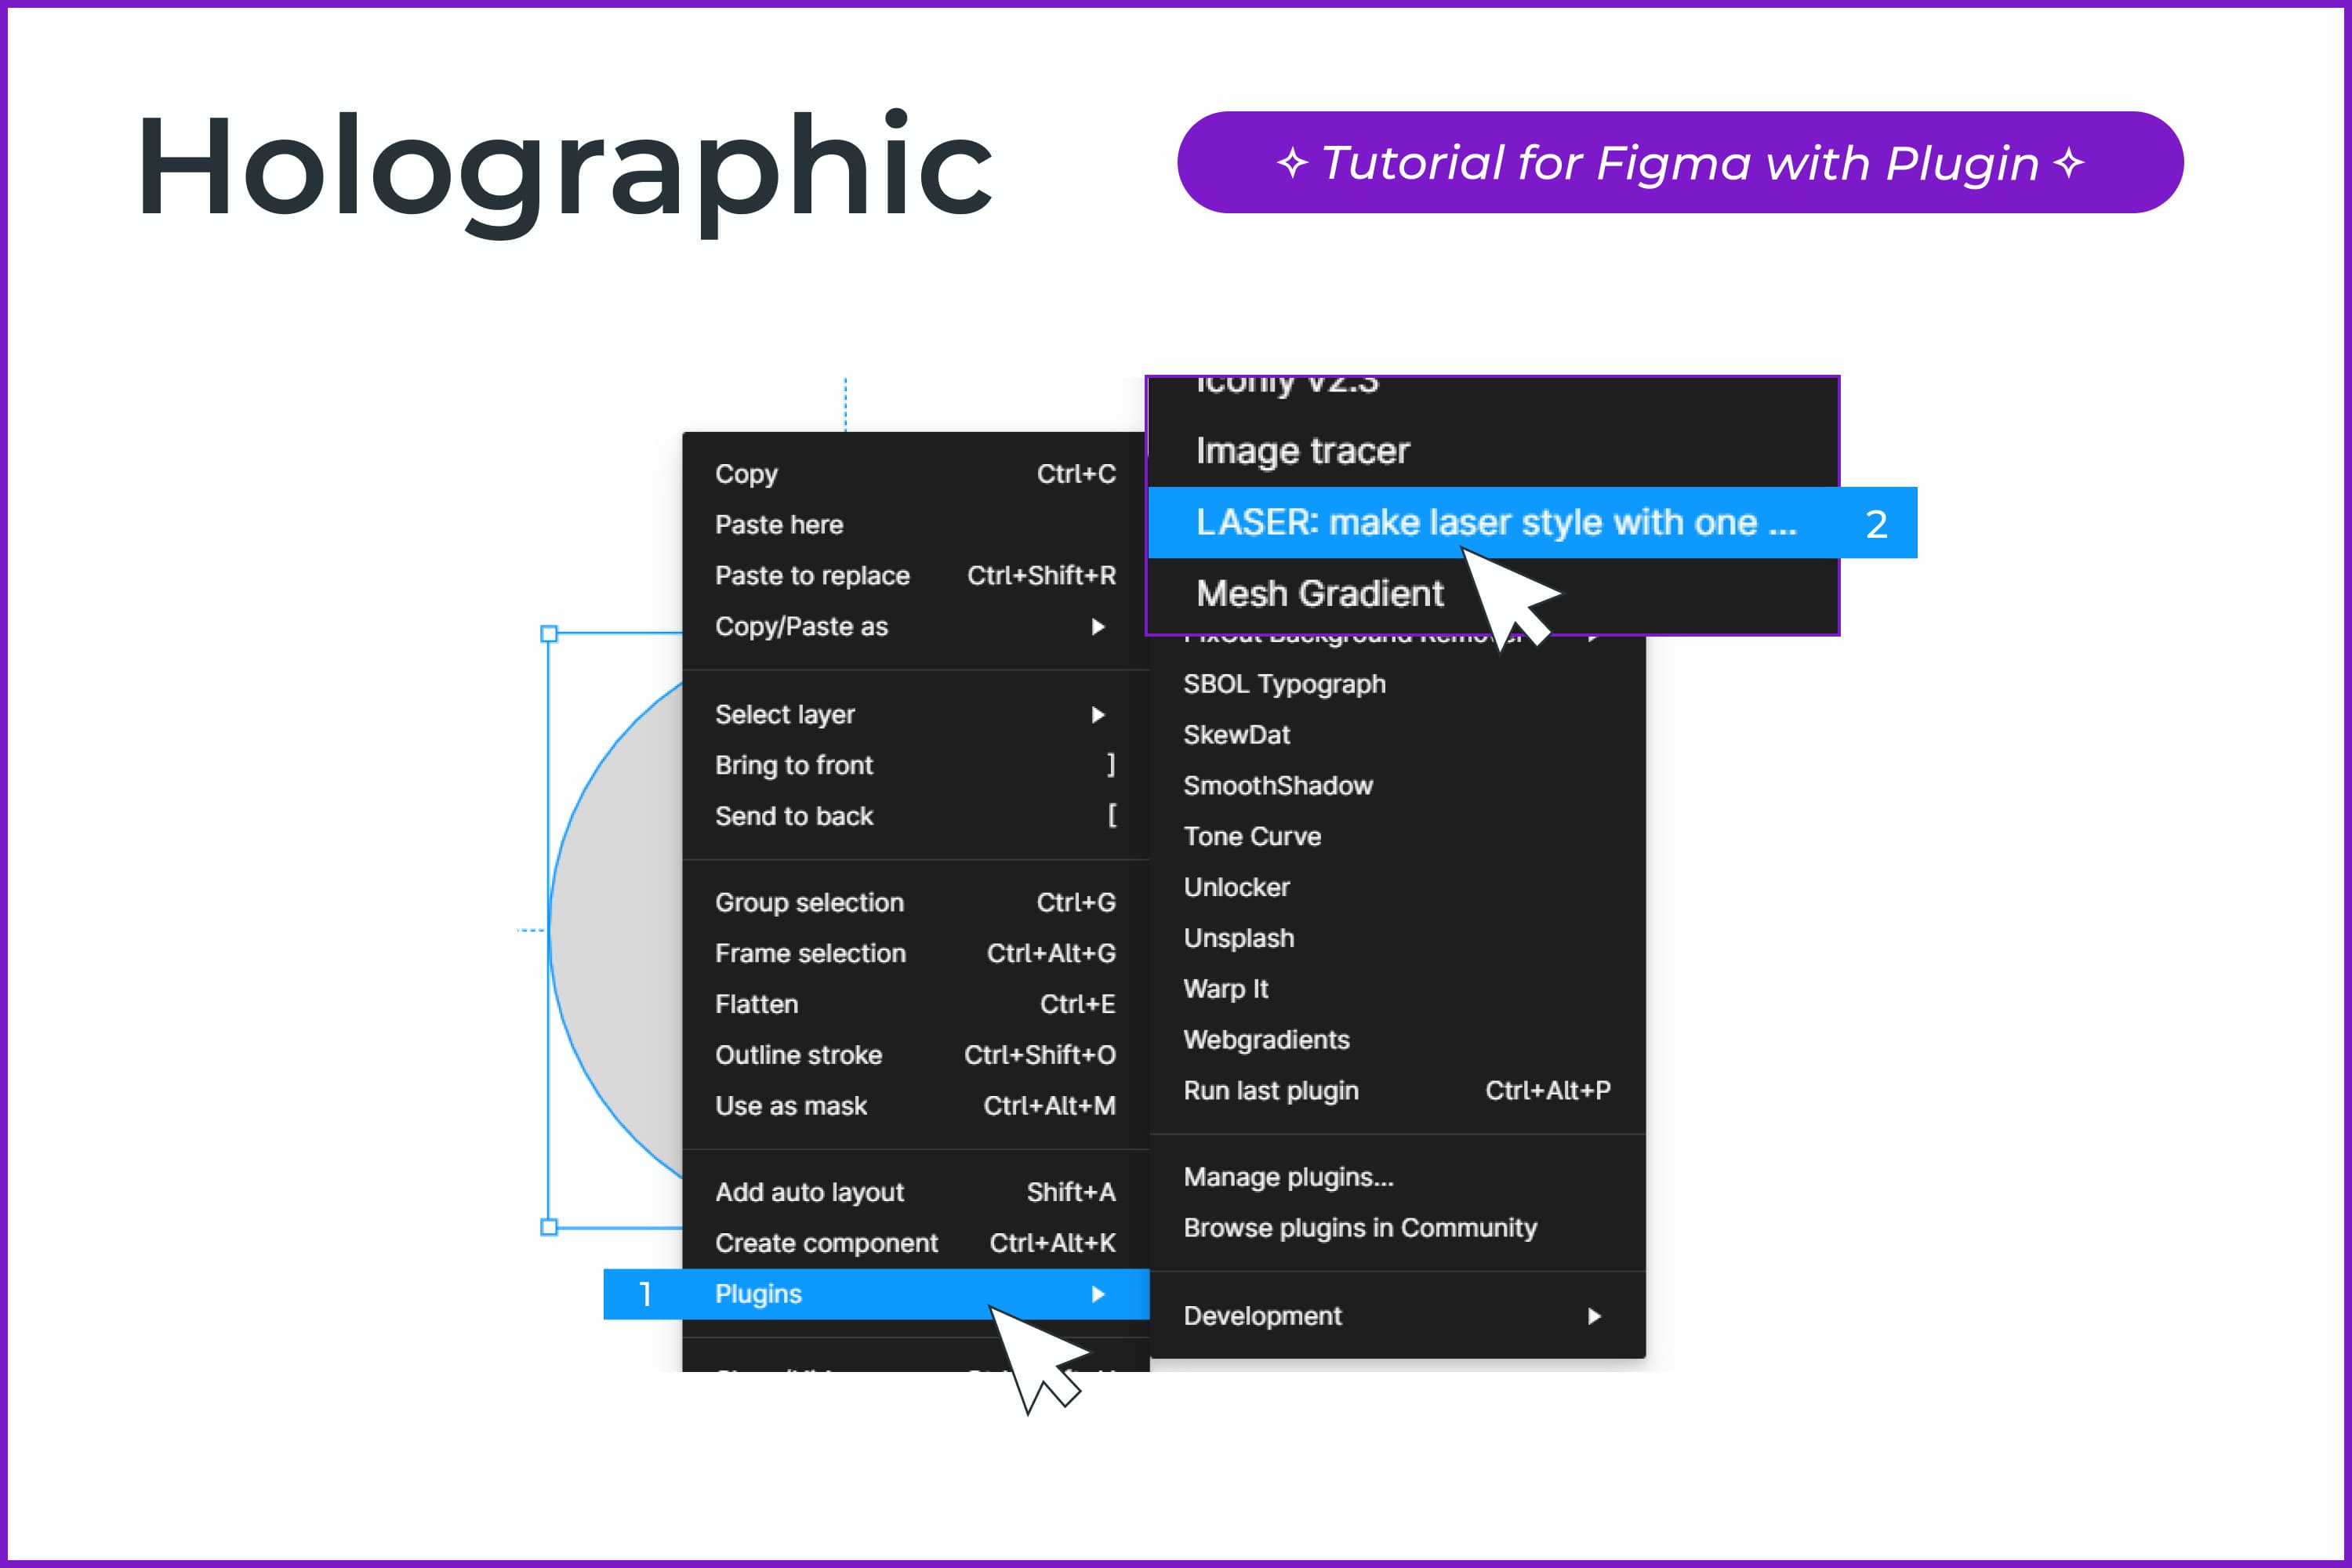
- In the plugin, select the style of the hologram and click Set background.
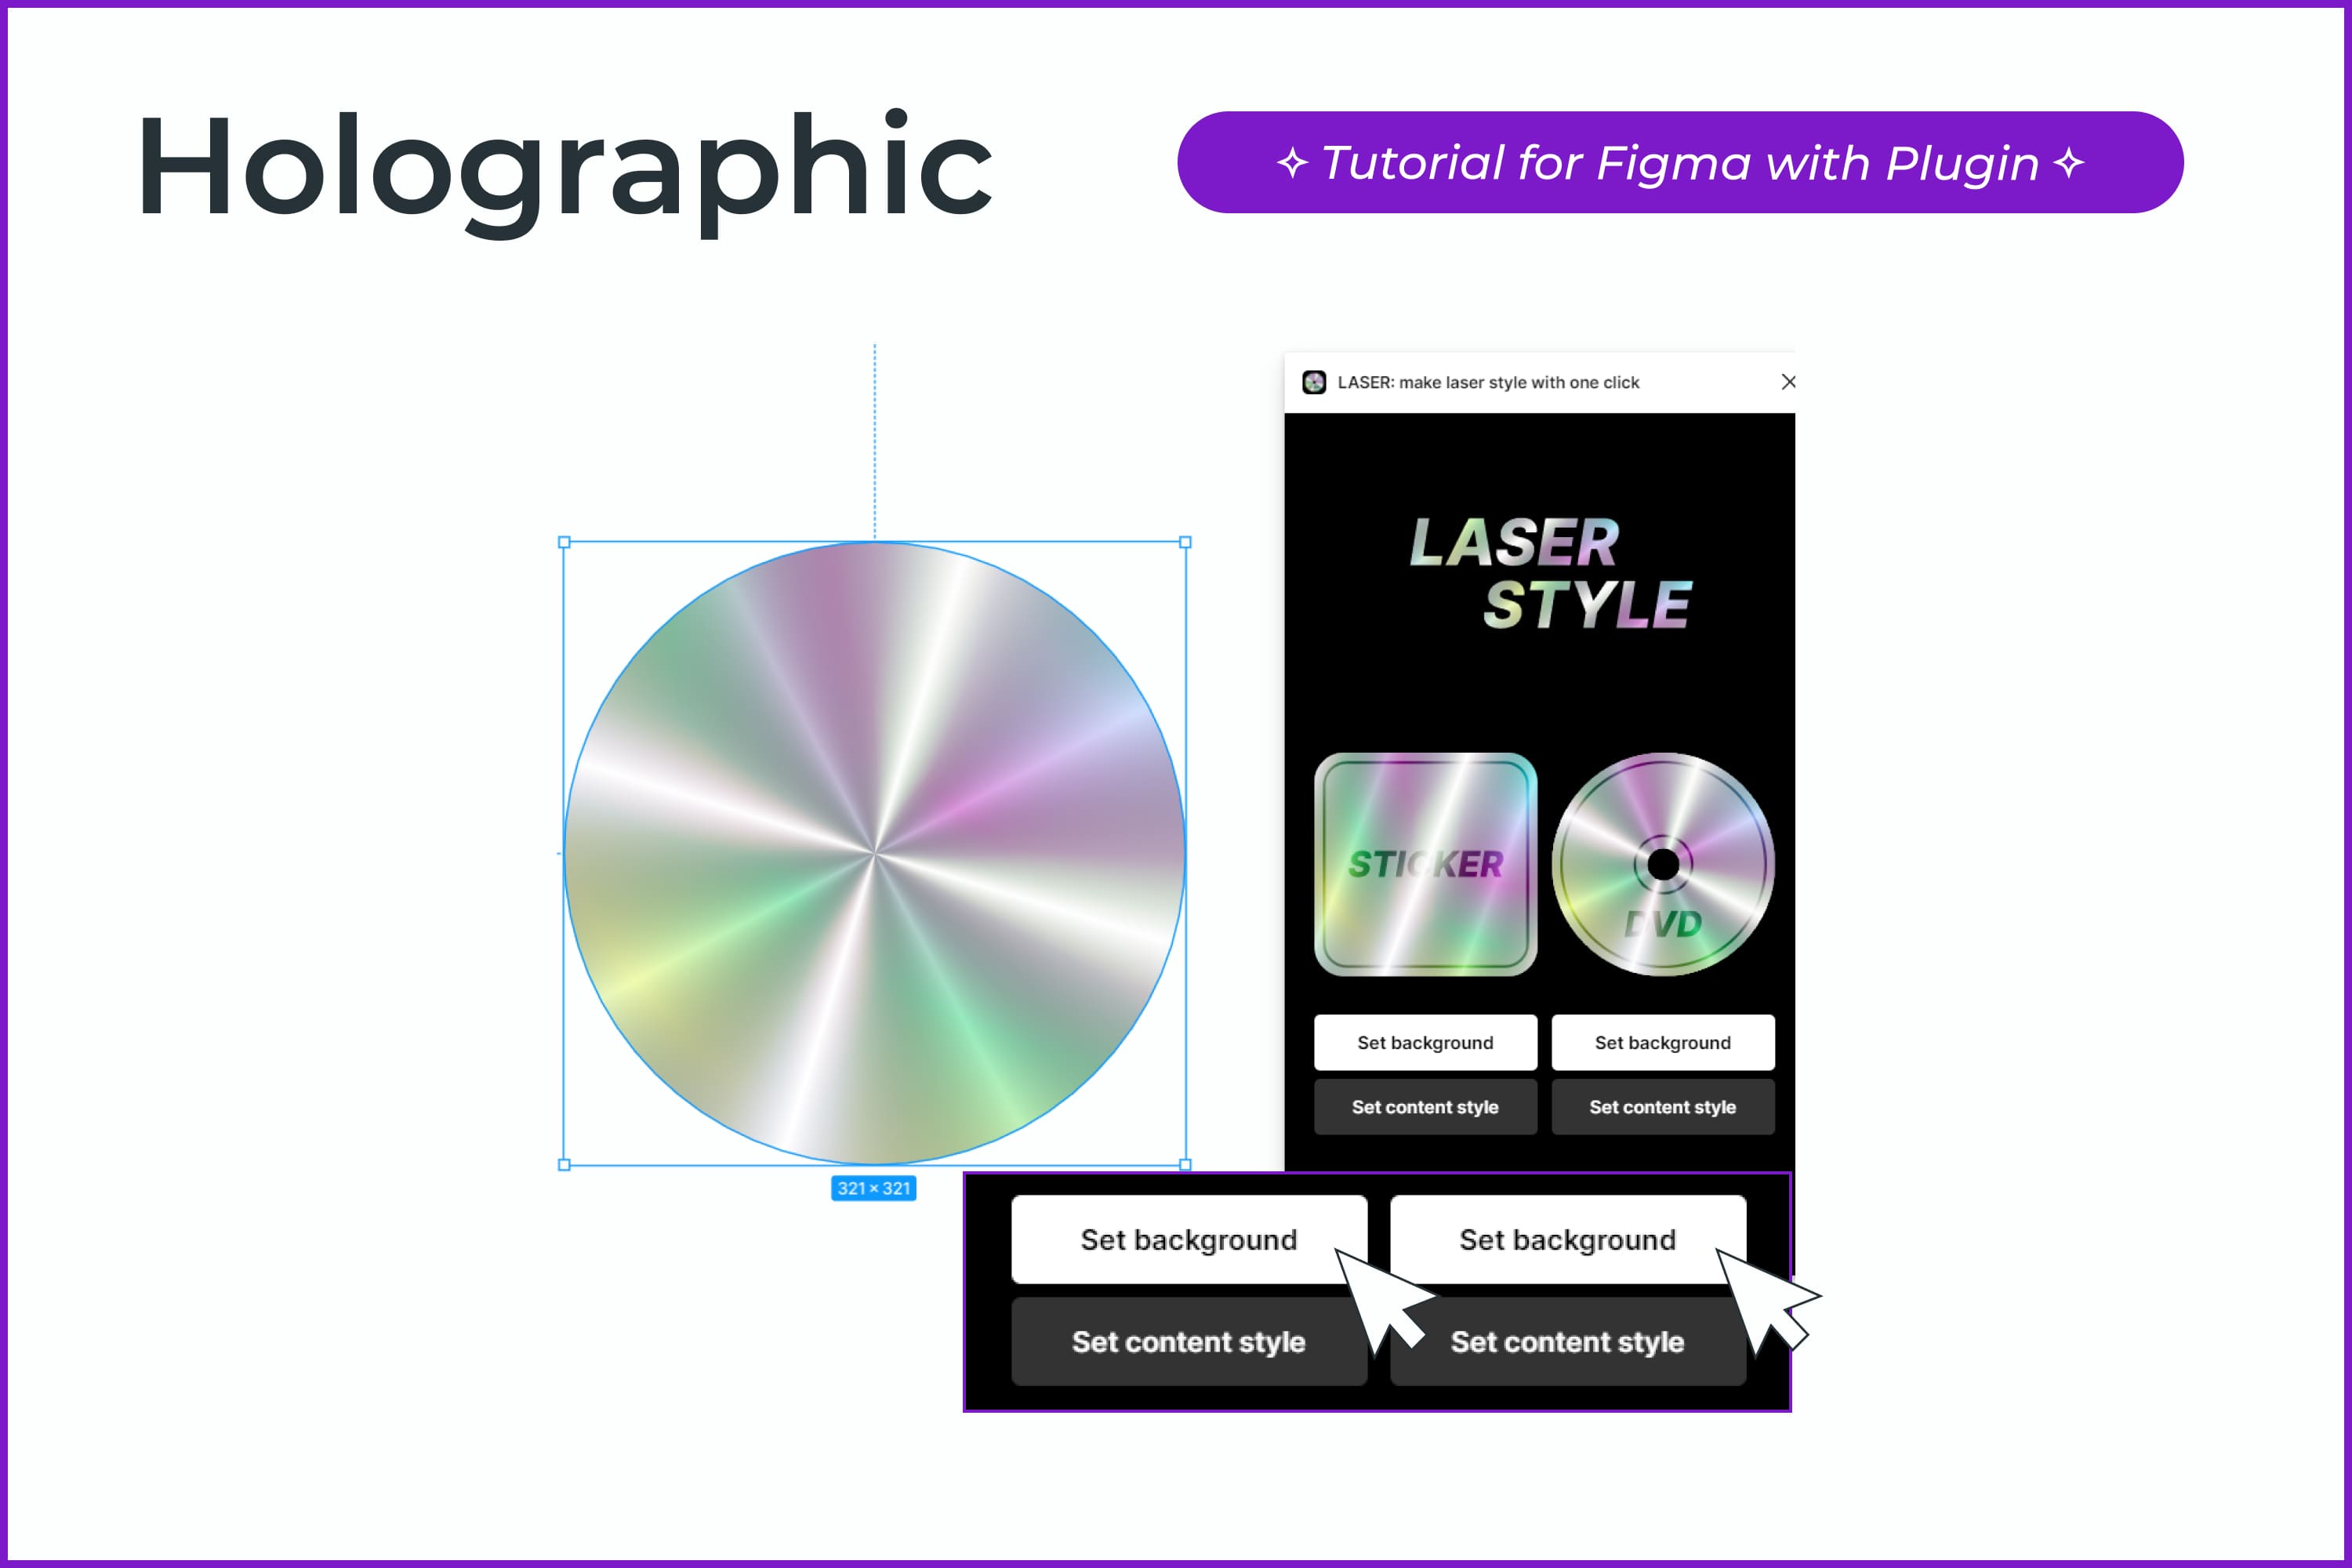
- Done! If you want to change the colors, you can do so in the Fill section.
Products that Can Come in Handy
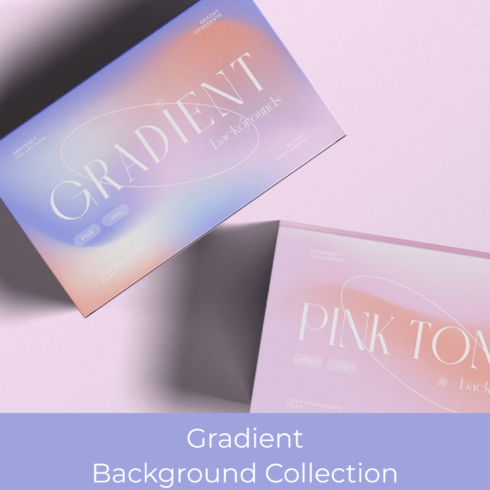
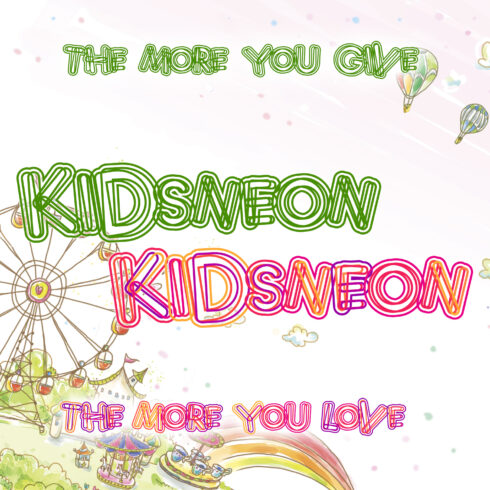
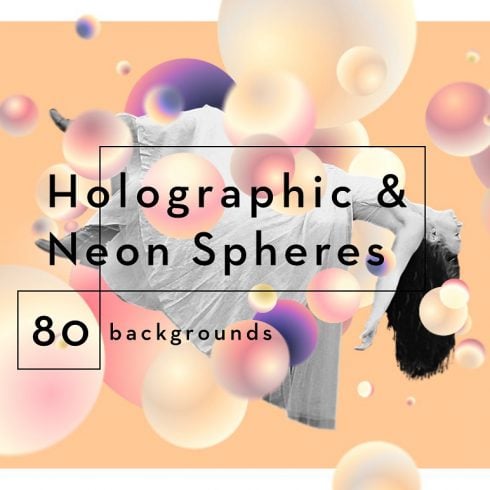
Holographic Pastel & Neon Spheres

Set of 40 abstract dynamic backgrounds with floating spheres in holographic and neon colors. There are already ready-made color solutions, but you can adjust the colors how you like.
12 Metallic Holographic Waves Digital Paper
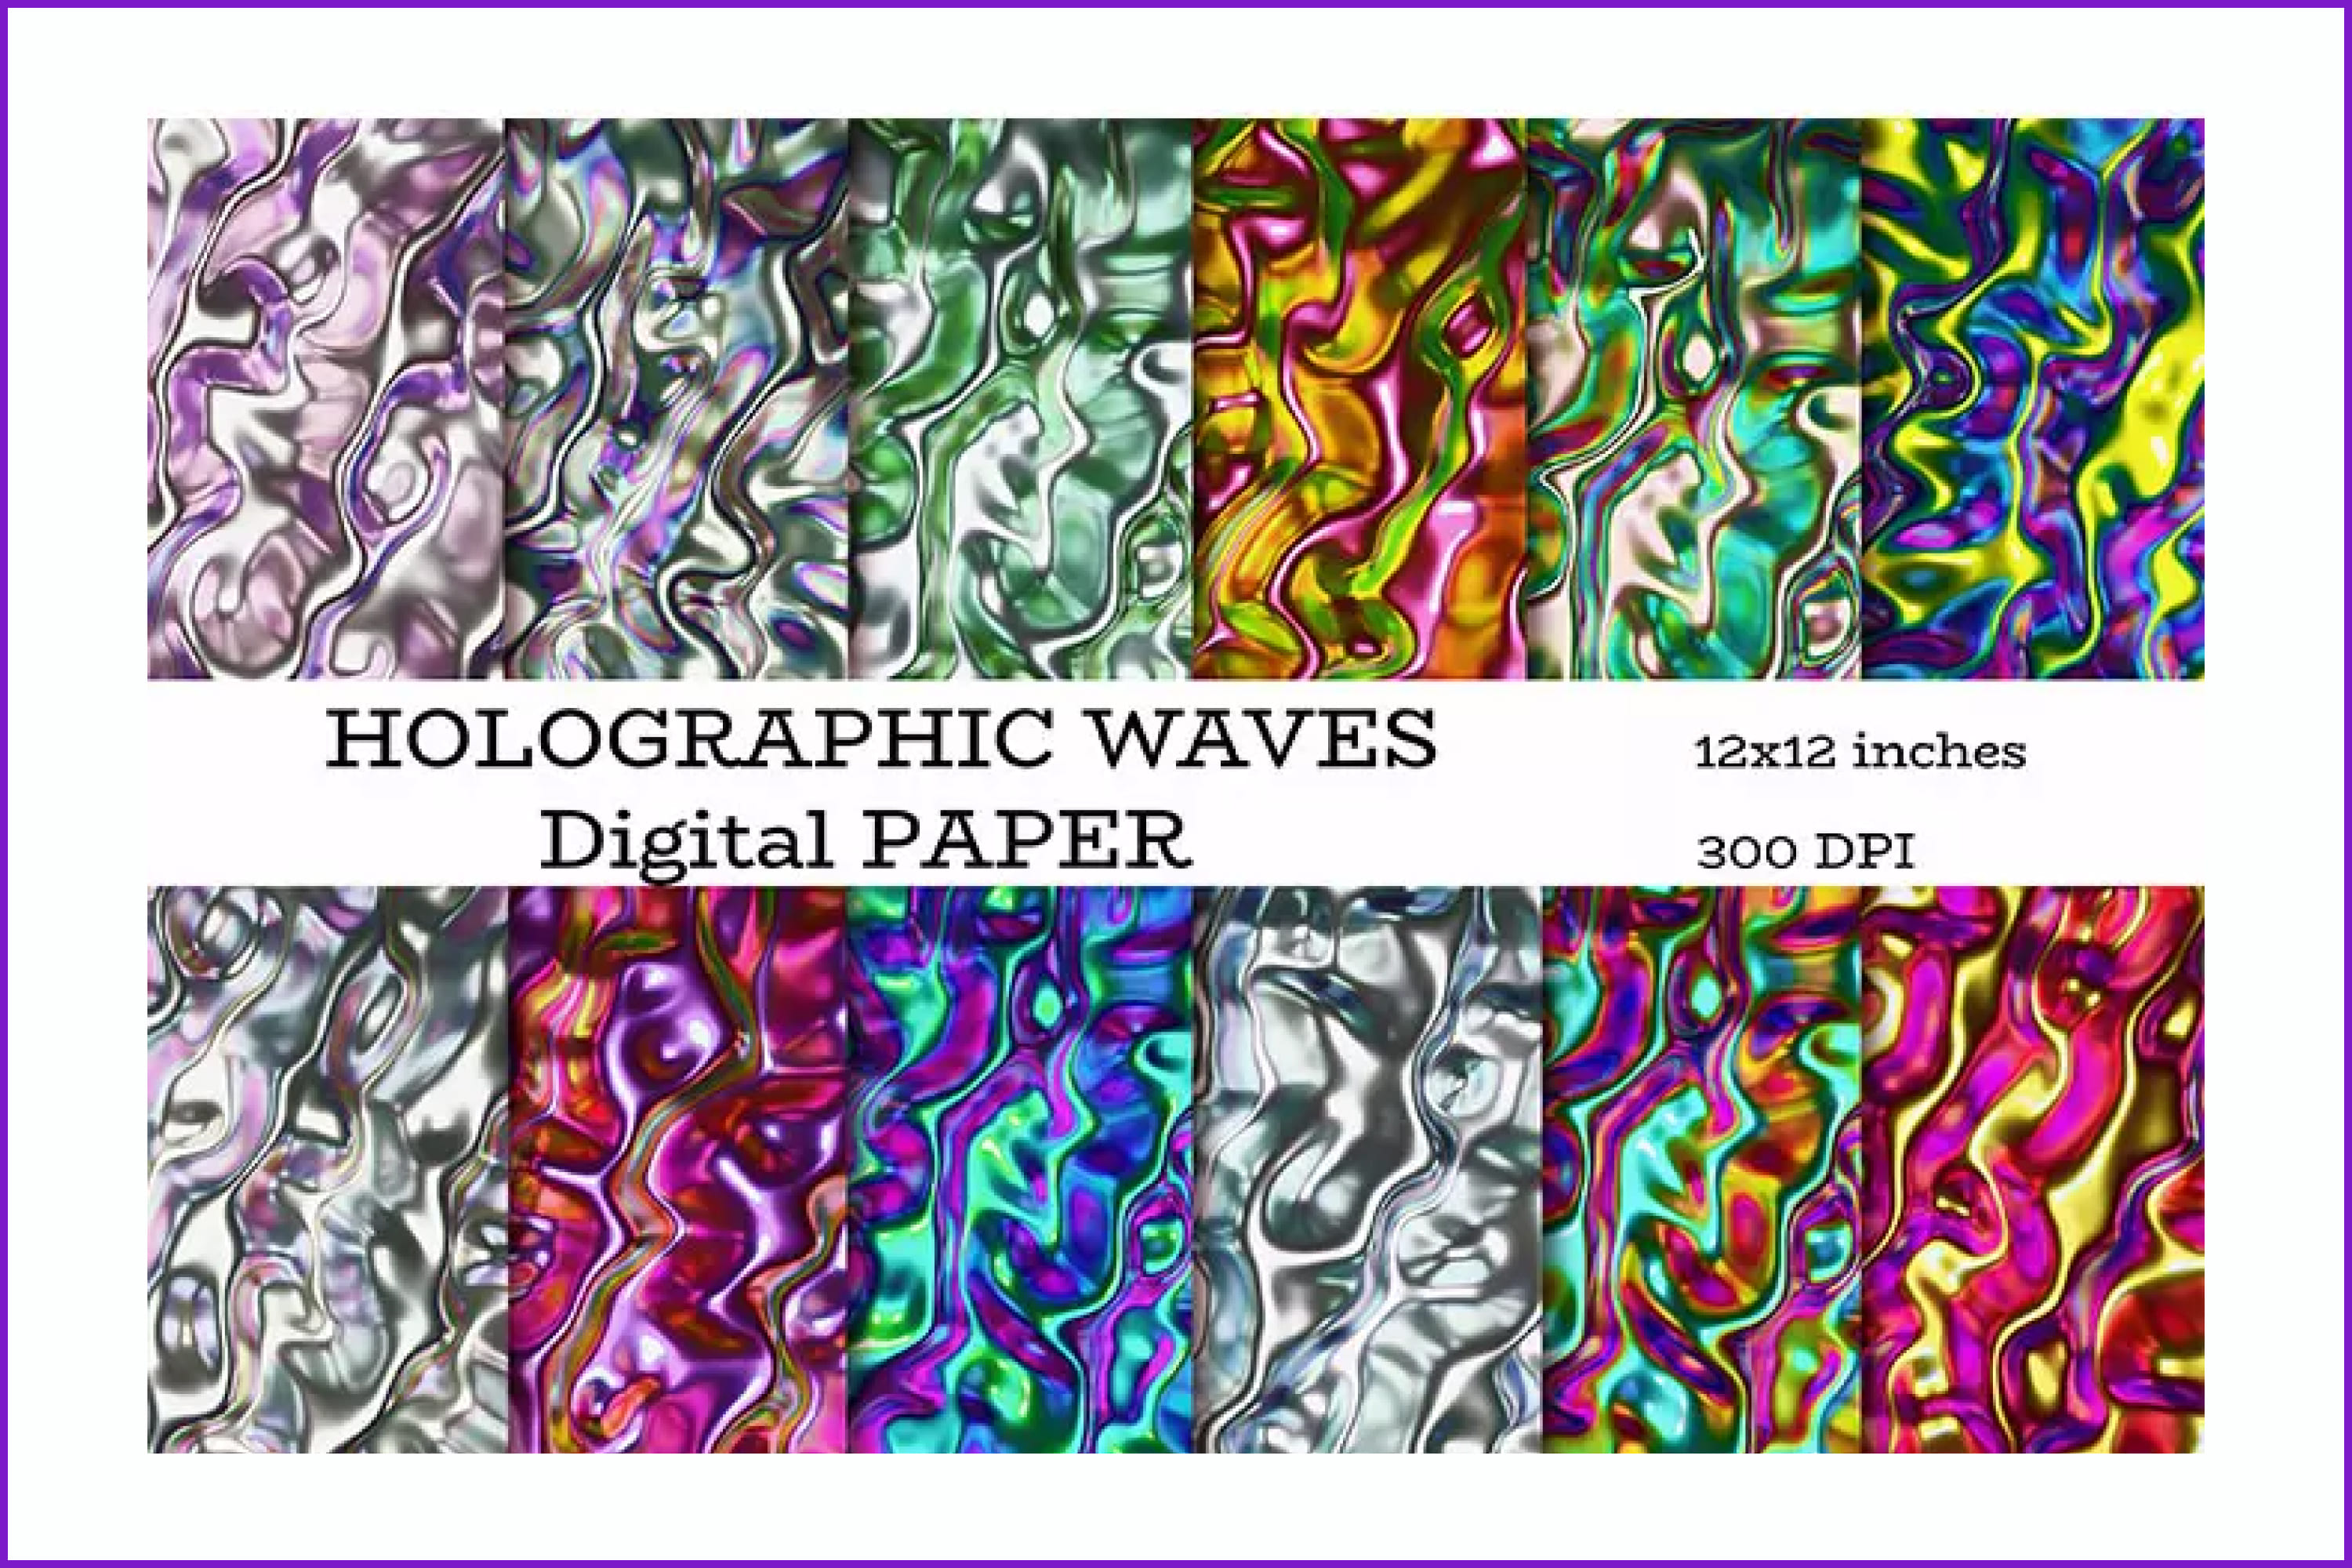
Here you will find 12 cool textures that look like liquid metal and shimmer in different colors. They will attract the eye and you will definitely want to consider them!
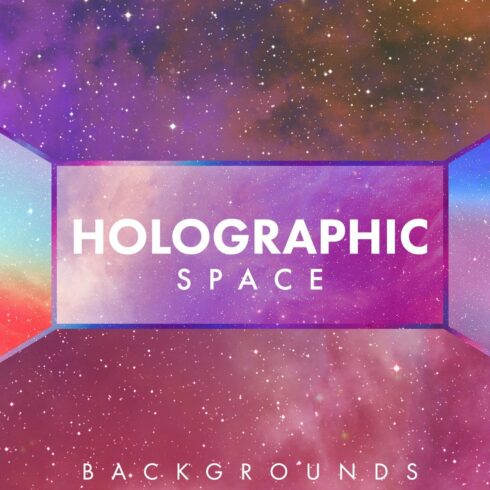
Holographic Backgrounds
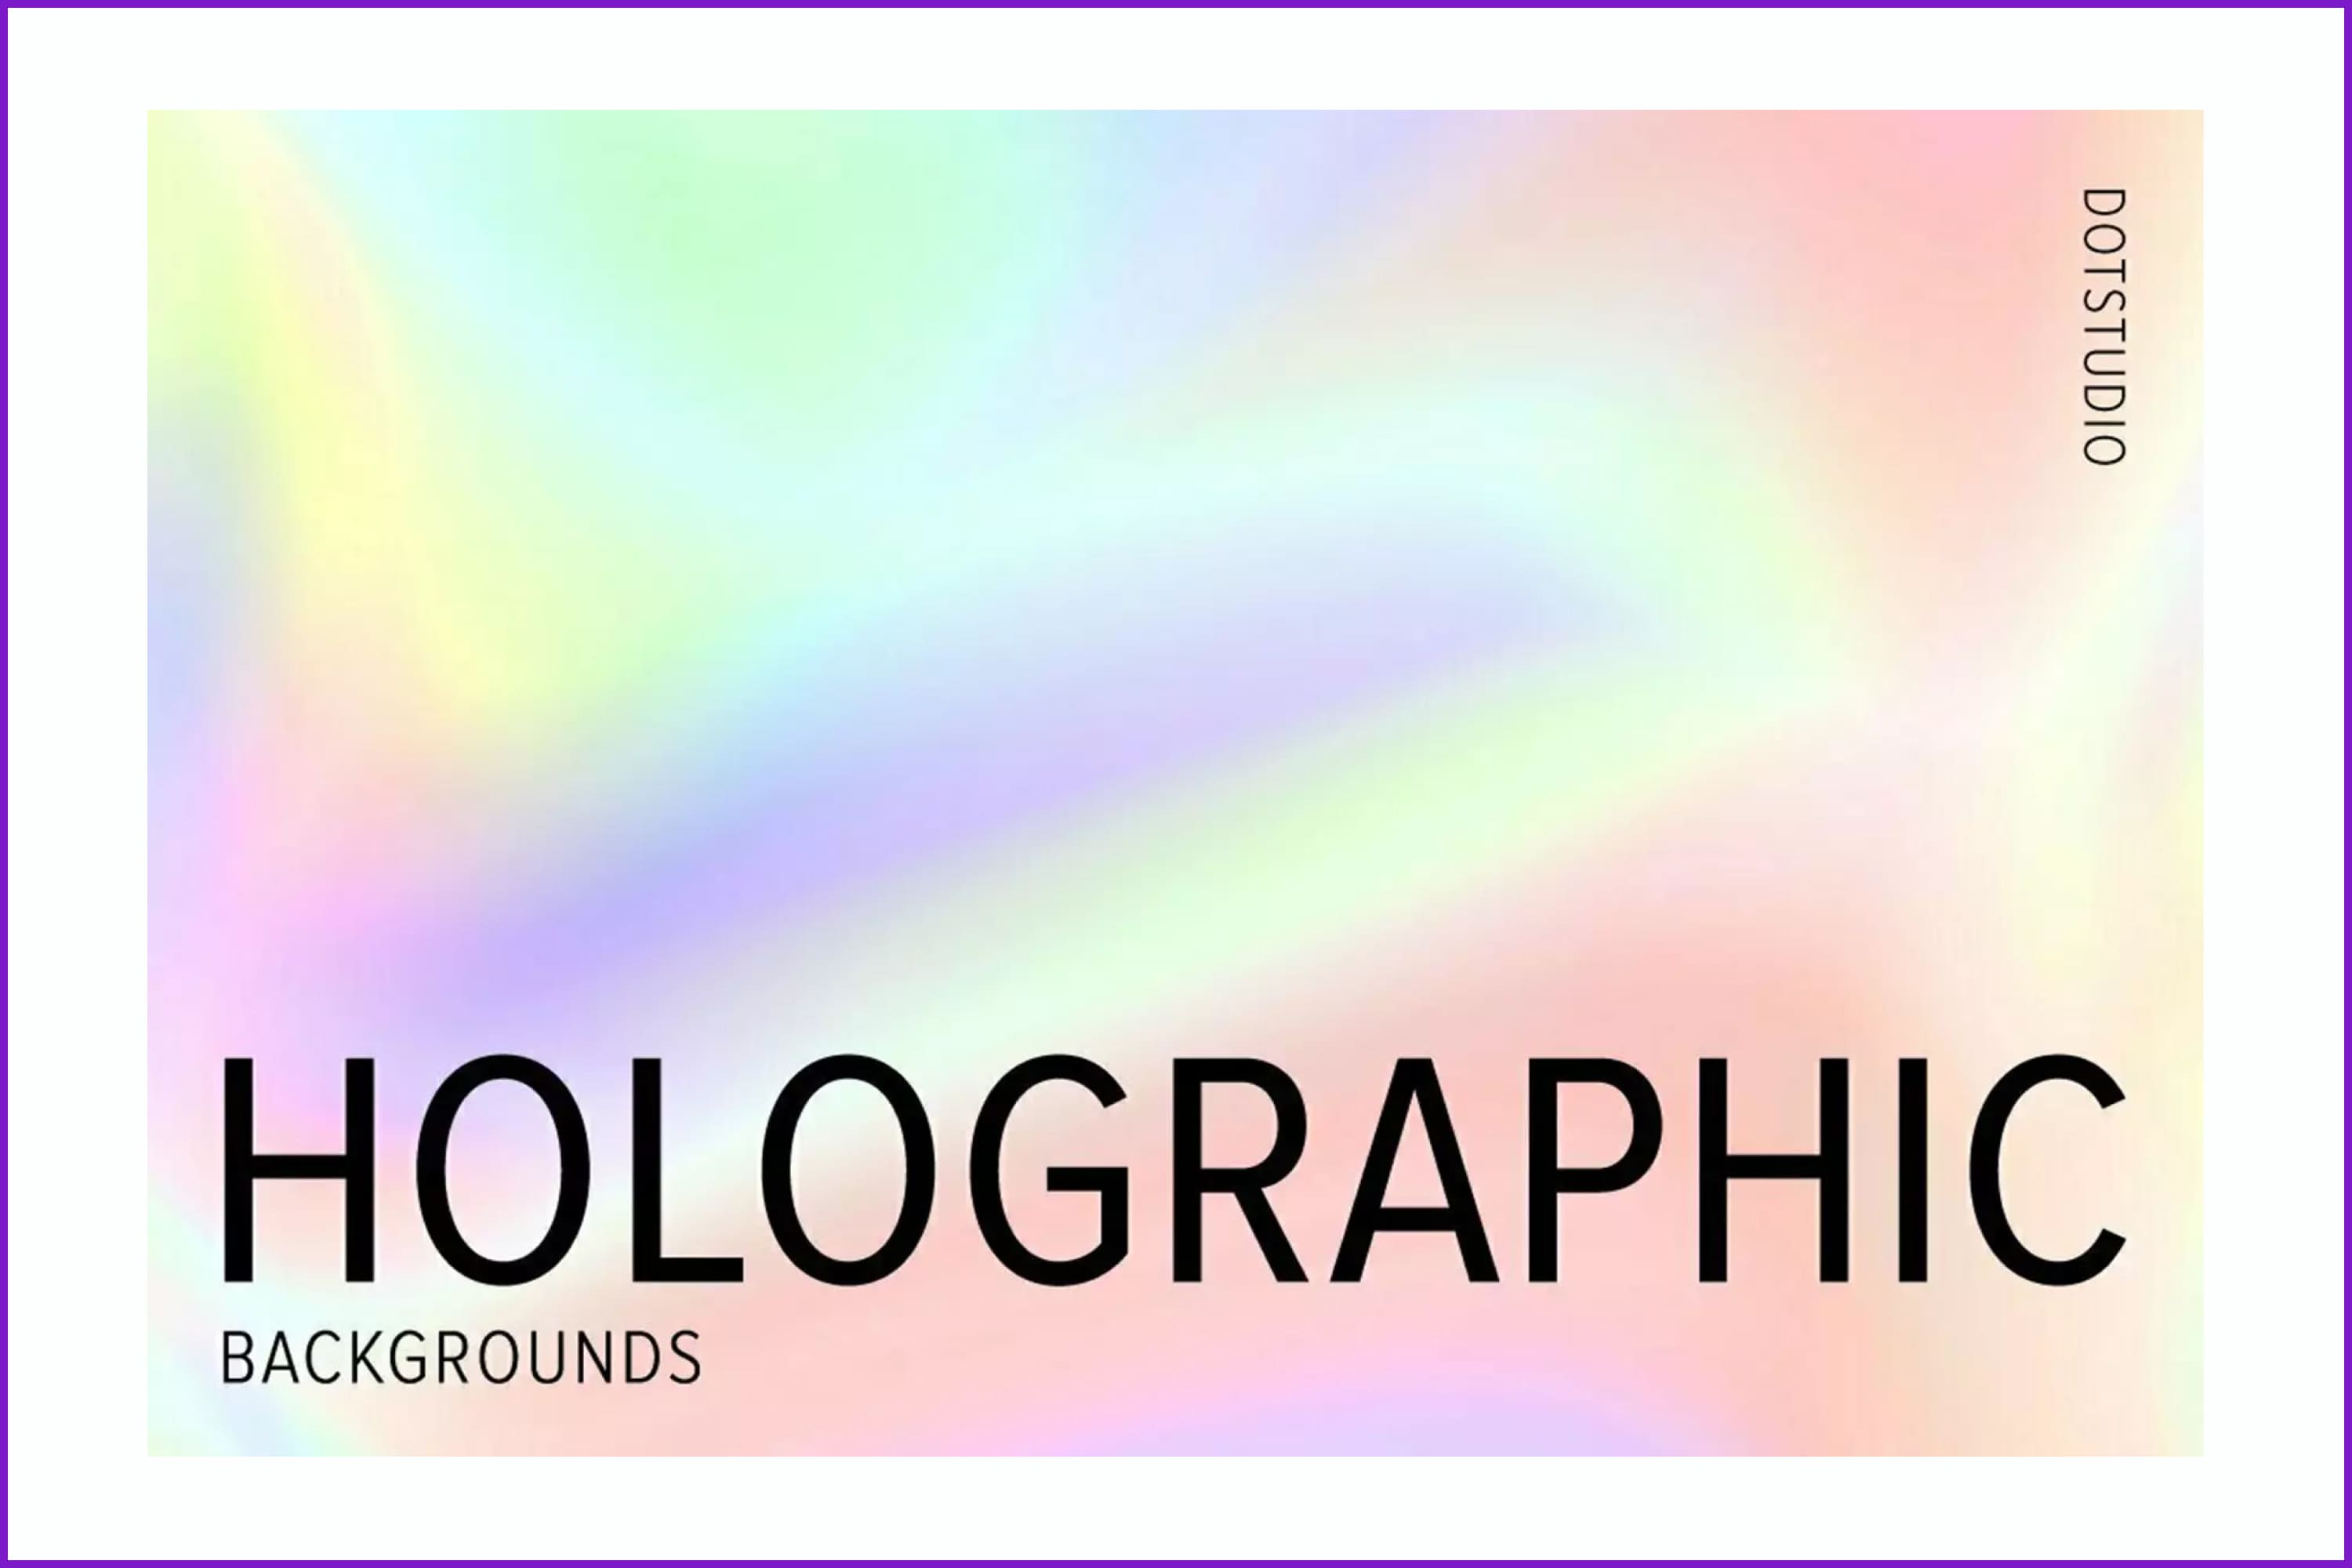
In this pack, you will get 60 holographic backgrounds. They are made in pleasant pastel colors and are perfect for designs where the target audience is women.
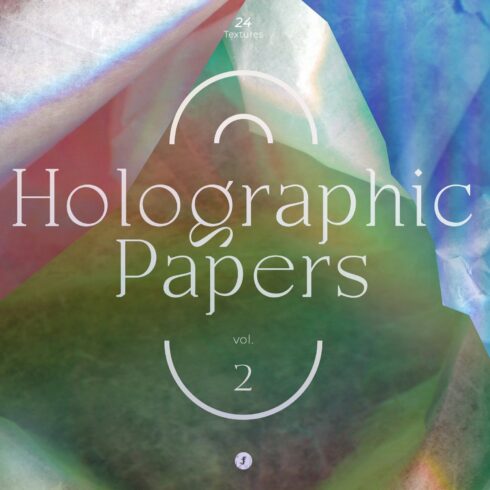
Holographic Papers Textures
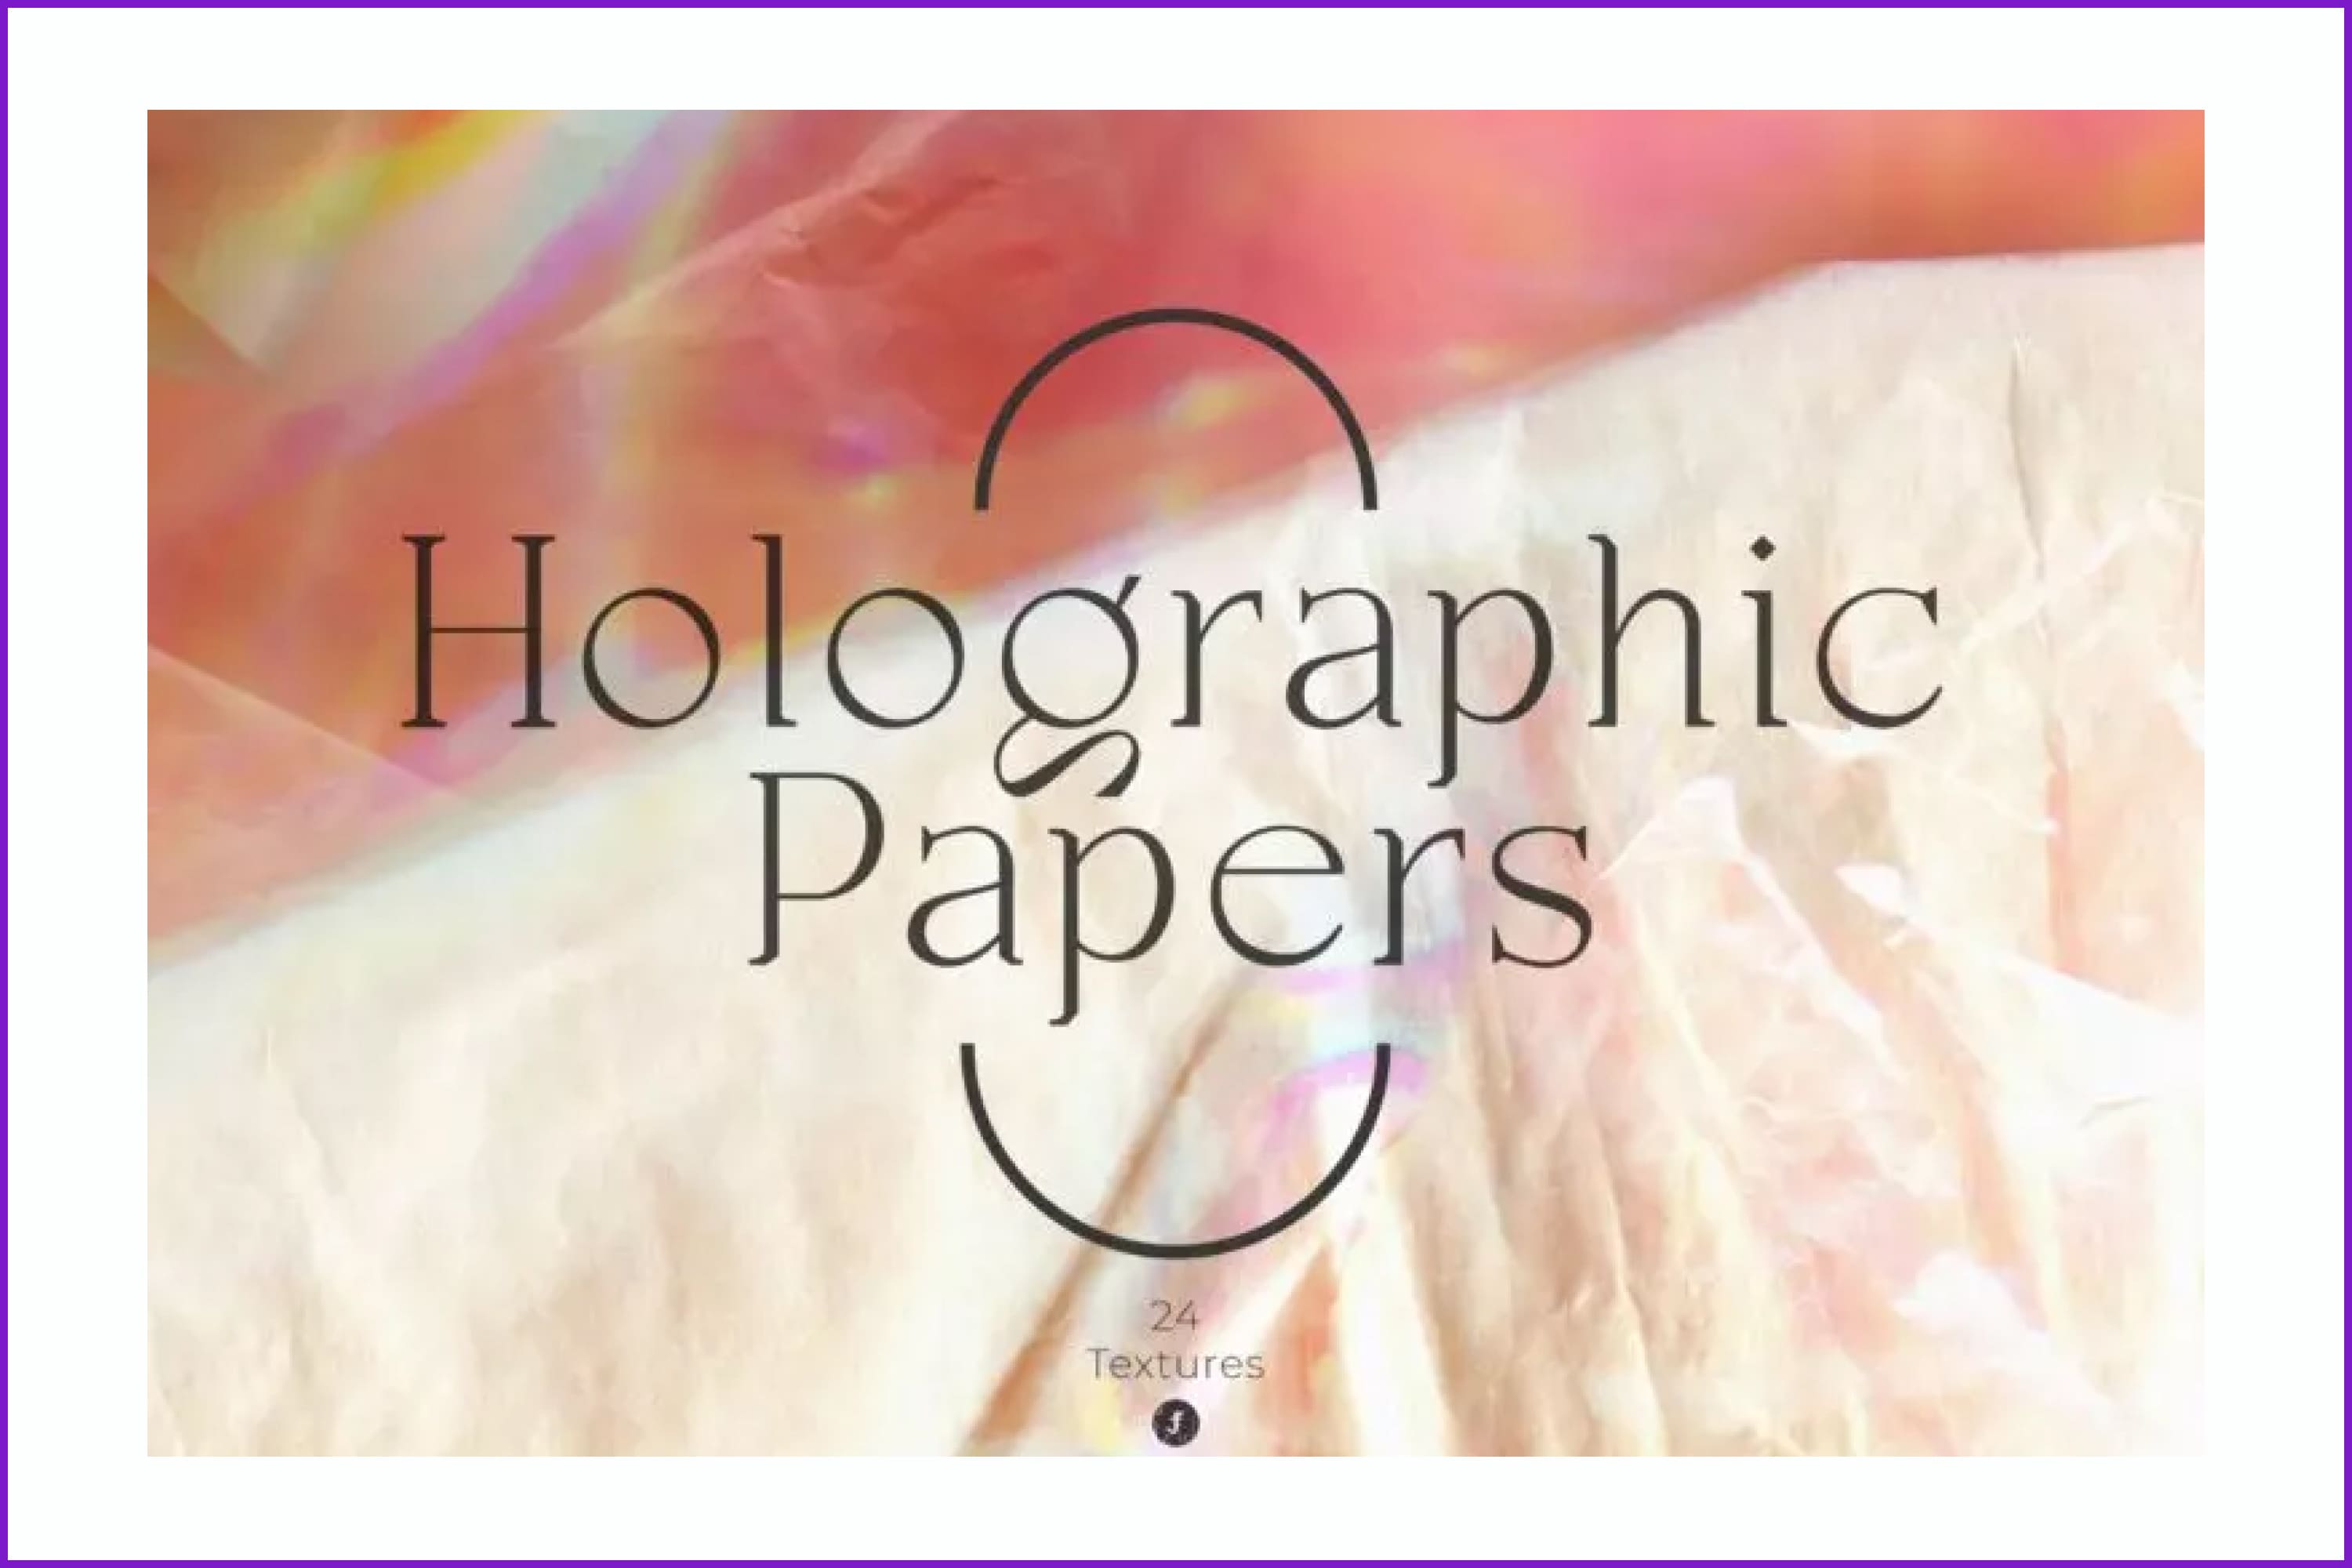
Check out these holographic digital paper textures with glitch distortions and rainbow effects. Bright and abstract they can be used as a background, texture, or as an overlay for your photos and illustrations.
Holographic Glitch Foil Textures
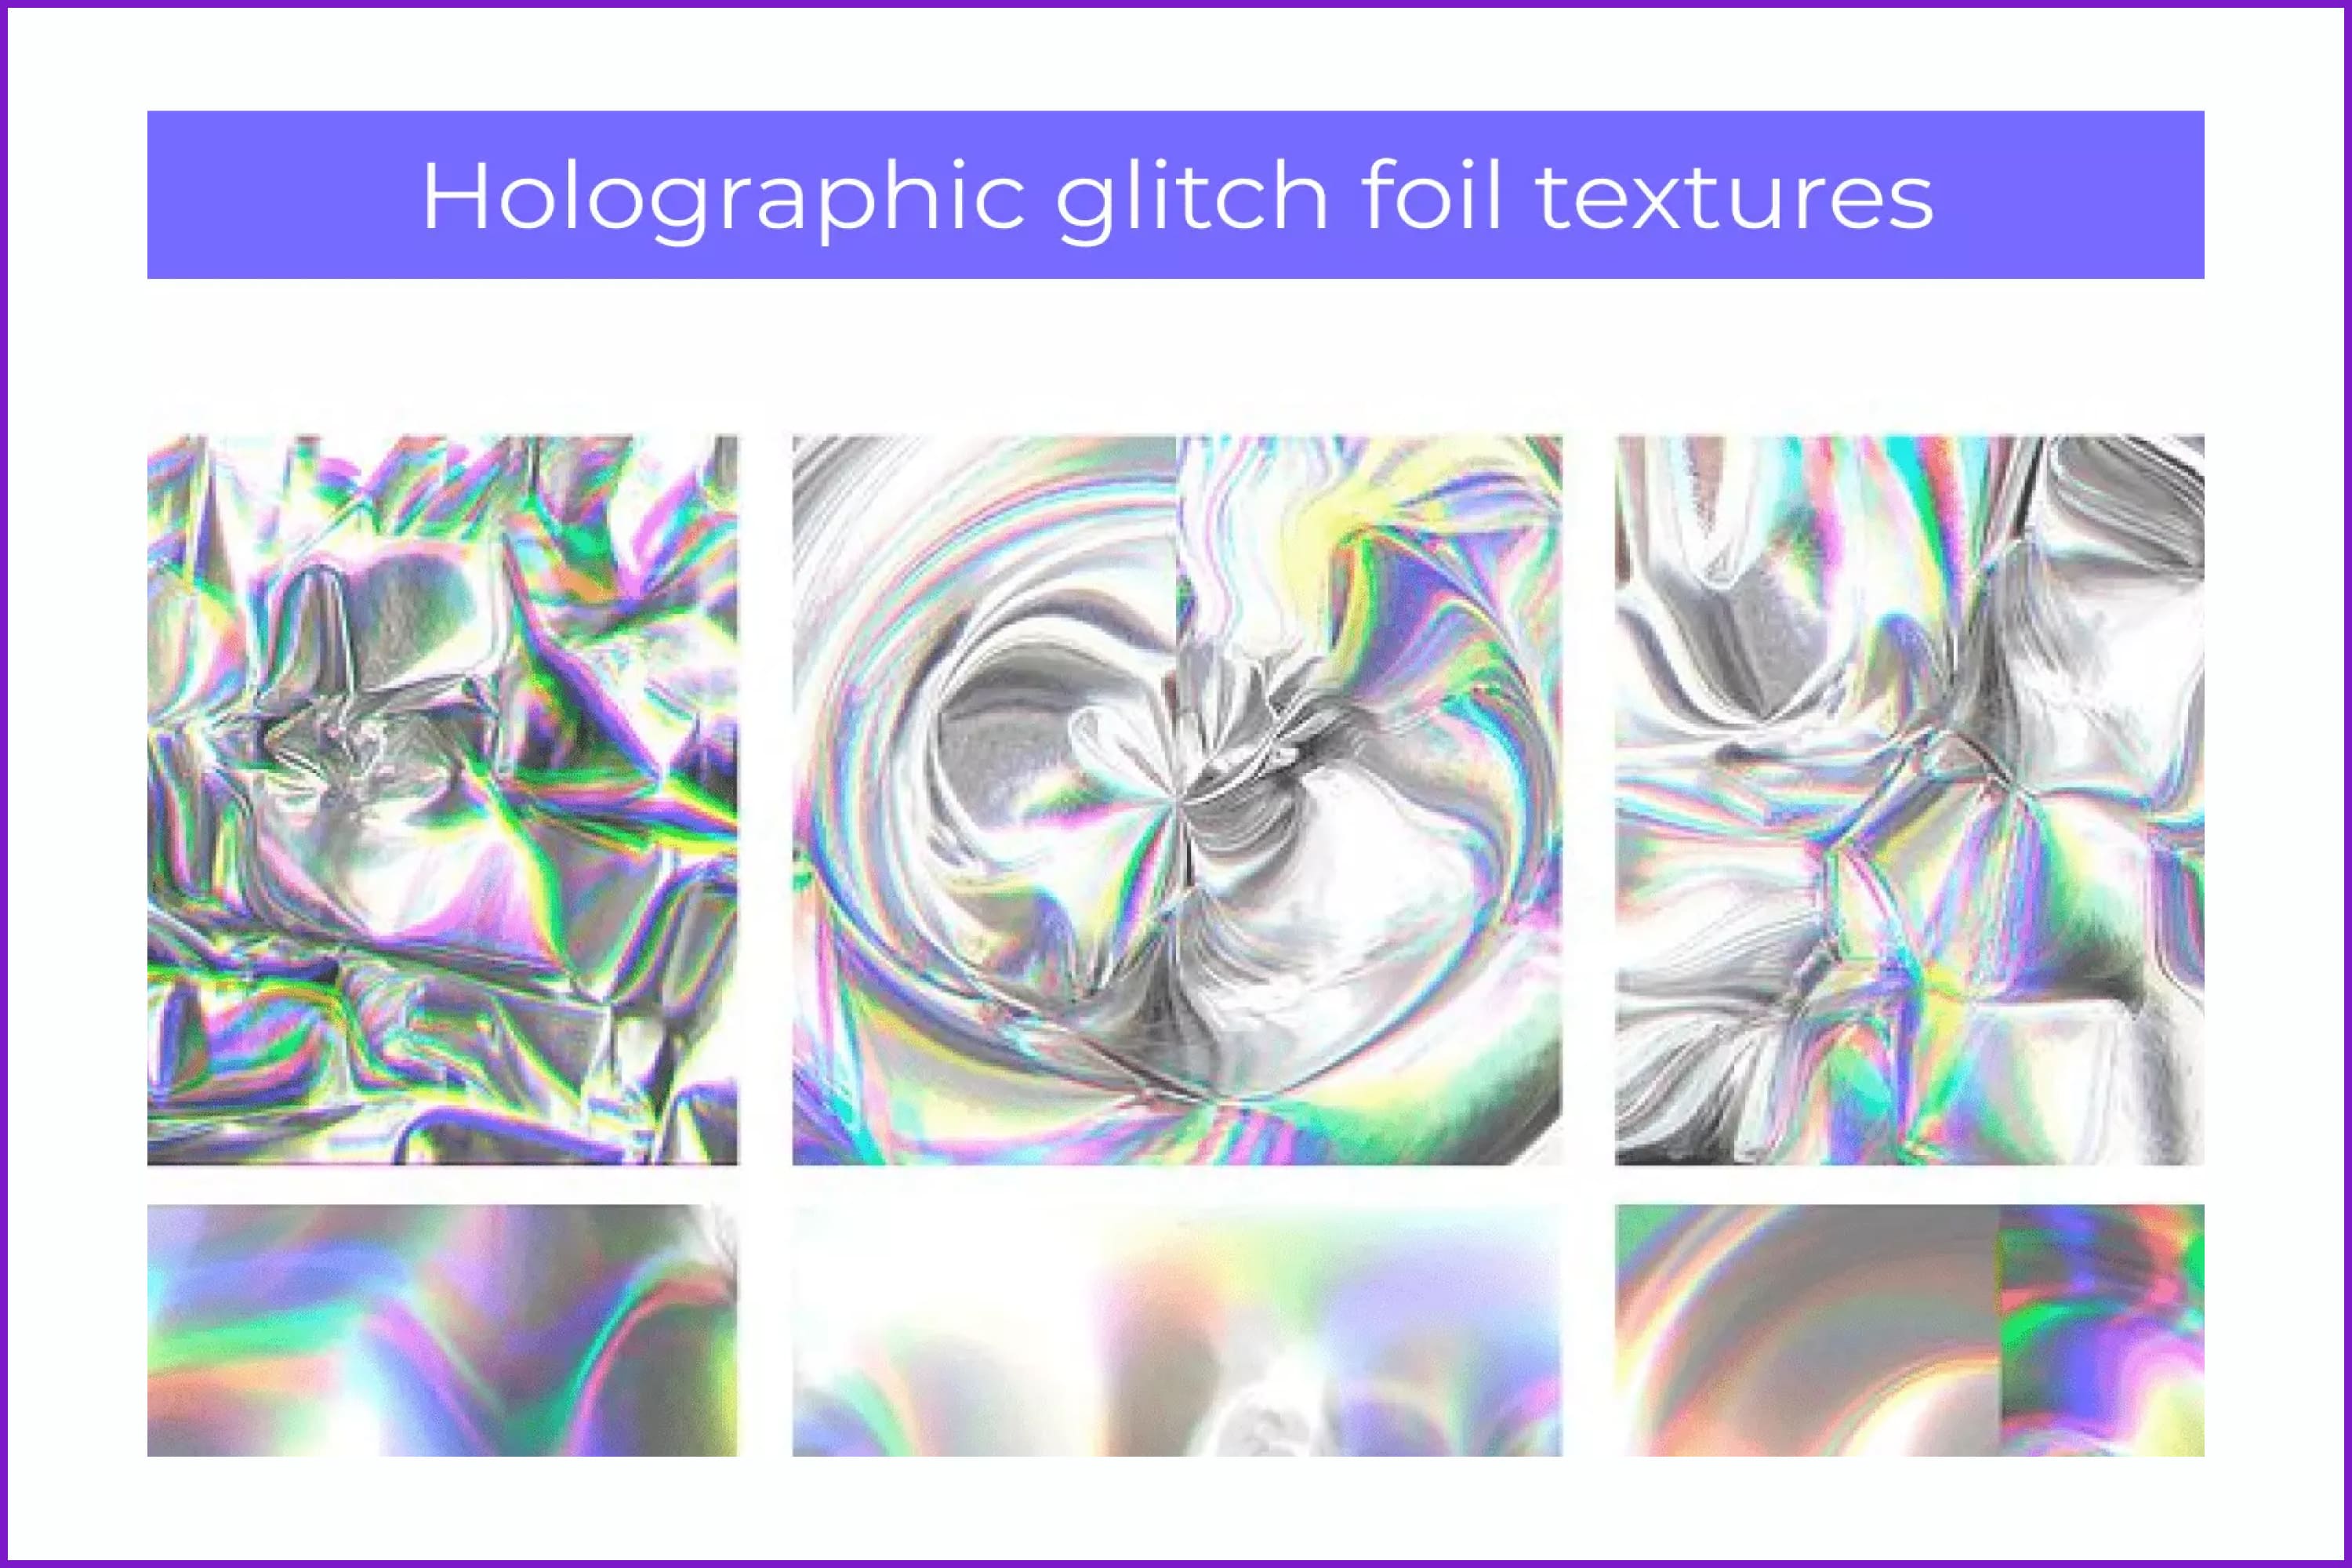
This is a collection of 50 high-resolution holographic glitch textures. They will be amazing modern backgrounds for your designs. Enjoy creating!
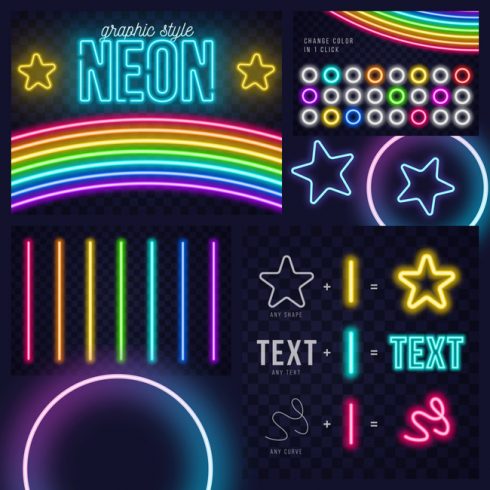
How to Create a Neon Ball
Colorful, blurry color spots look very interesting and visually appealing. These splashes of color can be used as an entire background or simply as an accent on some important interface elements. 3D is also popular this season, so let’s learn how to make a neon ball in Figma.
- Select the ellipse on the toolbar or press the O key. Create a circle.
- Change the fill of the ellipse to a radial blur in the Fill tab. Choose a bright color, in our case it is #FF00D6 set at 100%.
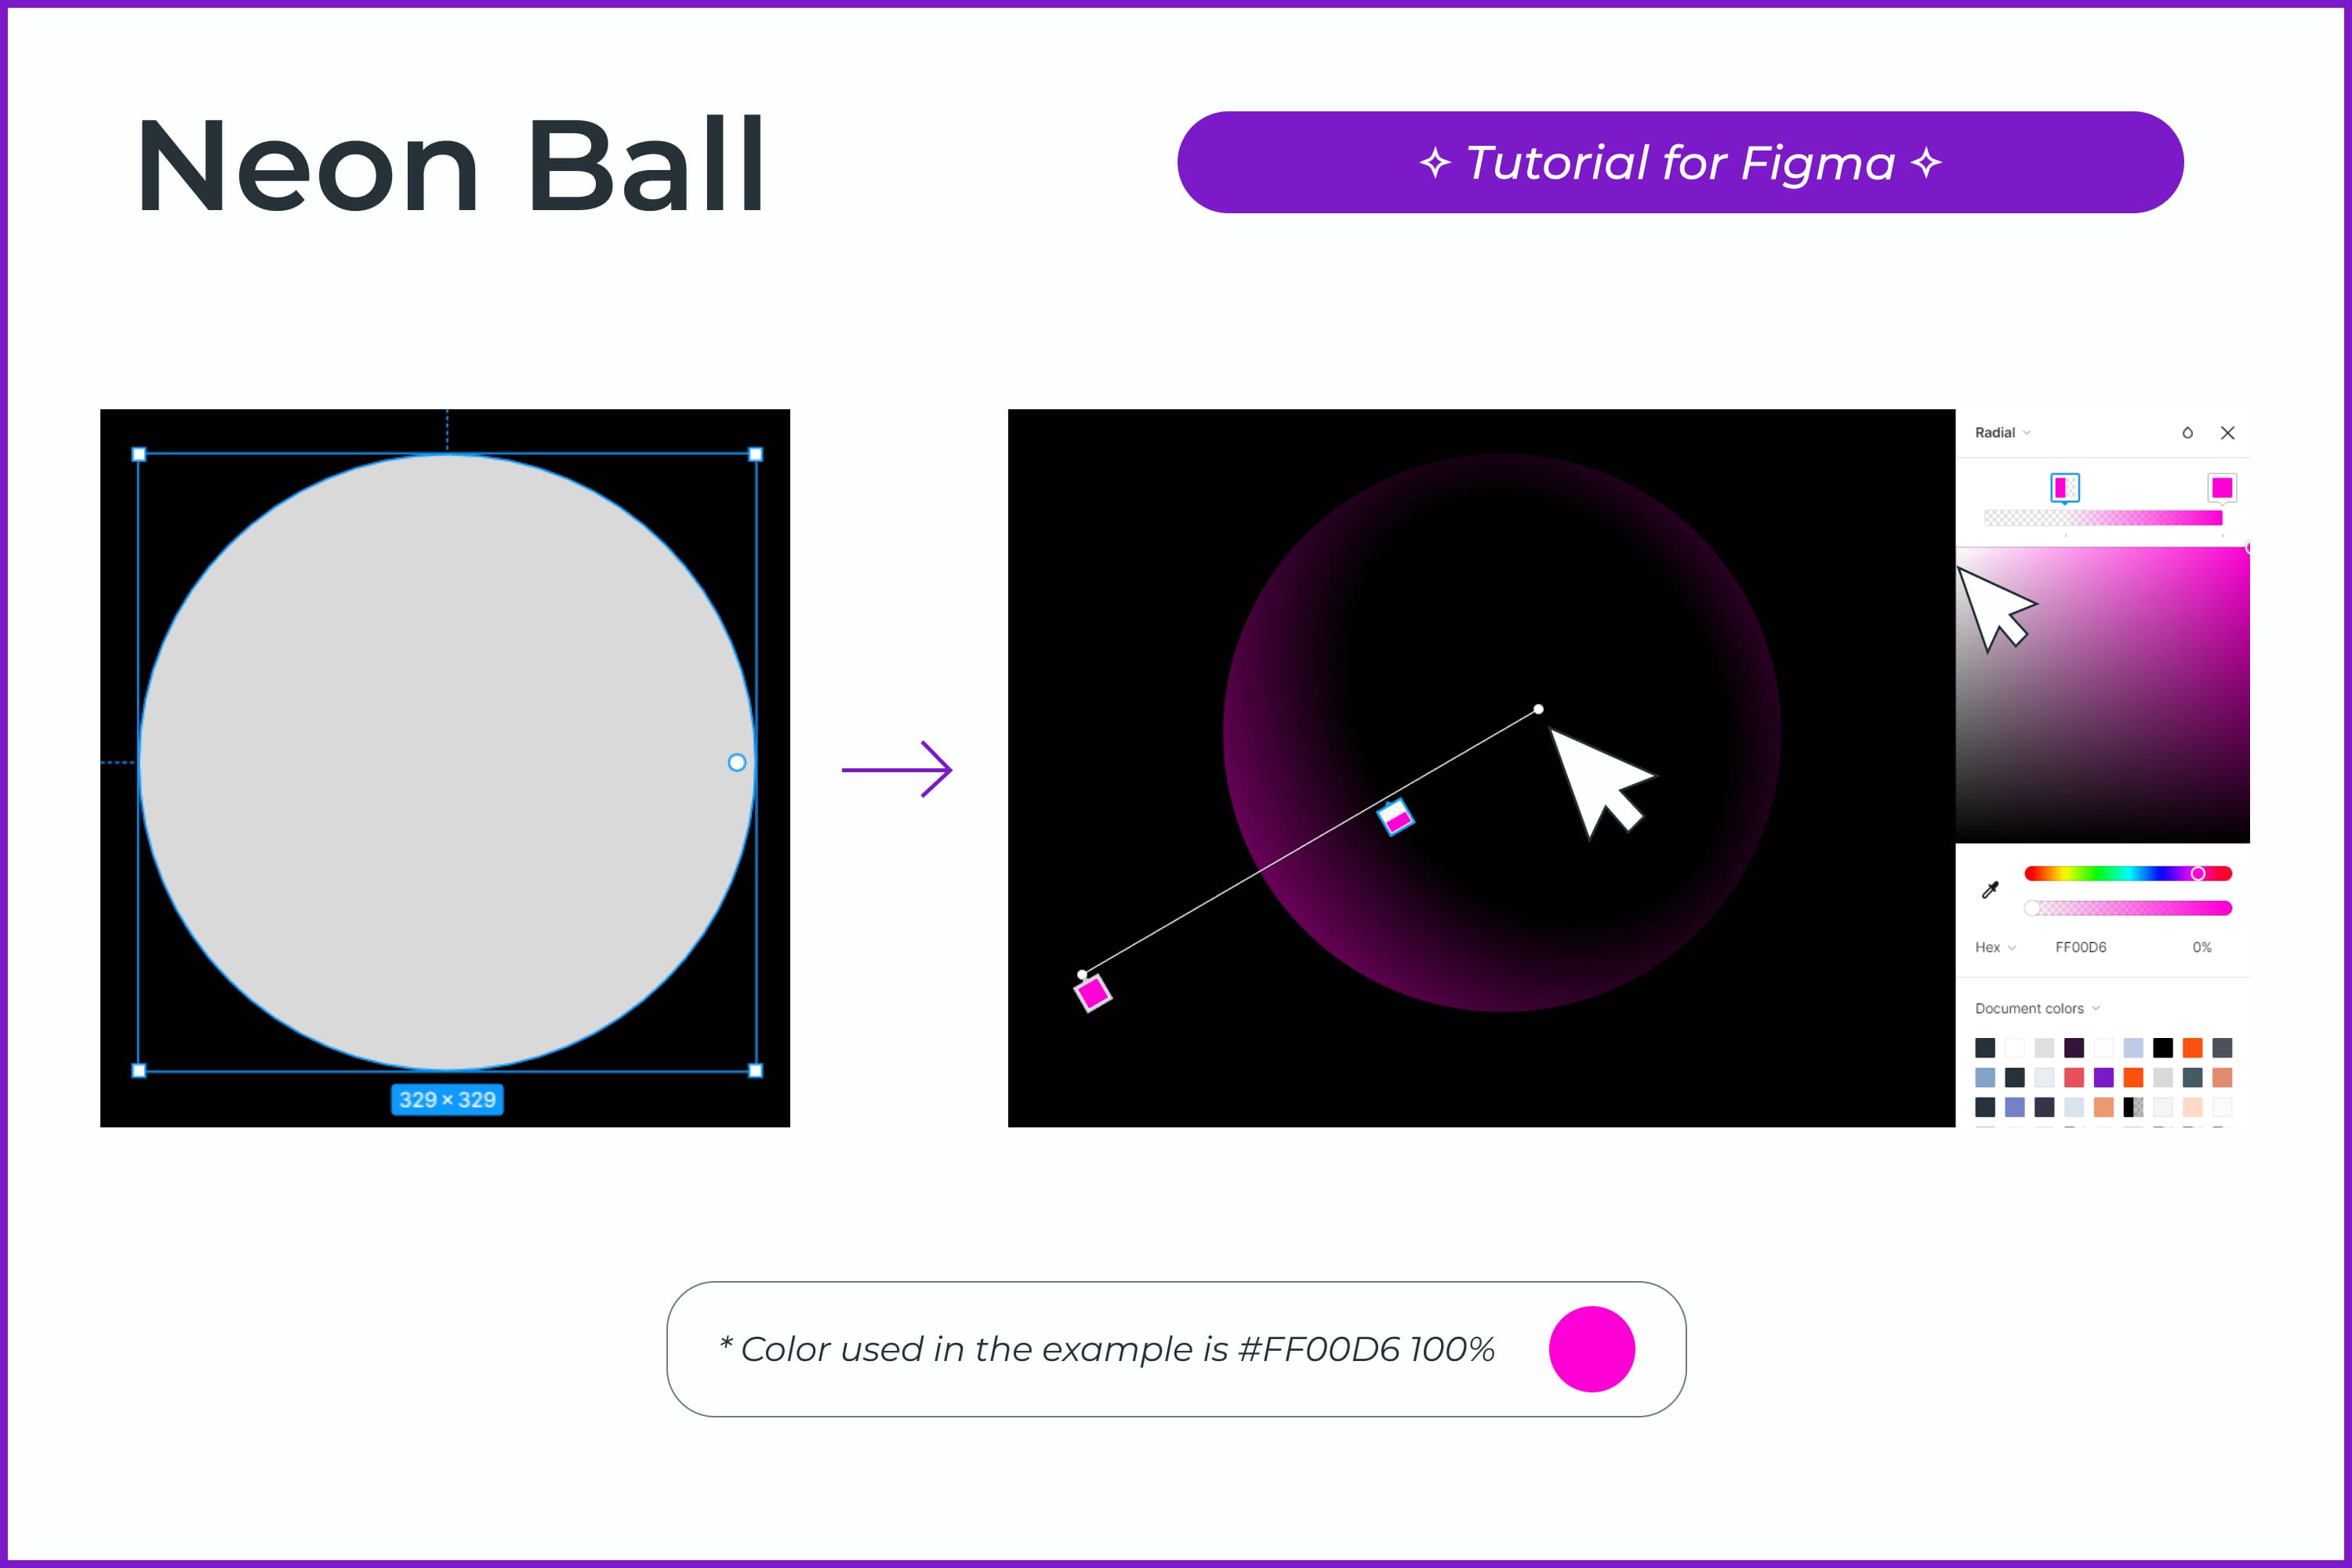
- On the color line, the transparent color should be on the left.
- Using the manipulator, move the gradient to the bottom of the circle. So we make a stroke of the future ball.
- Click on the + in the Fill section, select a radial gradient, and set a second darker deep color. We chose #6A008F set at 100%.
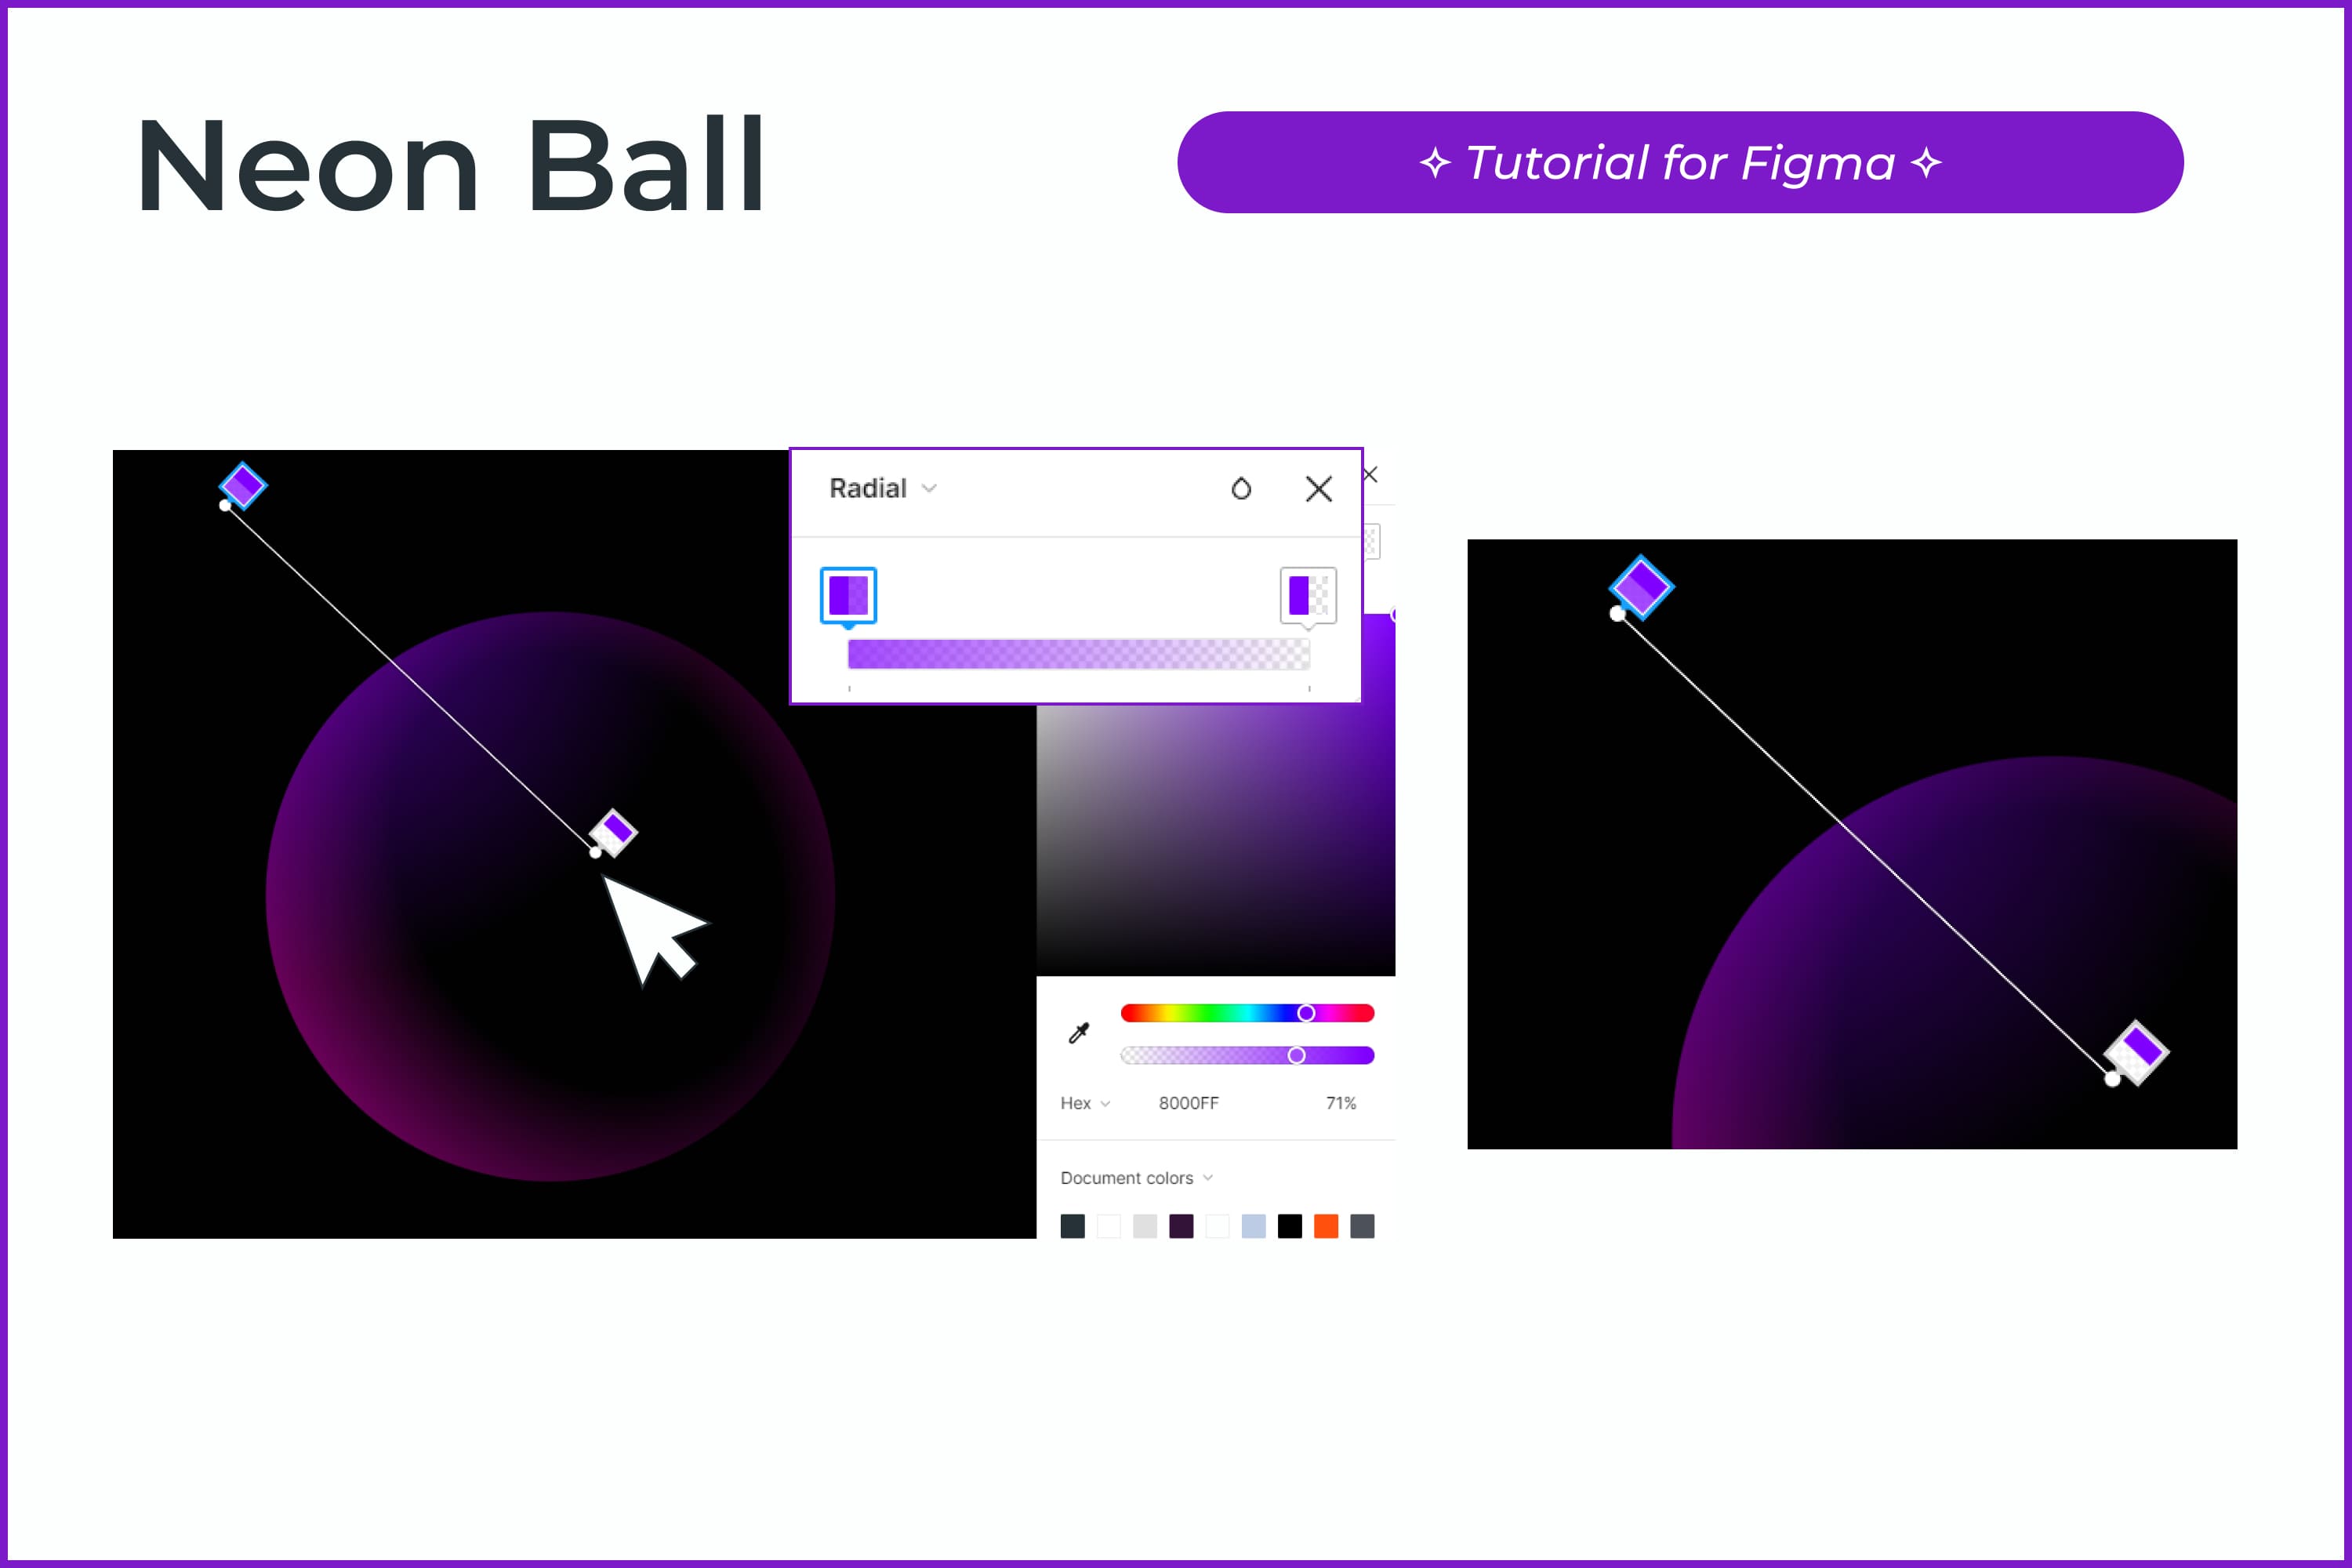
- Set the direction of the gradient closer to the upper left side of the shape.
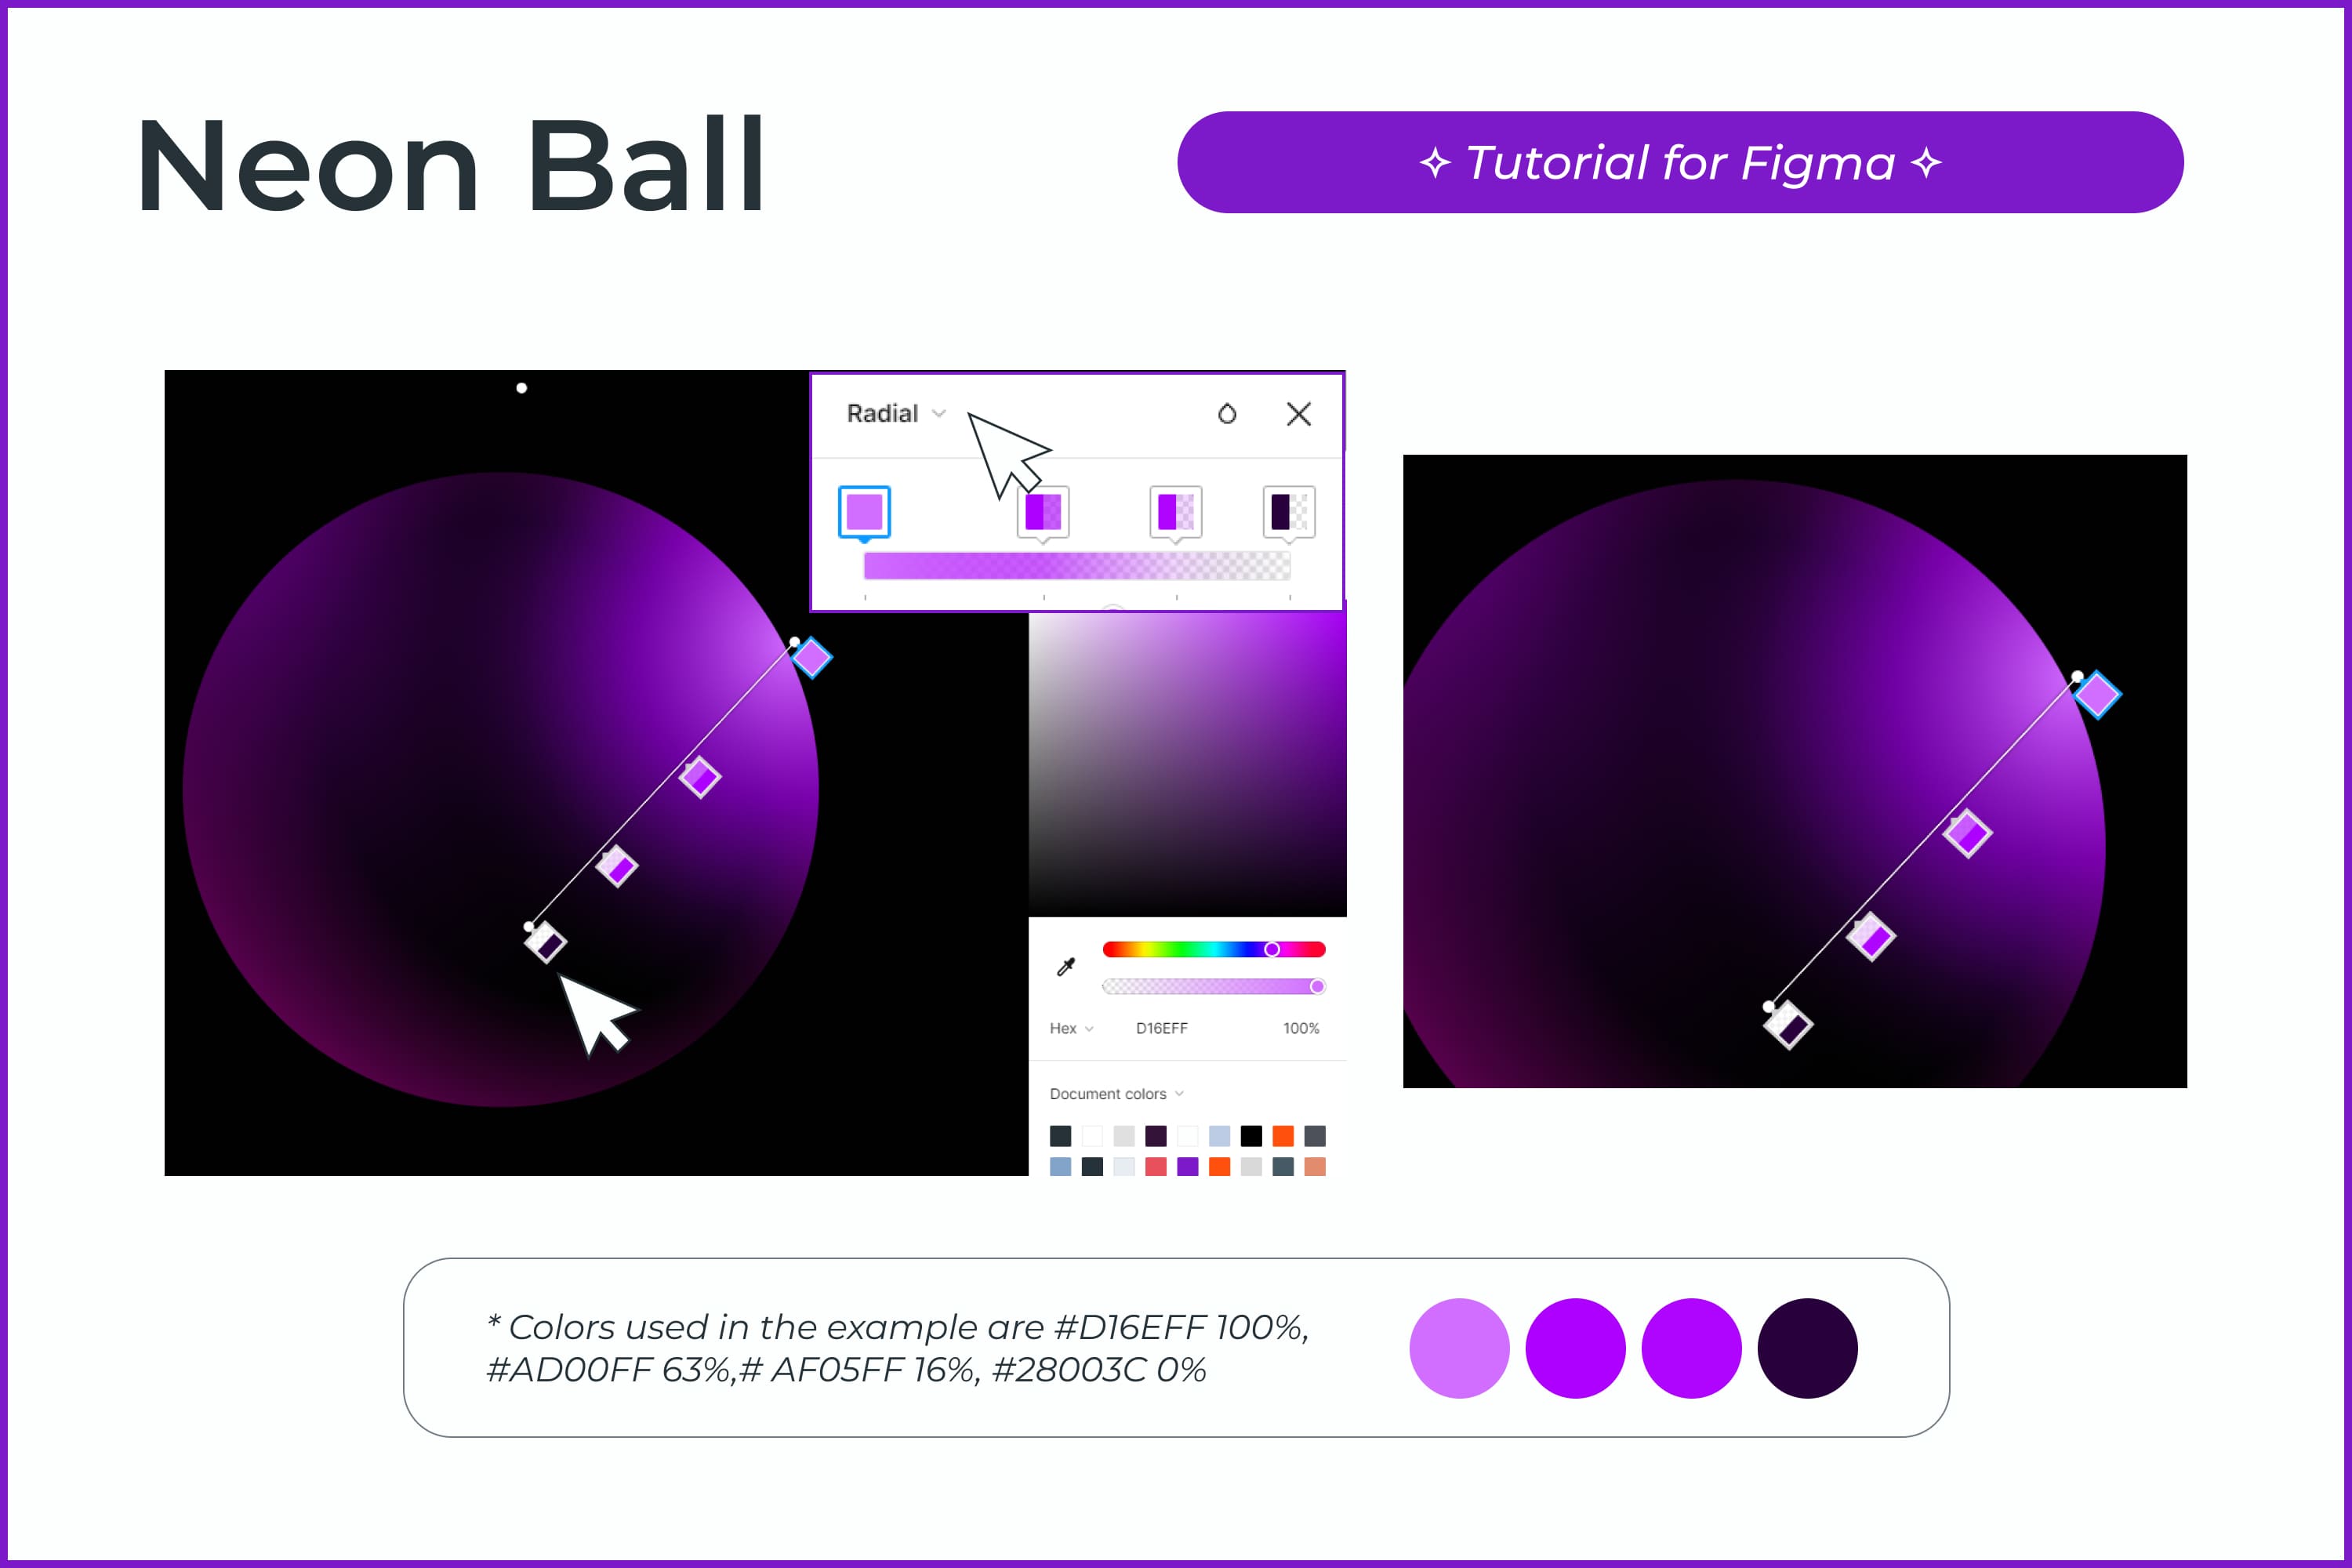
- Click on + in the Fill section, and select the radial gradient.
- We distribute four markers with colors on the color line. We chose #D16EFF set at 100%, #AD00FF at 63%,# AF05FF at 16%, and #28003C at 0%. The brightest color should be on the left and the darkest should be on the right. In the middle of the line should be 2 bright colors with reduced transparency for a smooth transition.
- Move with the help of manipulators to the upper right part of the ellipse.
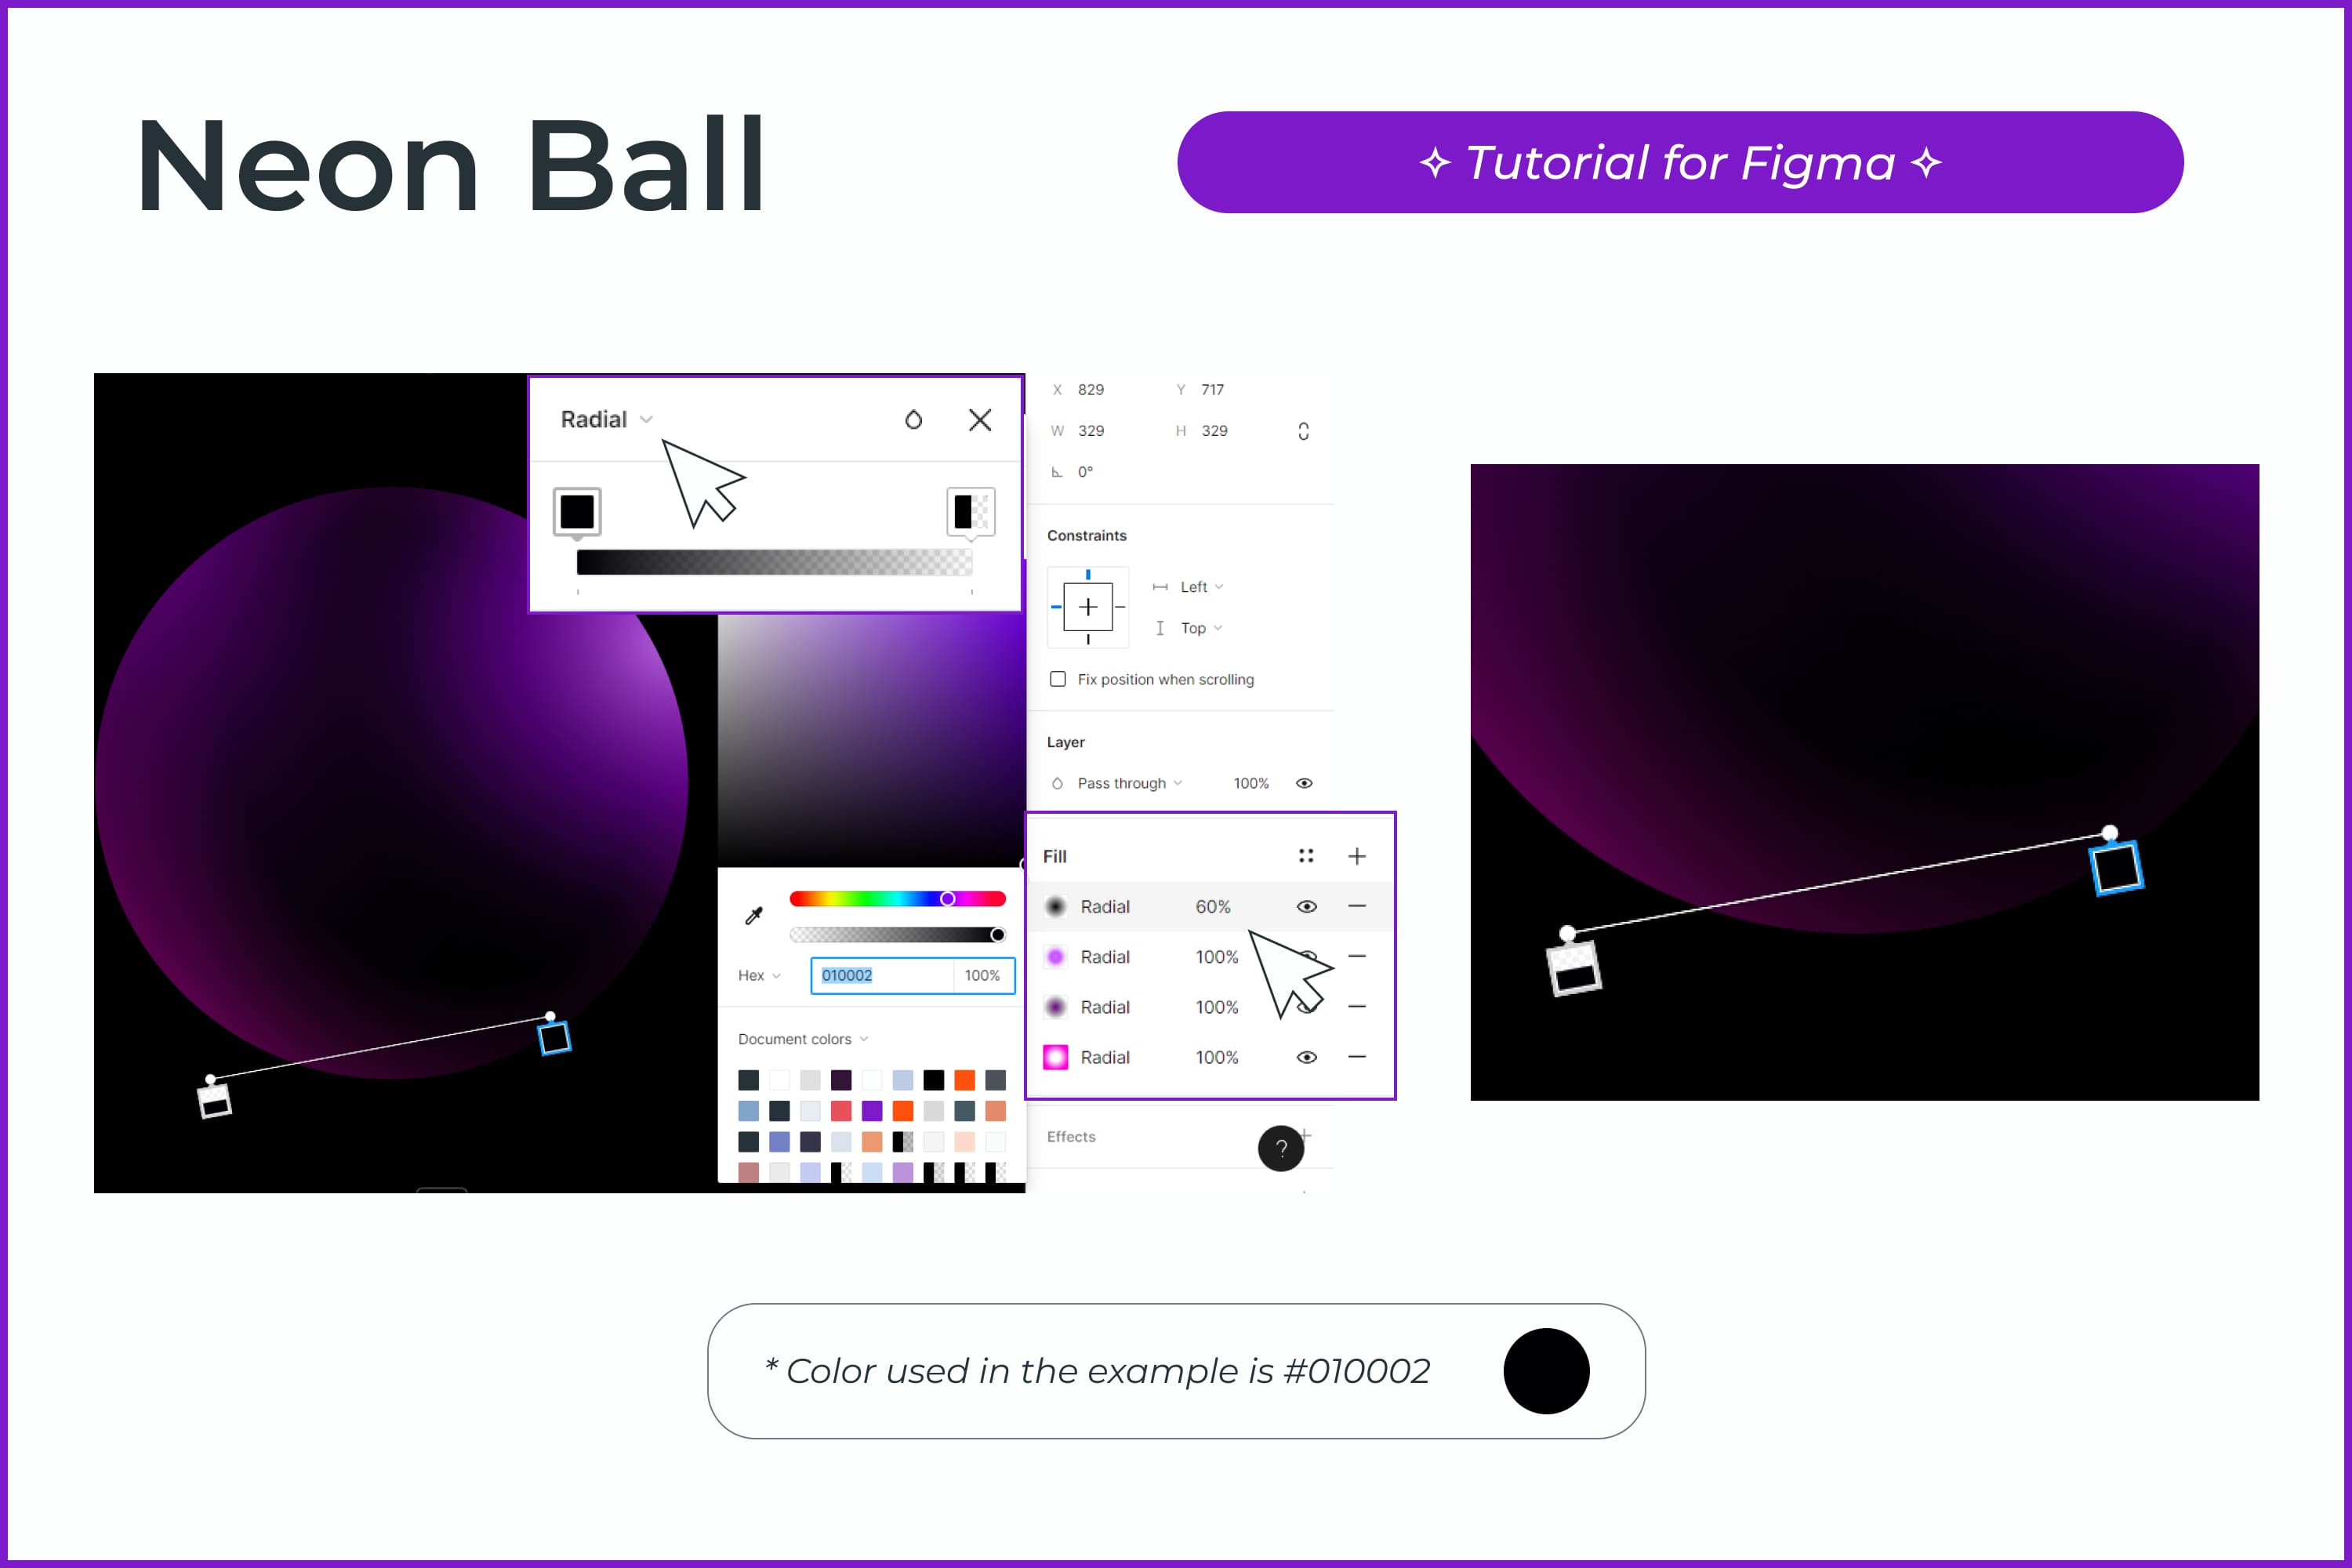
- Click on + in the Fill section, and select the radial gradient. The color used in the example is #010002.
- Move with the manipulators to the lower right ellipse. Change the Opacity of this radial gradient to 60%.
- Click on + in the Fill section, and select the radial gradient.
- We distribute three markers with colors on the color line. We chose #D16EFF, #D16EFF at 32%, and #1B0027 at 0%. The brightest color should be on the left and the darkest color should be on the right.
- Move with the help of manipulators to the lower left part of the ellipse.
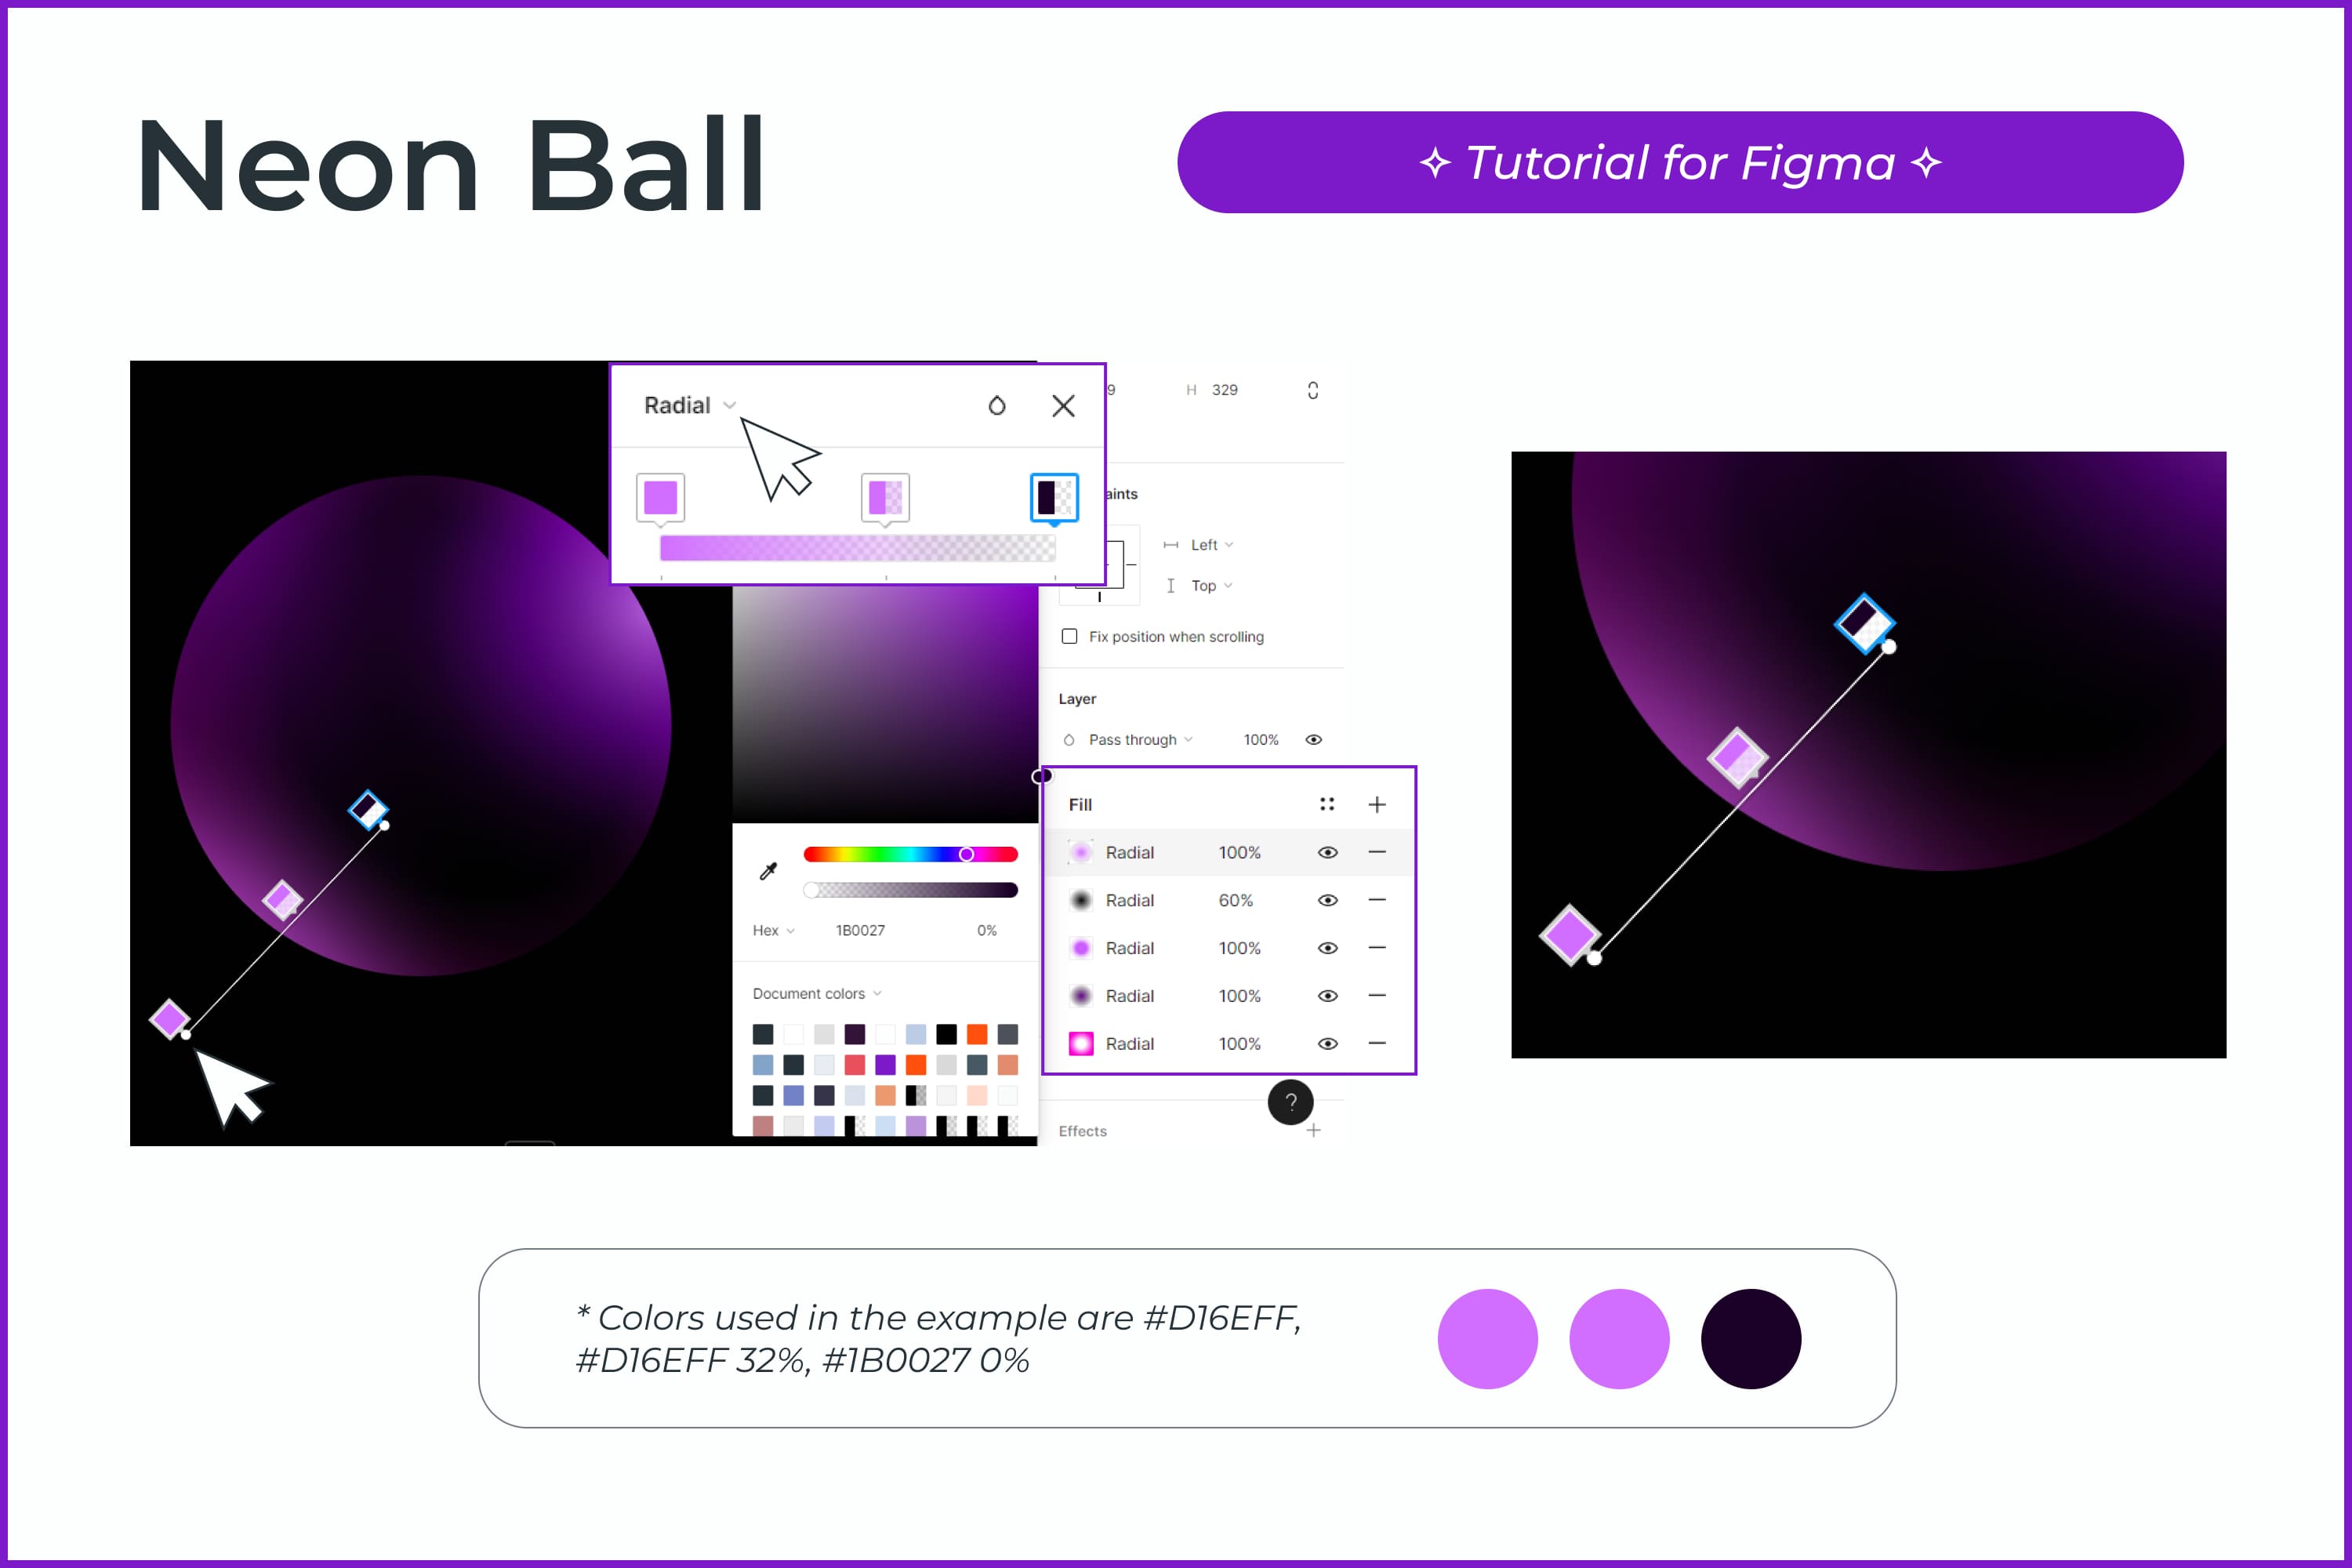
- This is the neon effect we made. Experiment with the position of the radial gradient dots and their transparency.
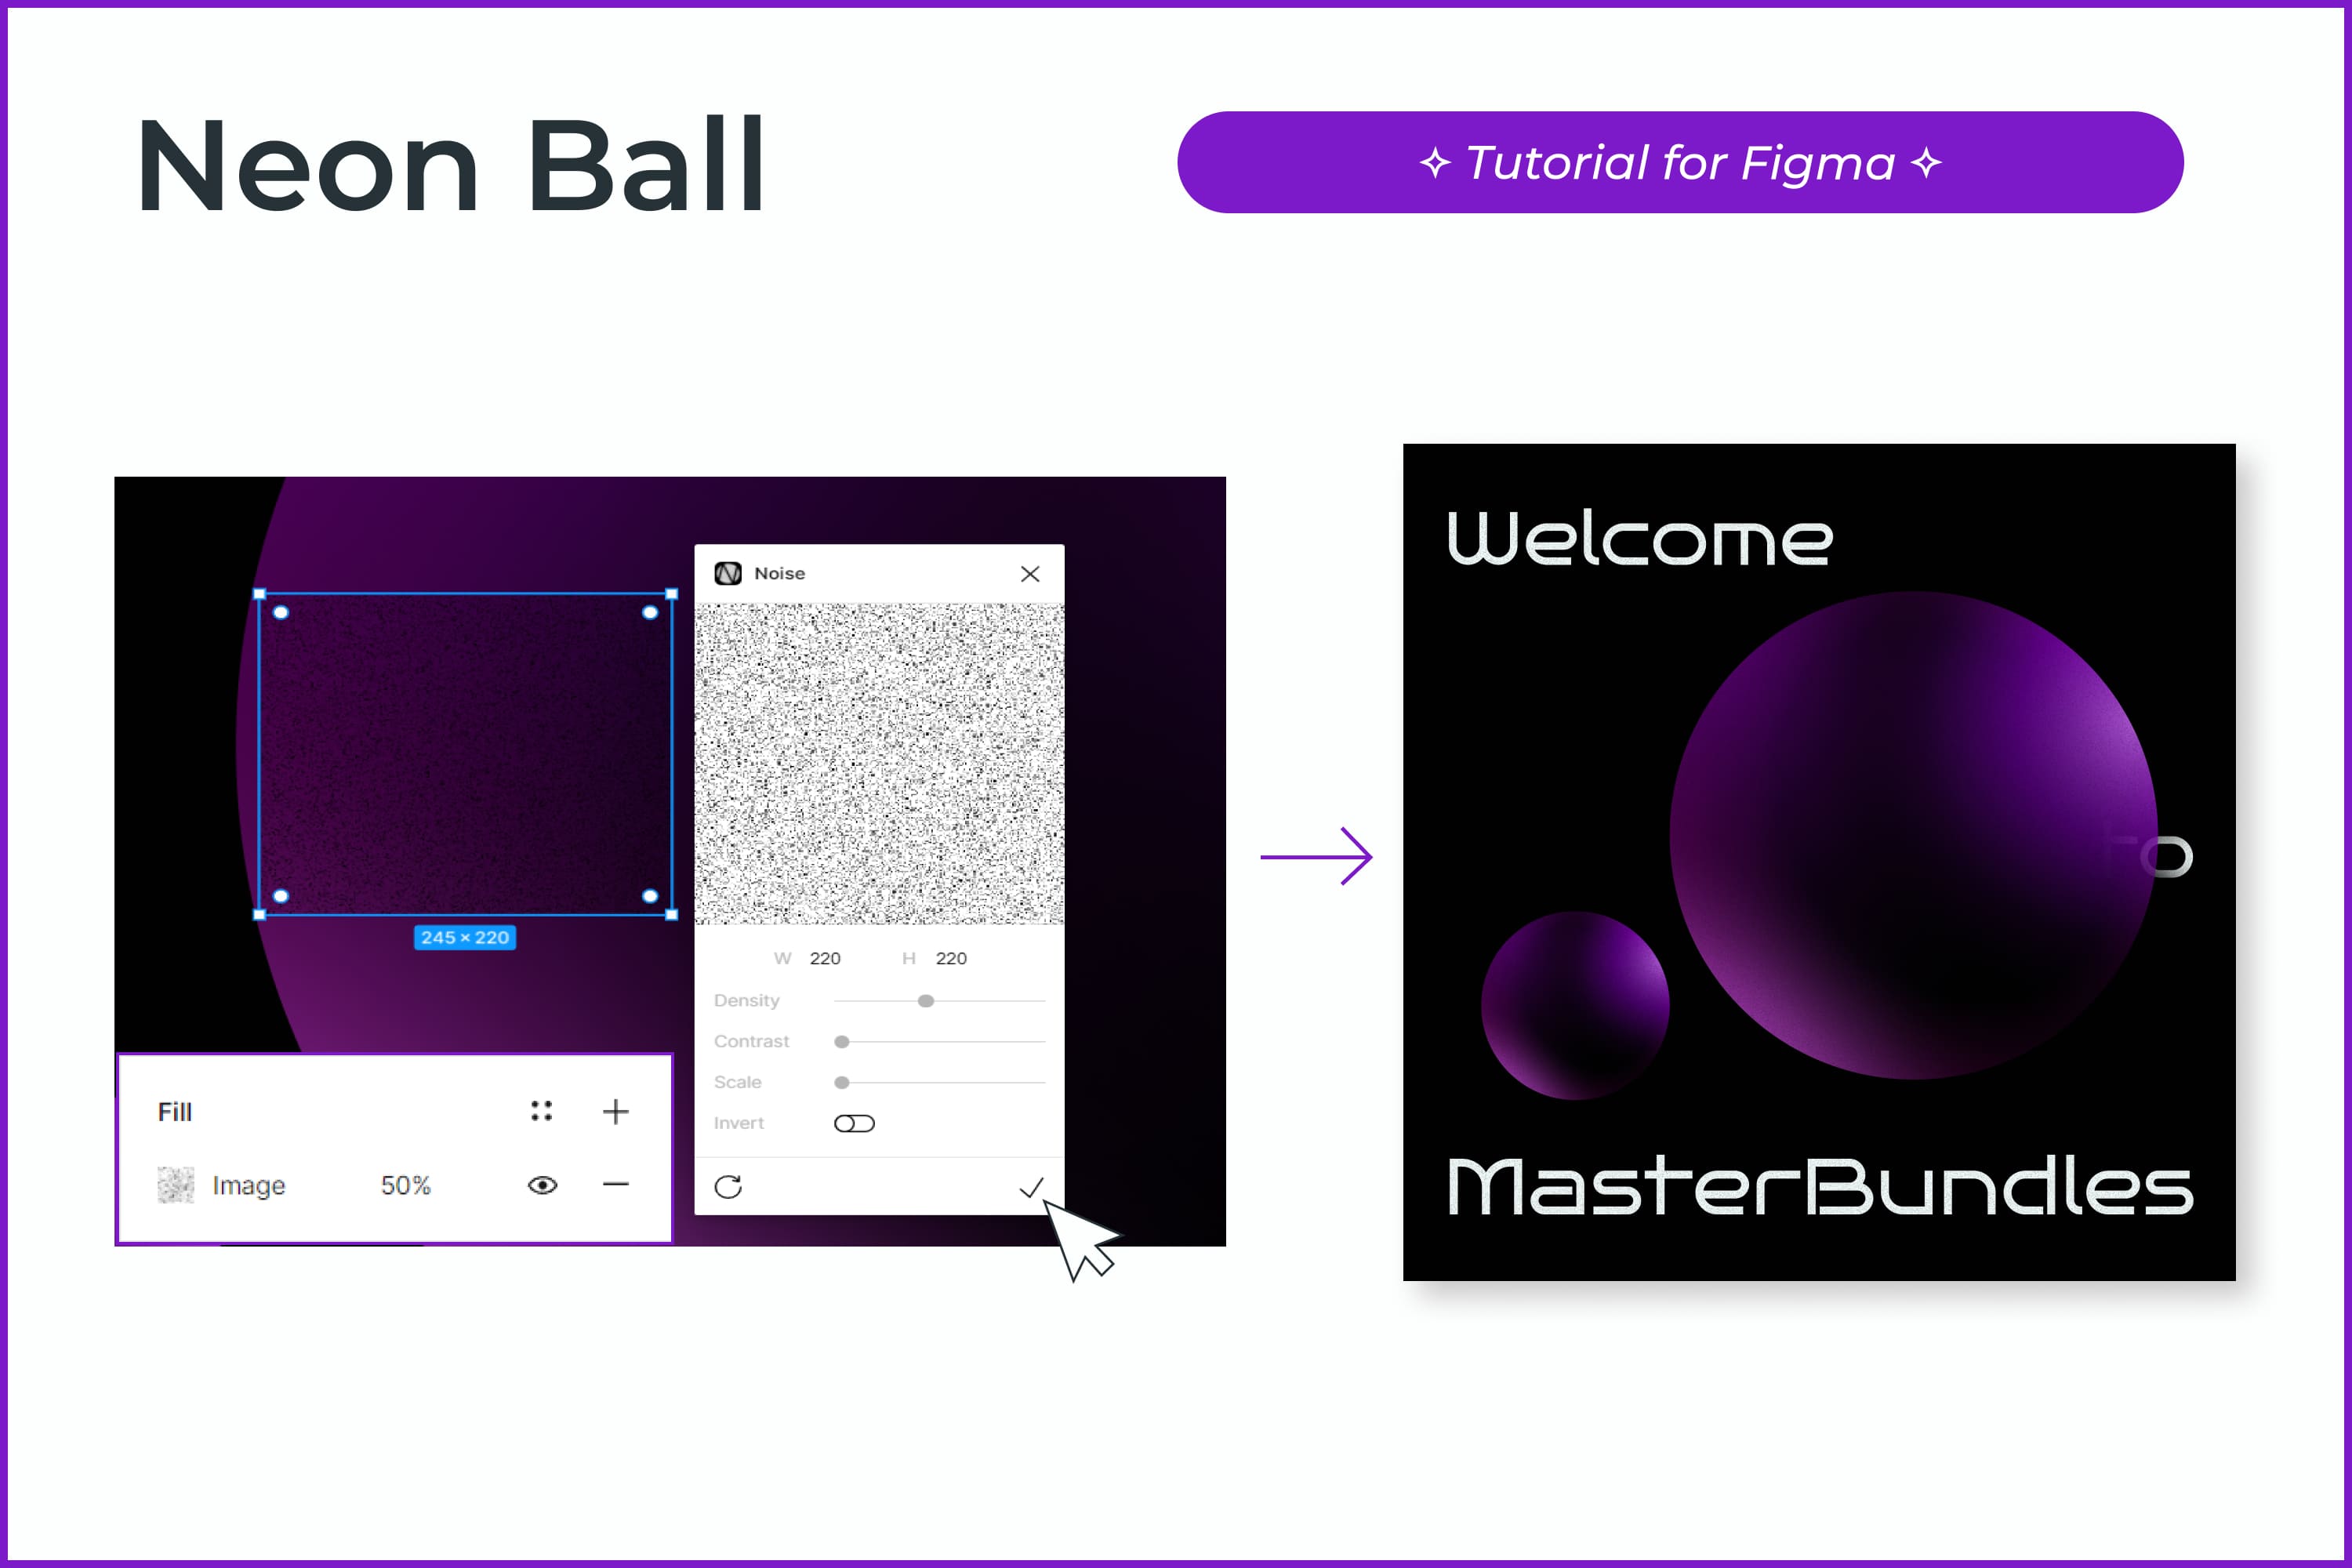
- Now let’s add another bigger neon ball. Let’s add text and grain using the Noise plugin. For the grainy texture, change the opacity to 30-50%.
Wondering how to copy effects in Figma? If you need to paste the same neon effect on another shape, it’s easy to do so:
- Click on the shape with which you will copy the effect settings
- Press Ctrl+Alt+C
- Select the shape in which you will insert the effect
- Press Ctrl+Alt+V
Use this feature and save your time.
Products that Might Come in Handy
Social Media App UI Kit
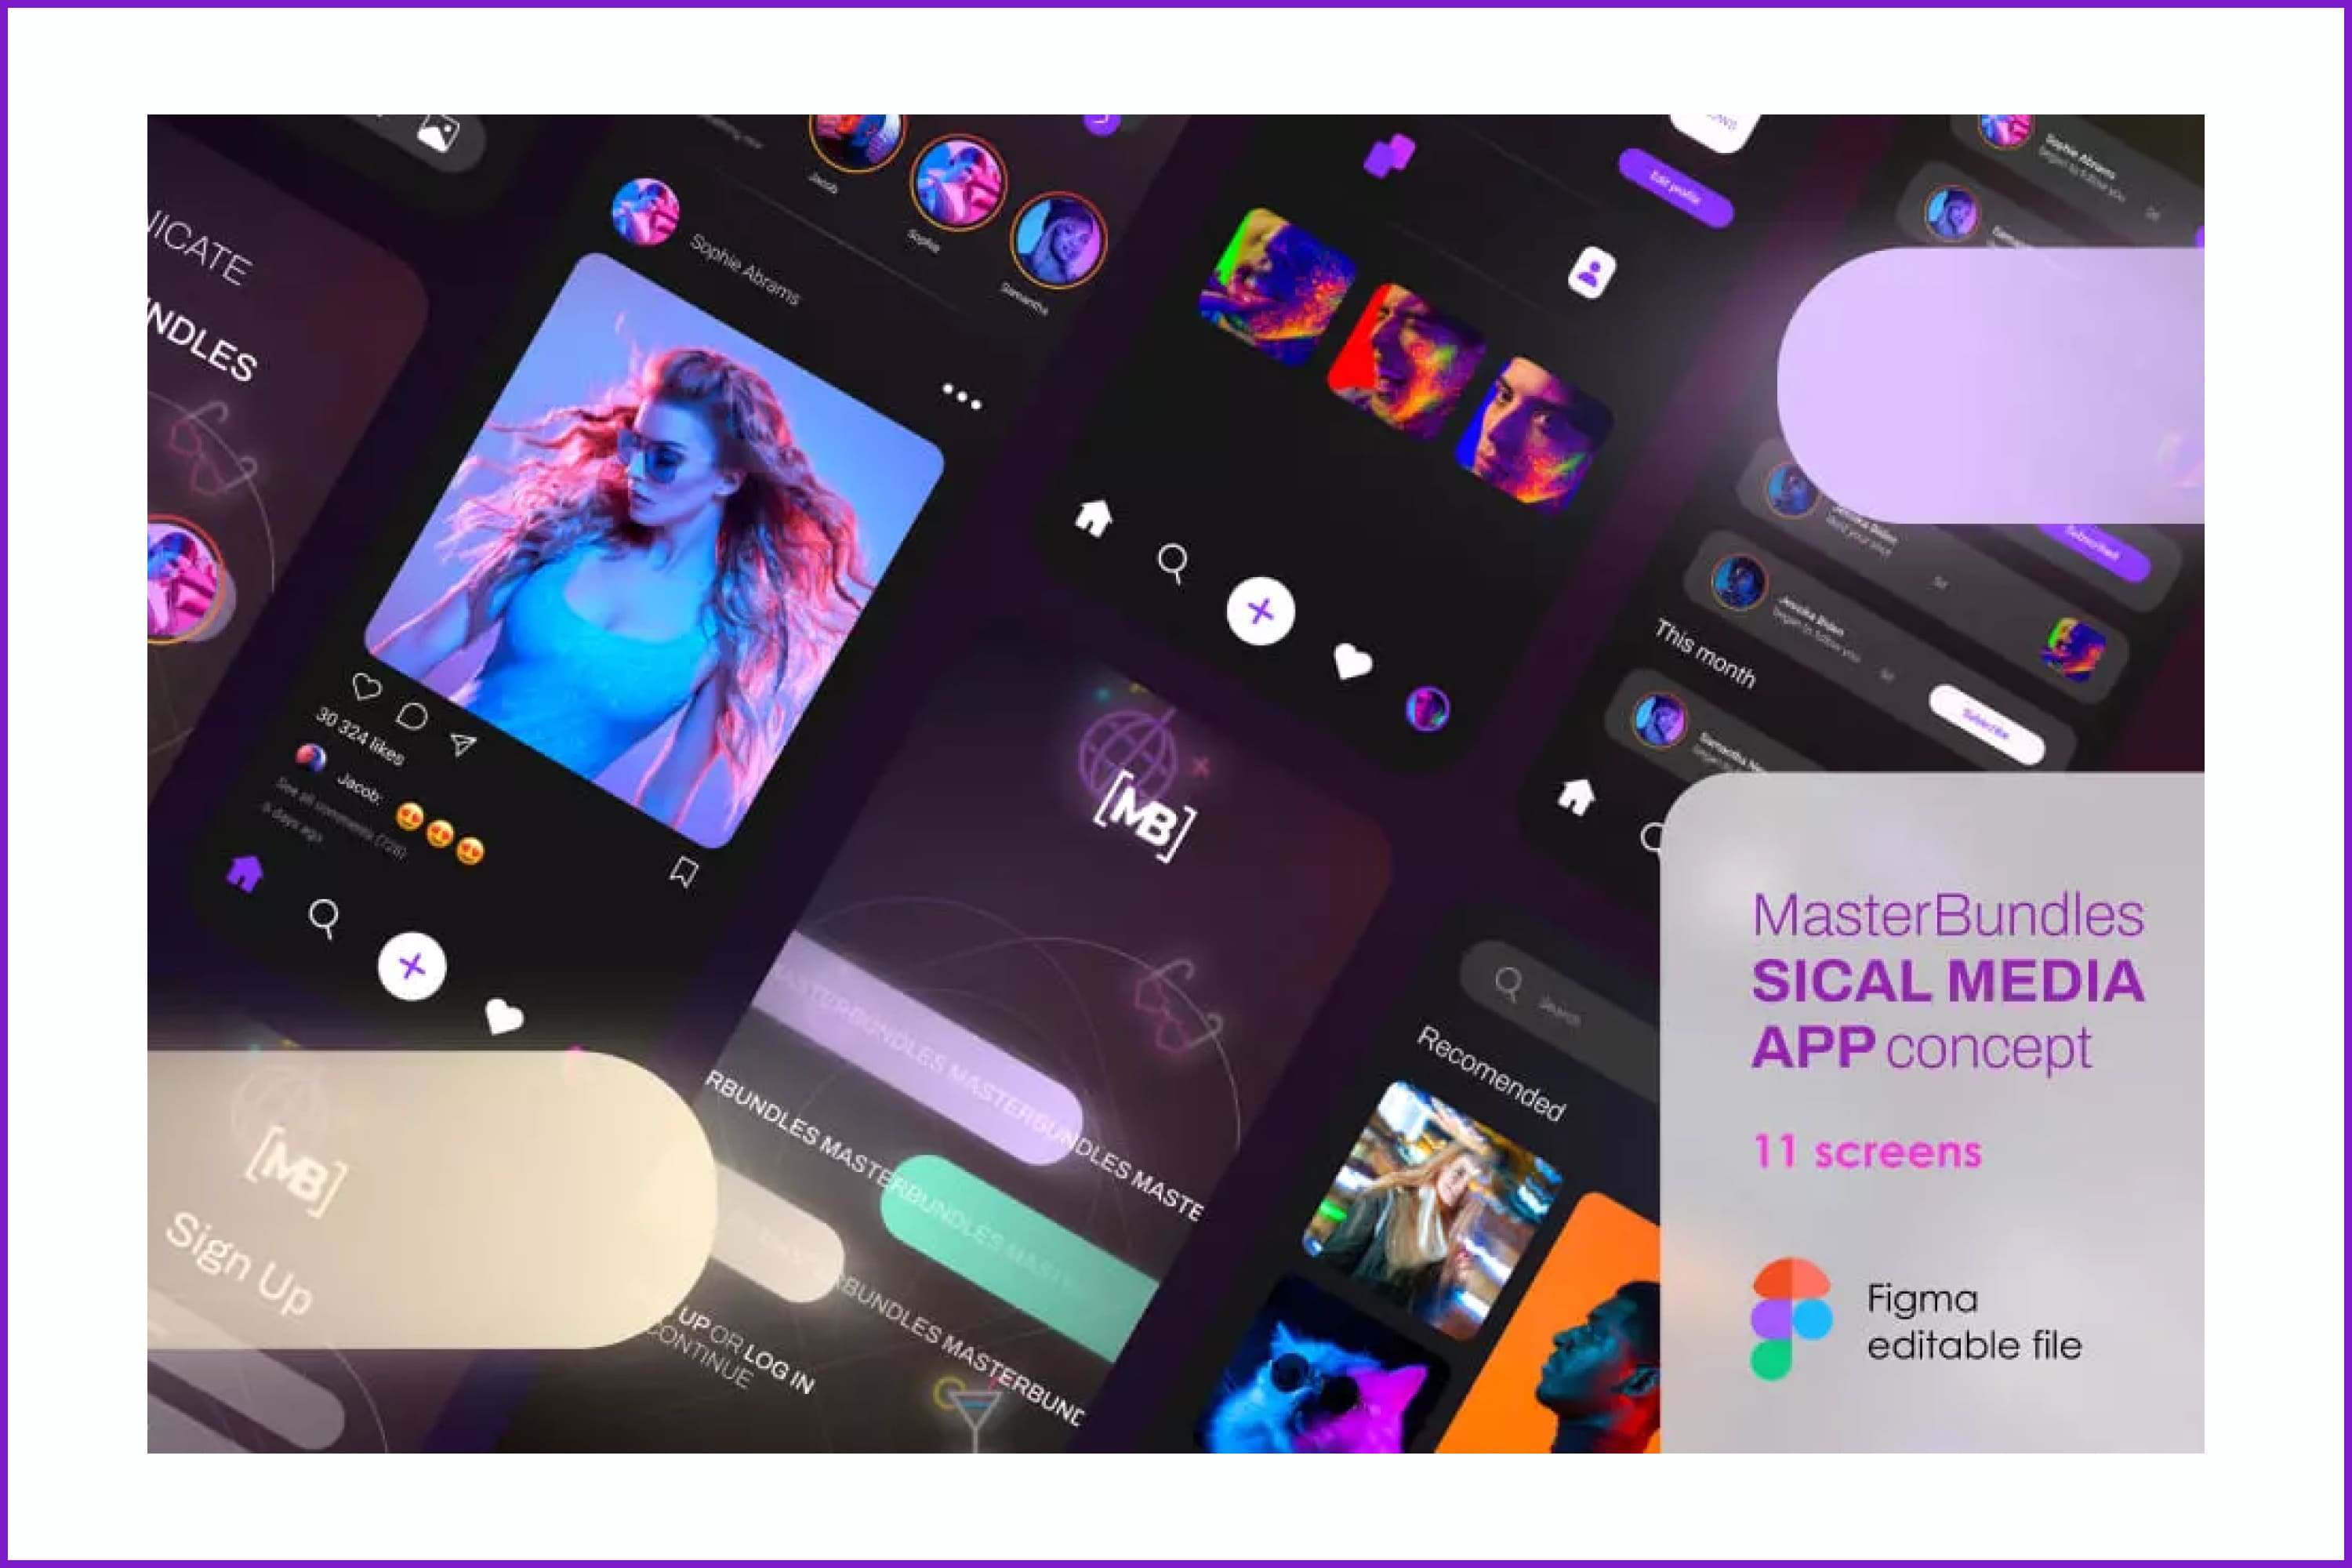
This UI kit will help speed up the creation of a trending neon social media app. Includes 10 screens.
Clean Landing Page Template for Bowling Club
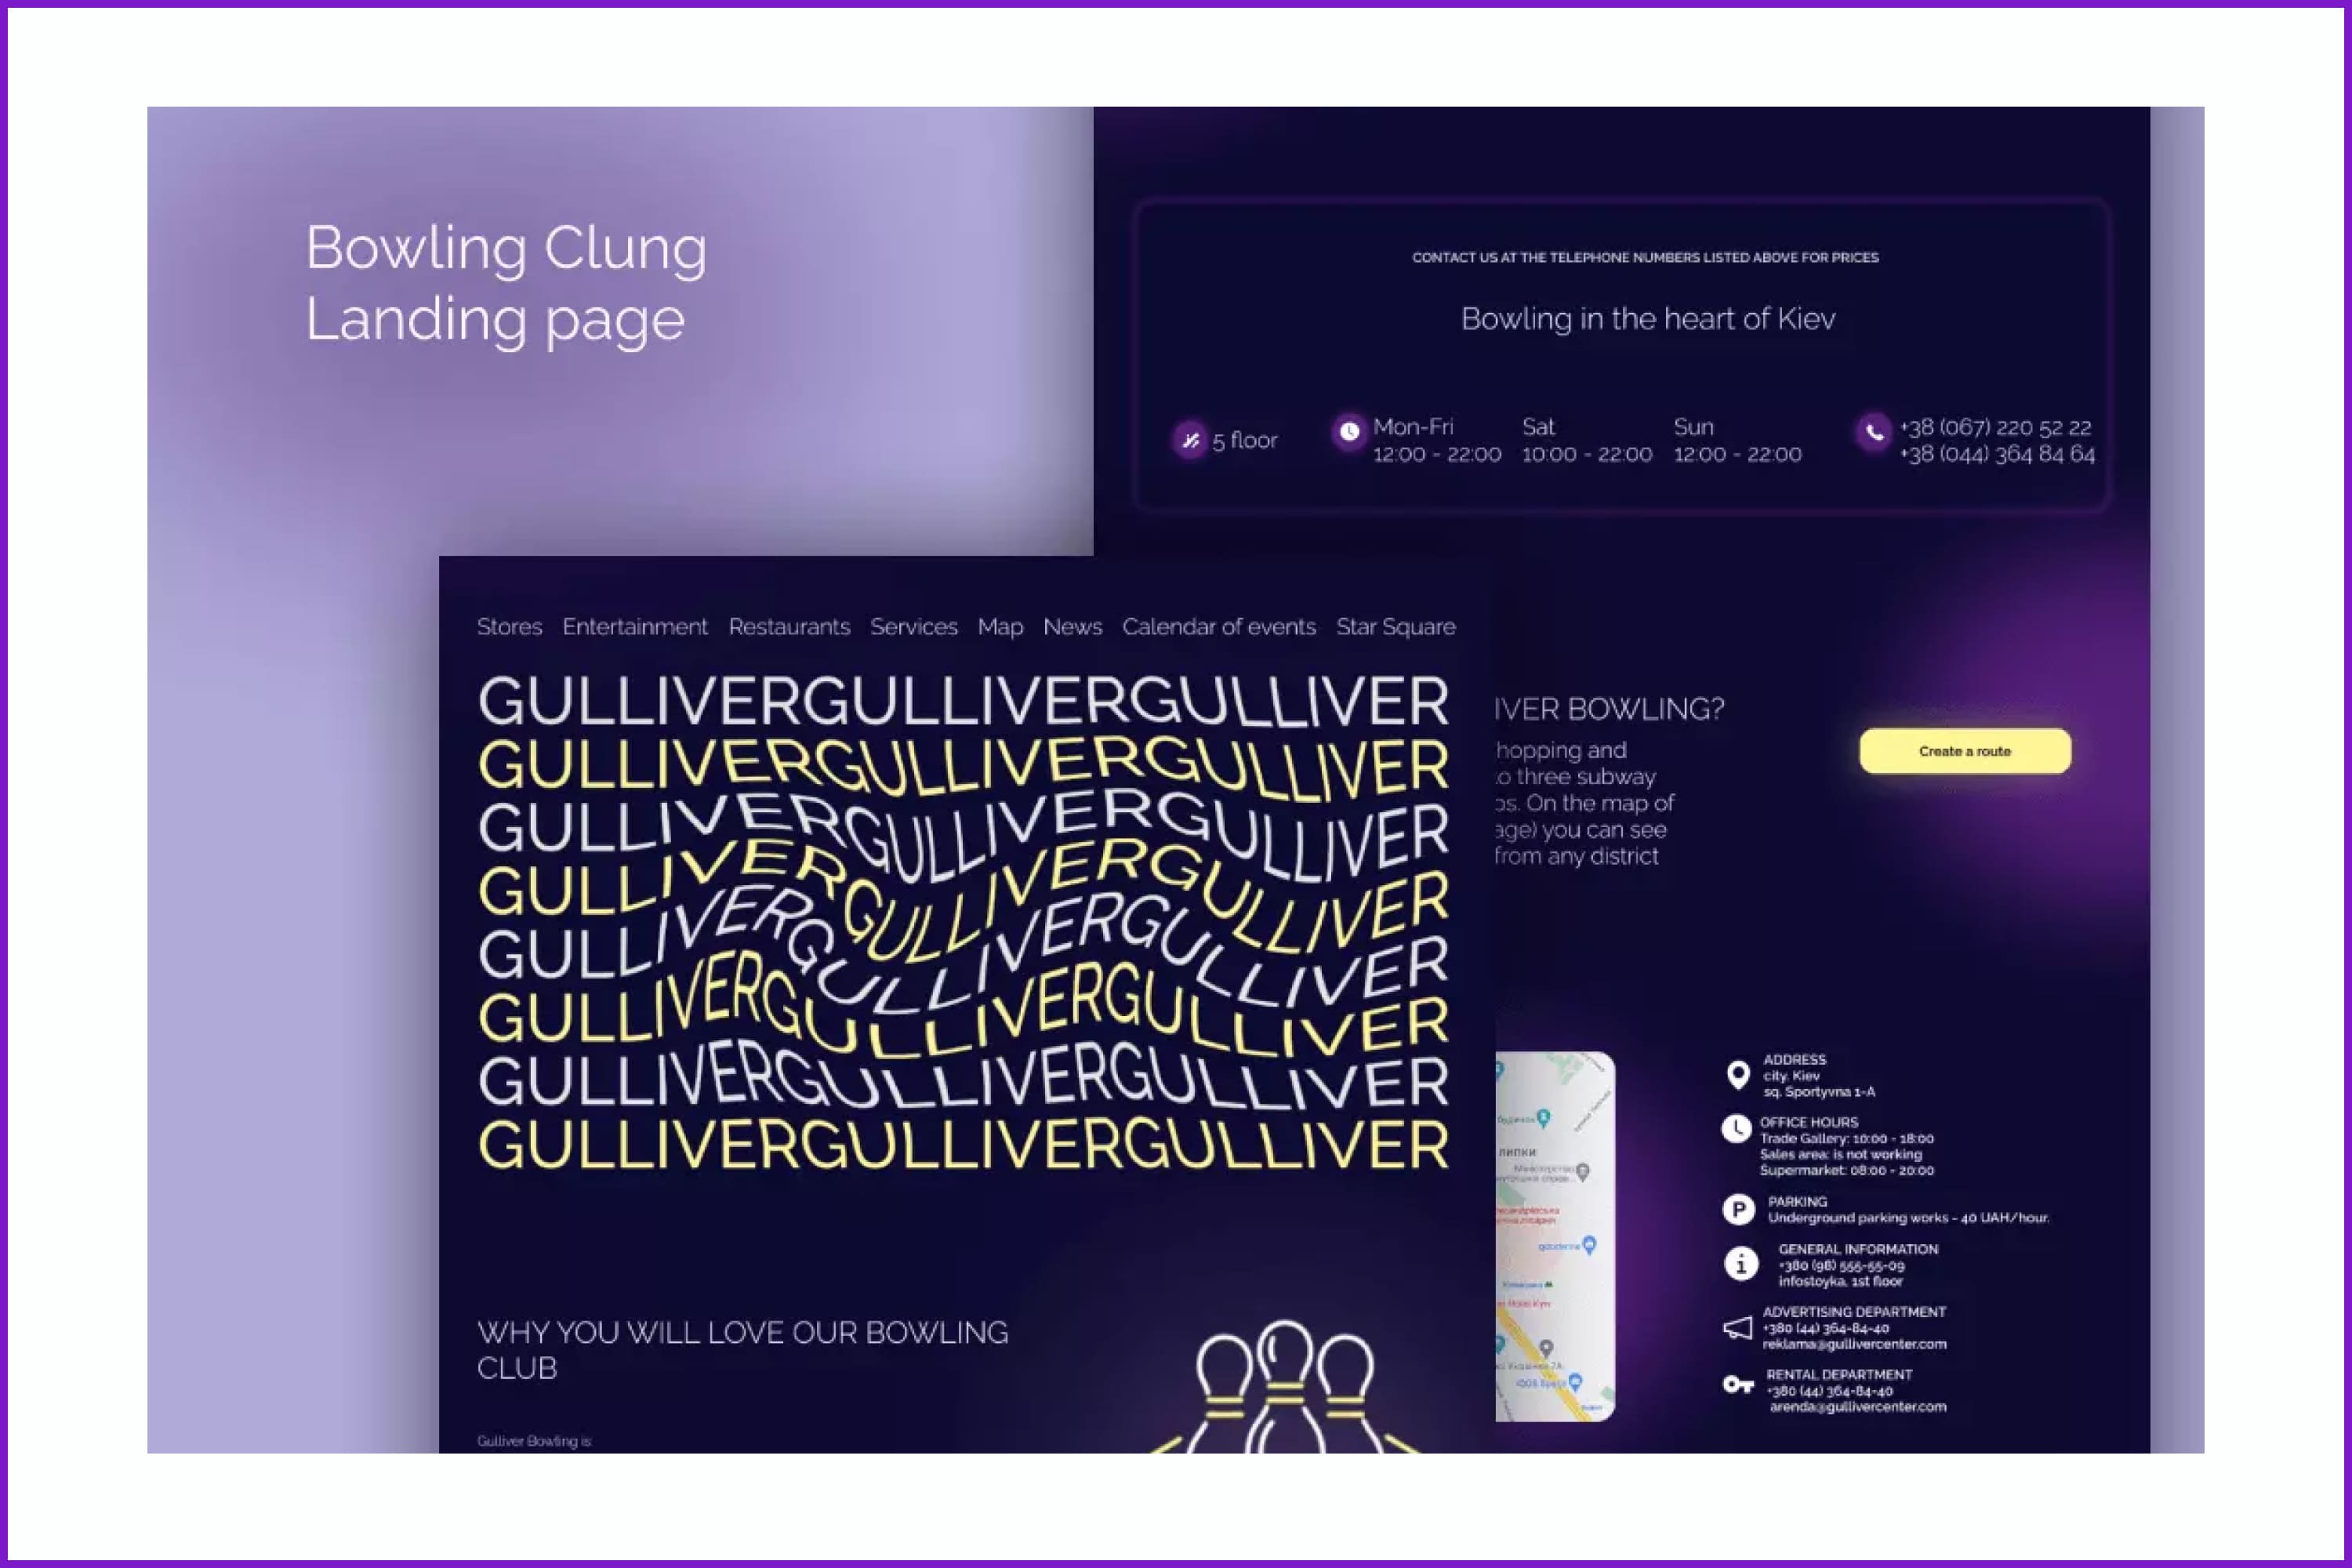
This is a great option if you need to design a website for a bowling alley or gaming club. The chosen colors and neon inserts perfectly describe the club atmosphere.
Bright Neon Light Instagram Lightroom Presets
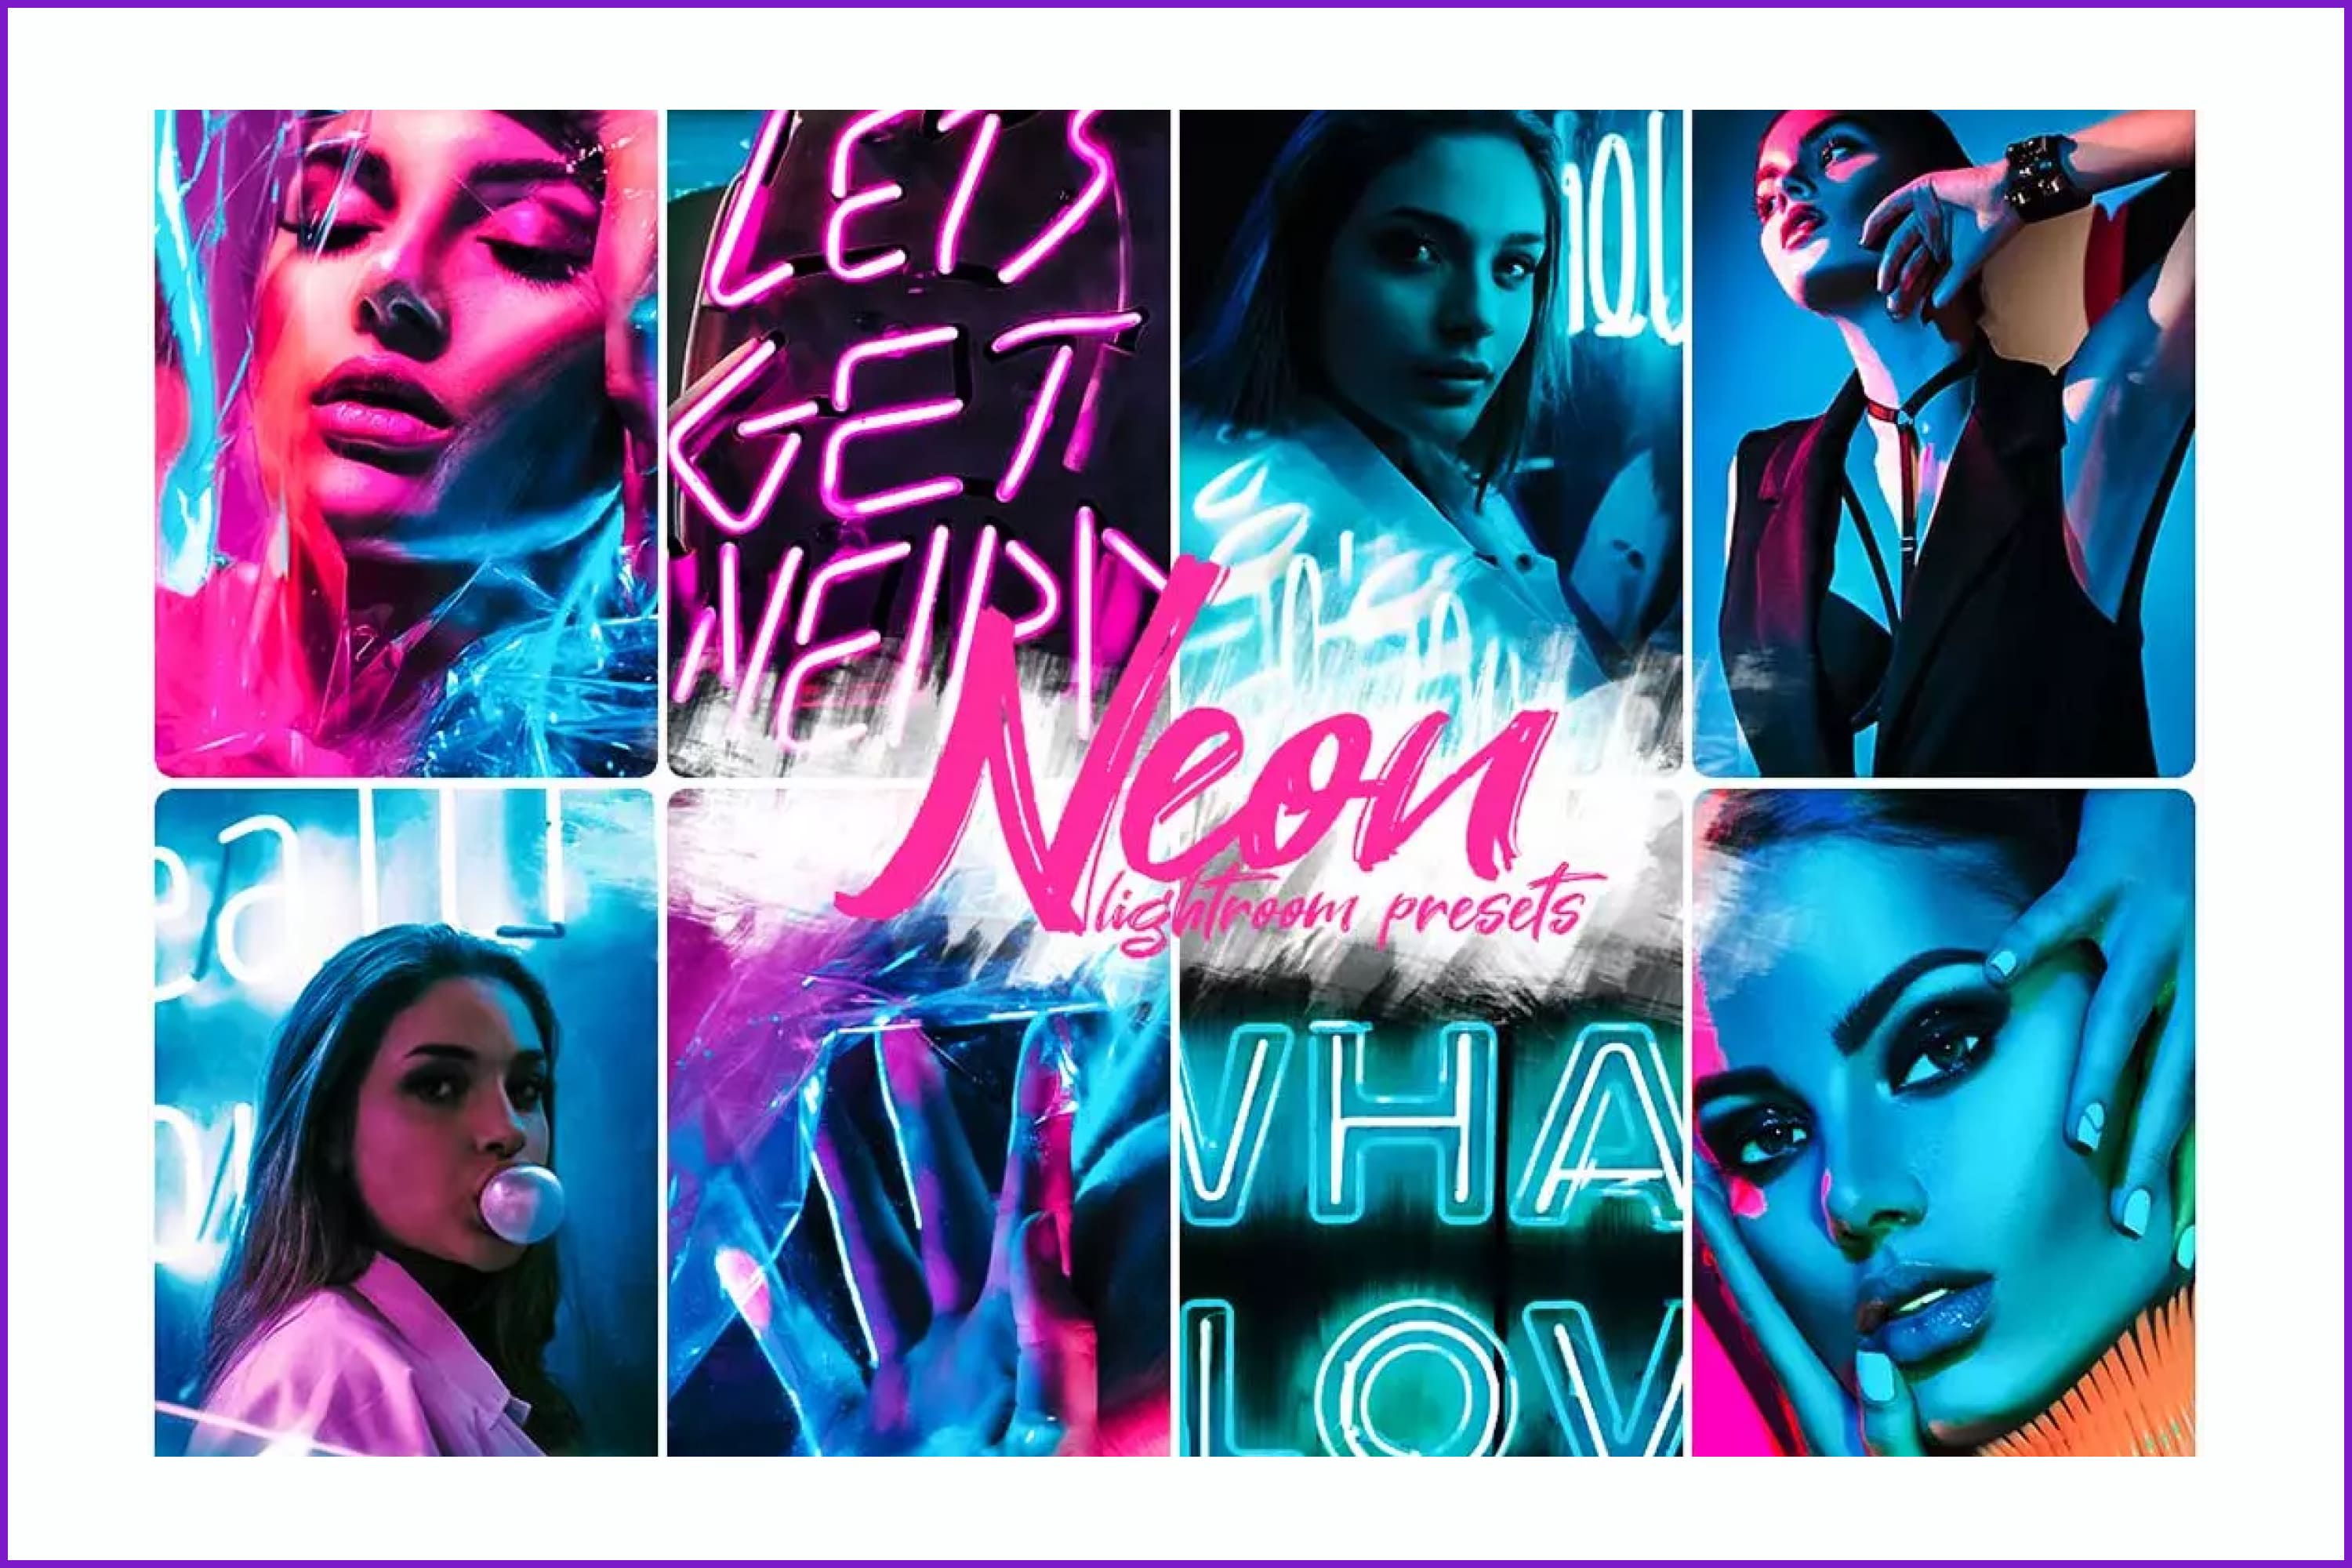
These Instagram Presets are perfect for your Lightroom Mobile App and work well with your photos shot with your iPhone or Android device.
Neon Holographic Digital Background Overlay
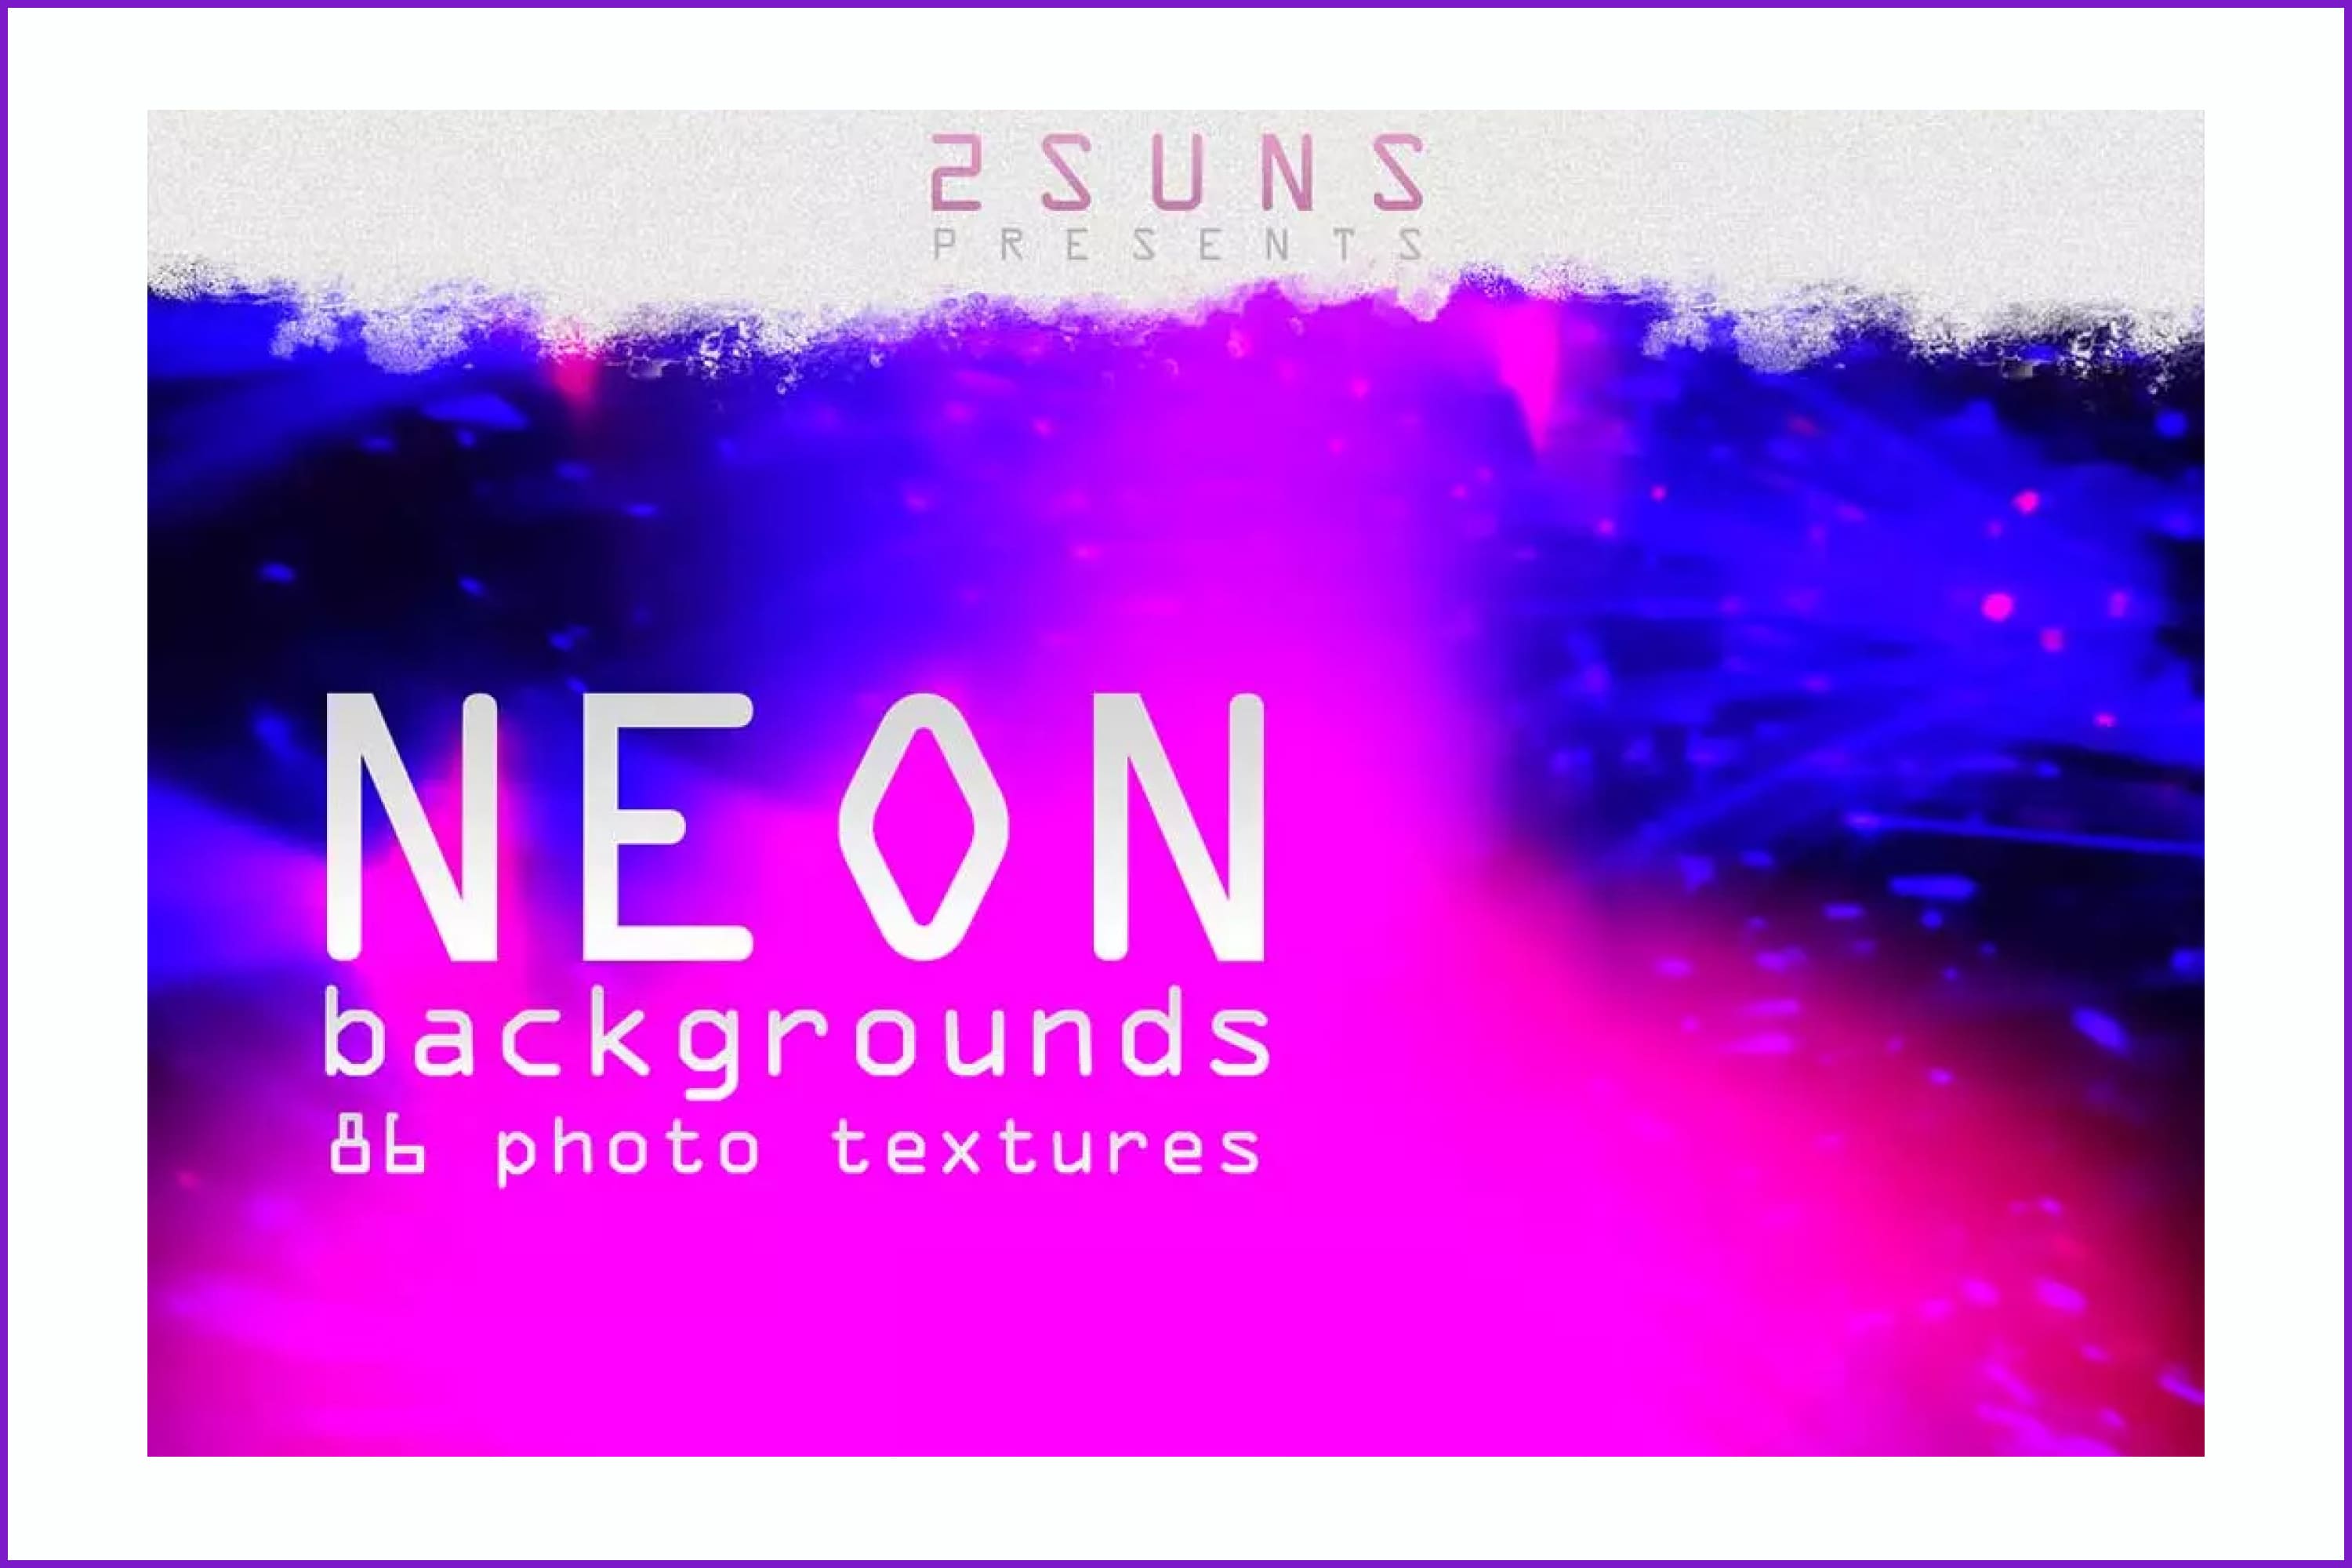
In this pack you can find neon digital backgrounds, holographic overlays, neon digital paper, neon lights Photoshop overlays, etc. It will help decorate your business card, certificate, postcard, and other projects.
Car Booking App UI Kit
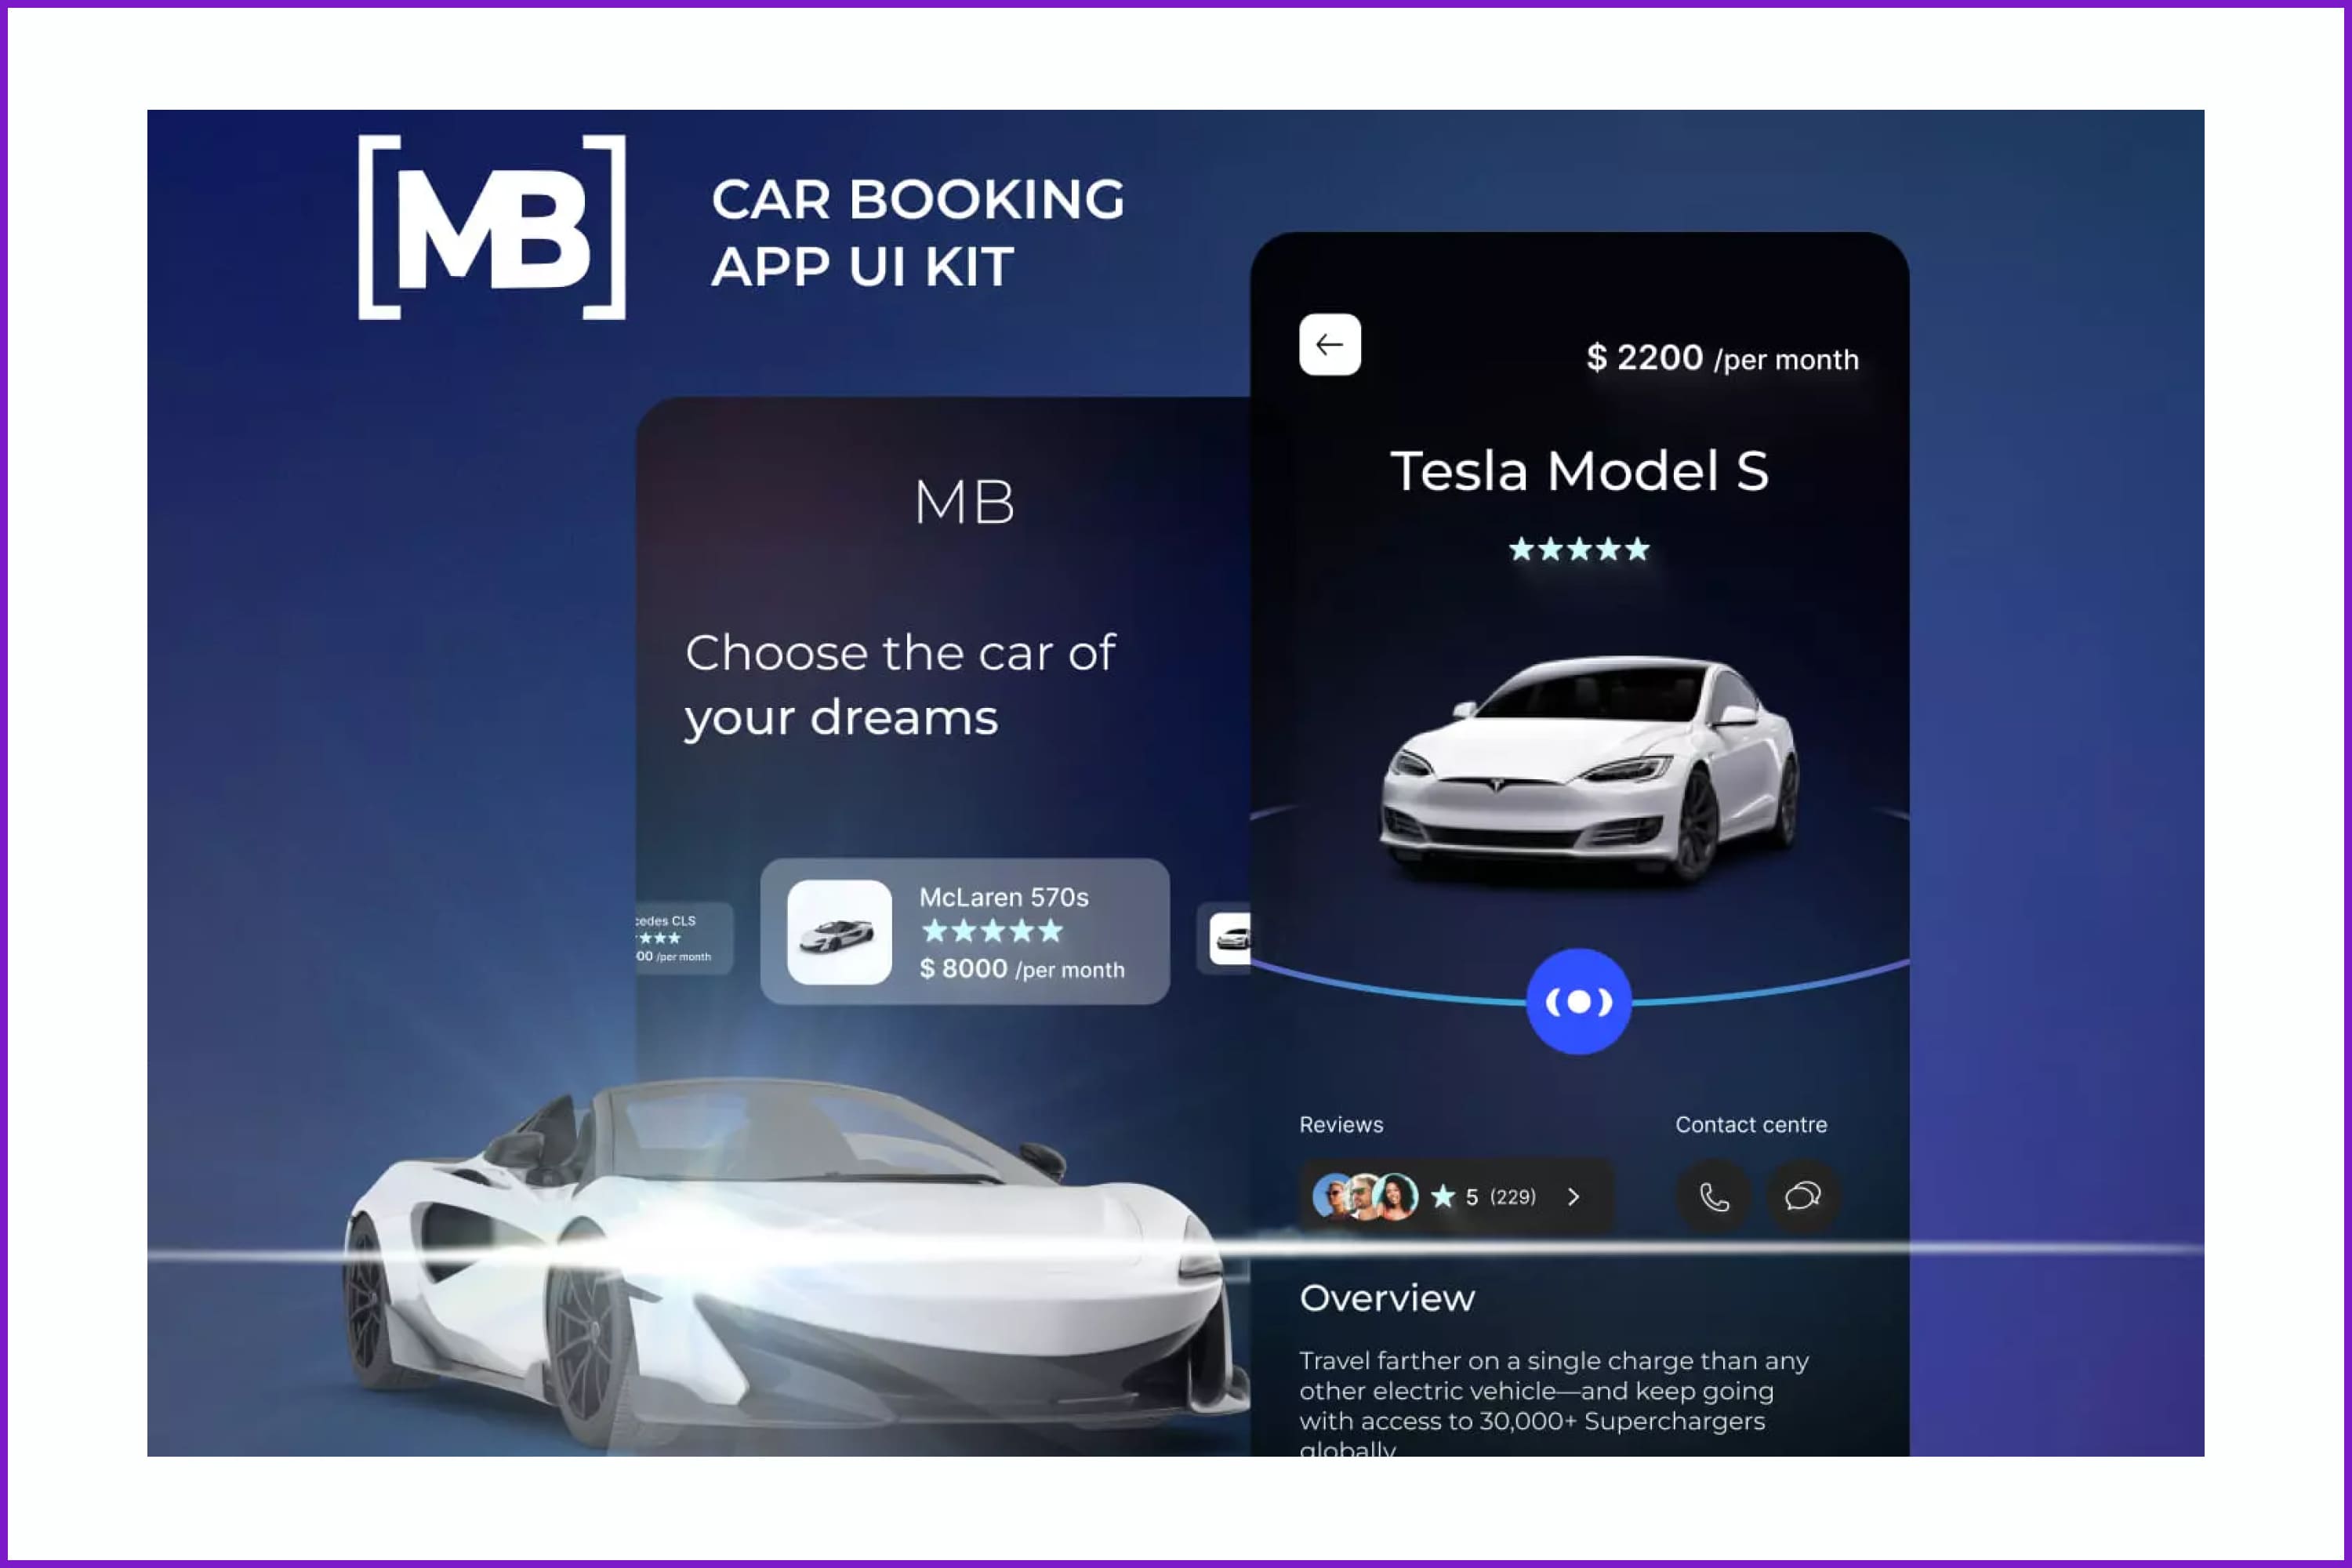
The design of this whale UI is done with neon stripes and bright purple colors. This is a great solution for creating a top app.
Conclusion
Wow, you’re doing great! Now you know how to create a cool hologram effect and an unusual neon ball. I recommend that you experiment with the colors and transparency of the fill to achieve different results.
Was this interesting for you? Leave a like so we can continue preparing more cool tutorials. You can also support us by sending it to your friends.
Best Related Articles


- best Figma plugins
What are your concerns?
Thanks for your response!
Disclosure: MasterBundles website page may contain advertising materials that may lead to us receiving a commission fee if you purchase a product. However, this does not affect our opinion of the product in any way and we do not receive any bonuses for positive or negative ratings.