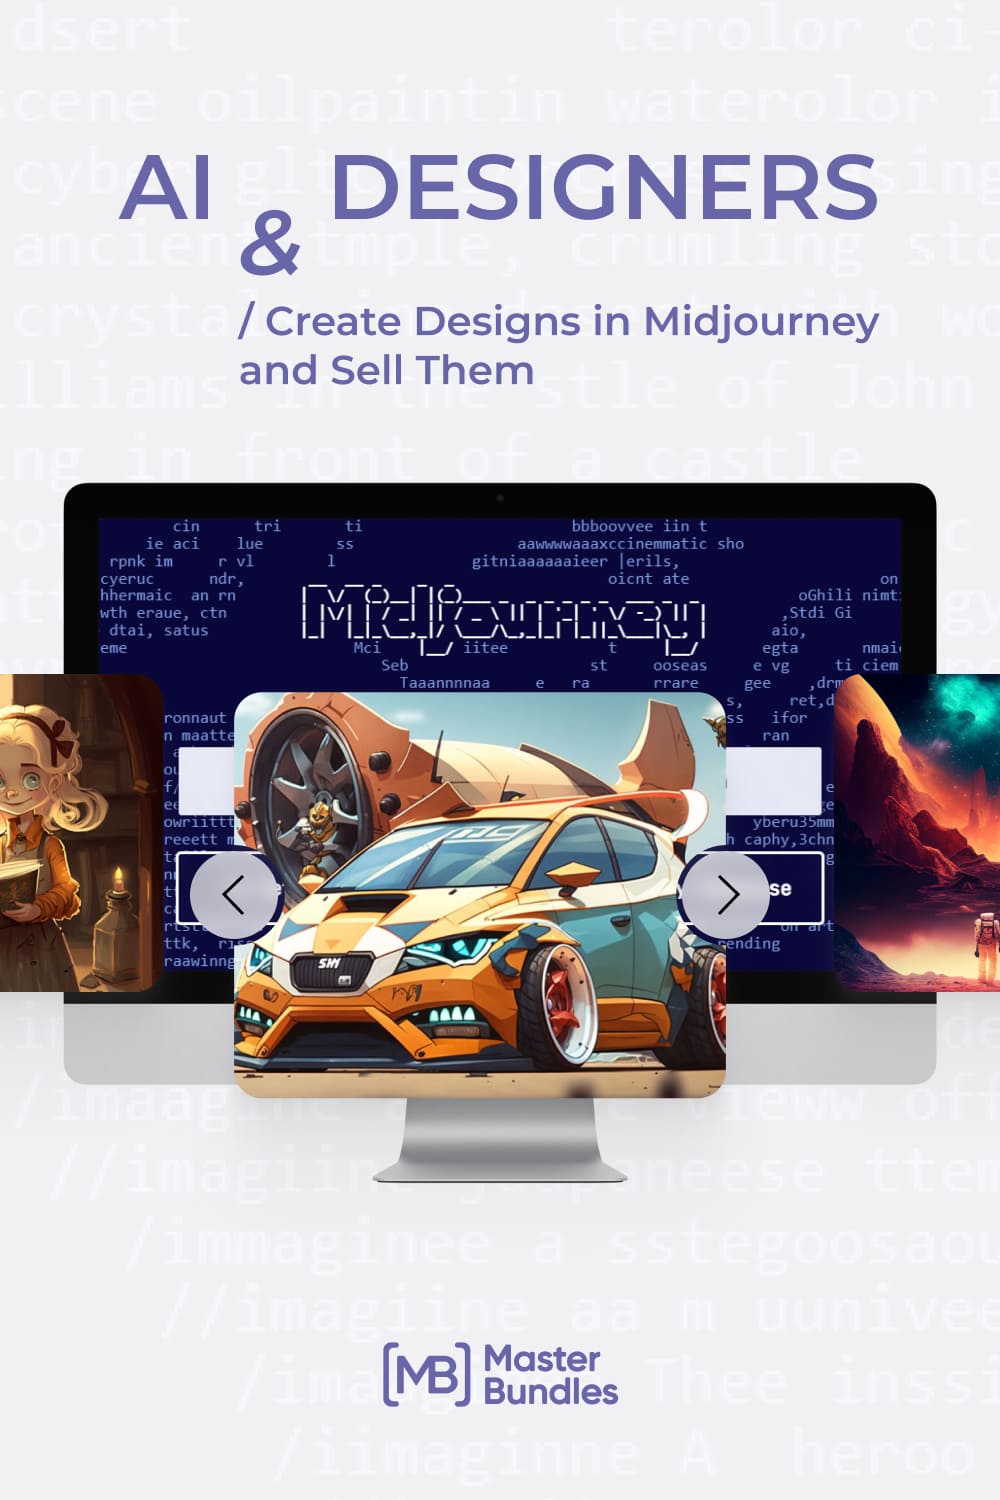
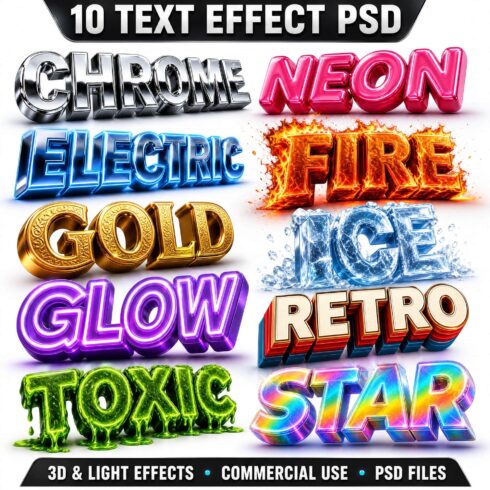
AI-Assisted Design Generation and Marketplace Sales: Midjourney Step-by-Step Guide
Artificial intelligence (AI) will eventually replace designers! Have you seen such messages in your information field? The public is talking about this actively, and I will consider this topic from the side of using AI as a tool for work.
This article is my case of interaction with the sensational AI Midjourney. I will show the process of creating illustrations for sale on the marketplace and share useful recommendations.
Let’s look at how to be the main one in this “battle” 🙂
What is Midjourney?
Midjourney is an AI program that has received a bit of public outcry but is now one of the more actively used tools. It generates images from a text description, modifies your photos, and even records a video of the generation process.
The project team itself positions itself as an independent research laboratory dedicated to expanding the creative abilities of mankind.
Like all AI, it learns from works already existing on the Internet. This leads to the issue that more and more questions are being directed to the creators about copyright infringement.
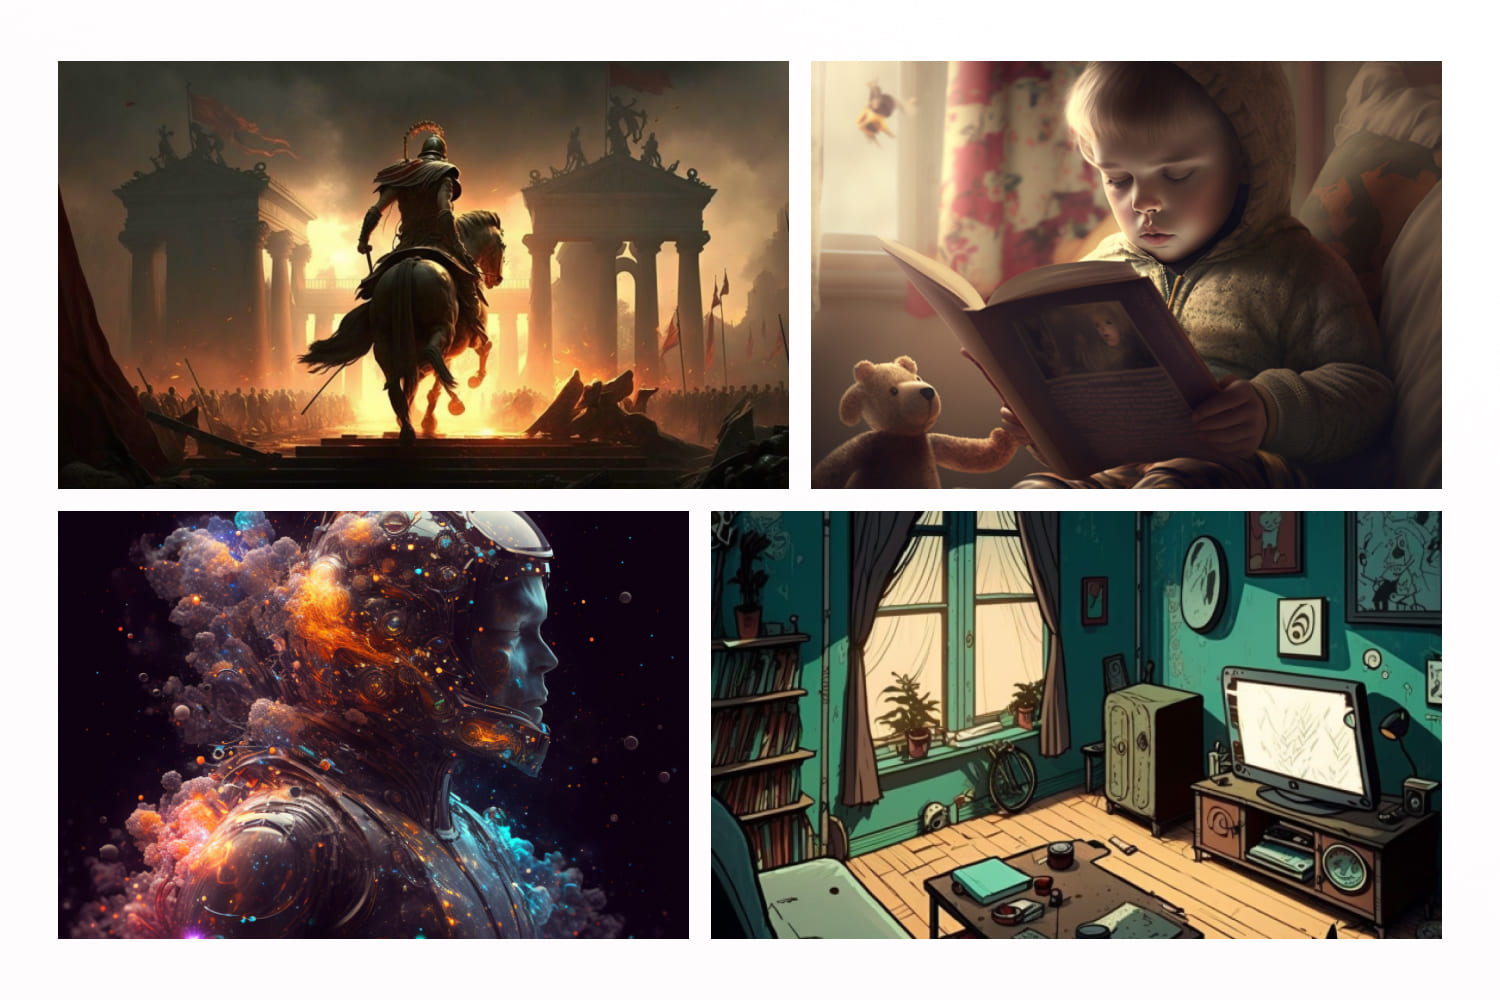
At the same time, this is a really cool tool for inspiration, searching for new ideas, and even for selling.
Please note: Carefully read the descriptions of user agreements when working with AI. Some prohibit the commercial use of generated works. Let’s create a society that respects the copyrights of others.
Step-by-Step Instruction for Design Generation
AI Midjourney is available in paid and free versions (30 GPU minutes and commercial usage restrictions). There are 3 paid plans and you can quickly switch between them.
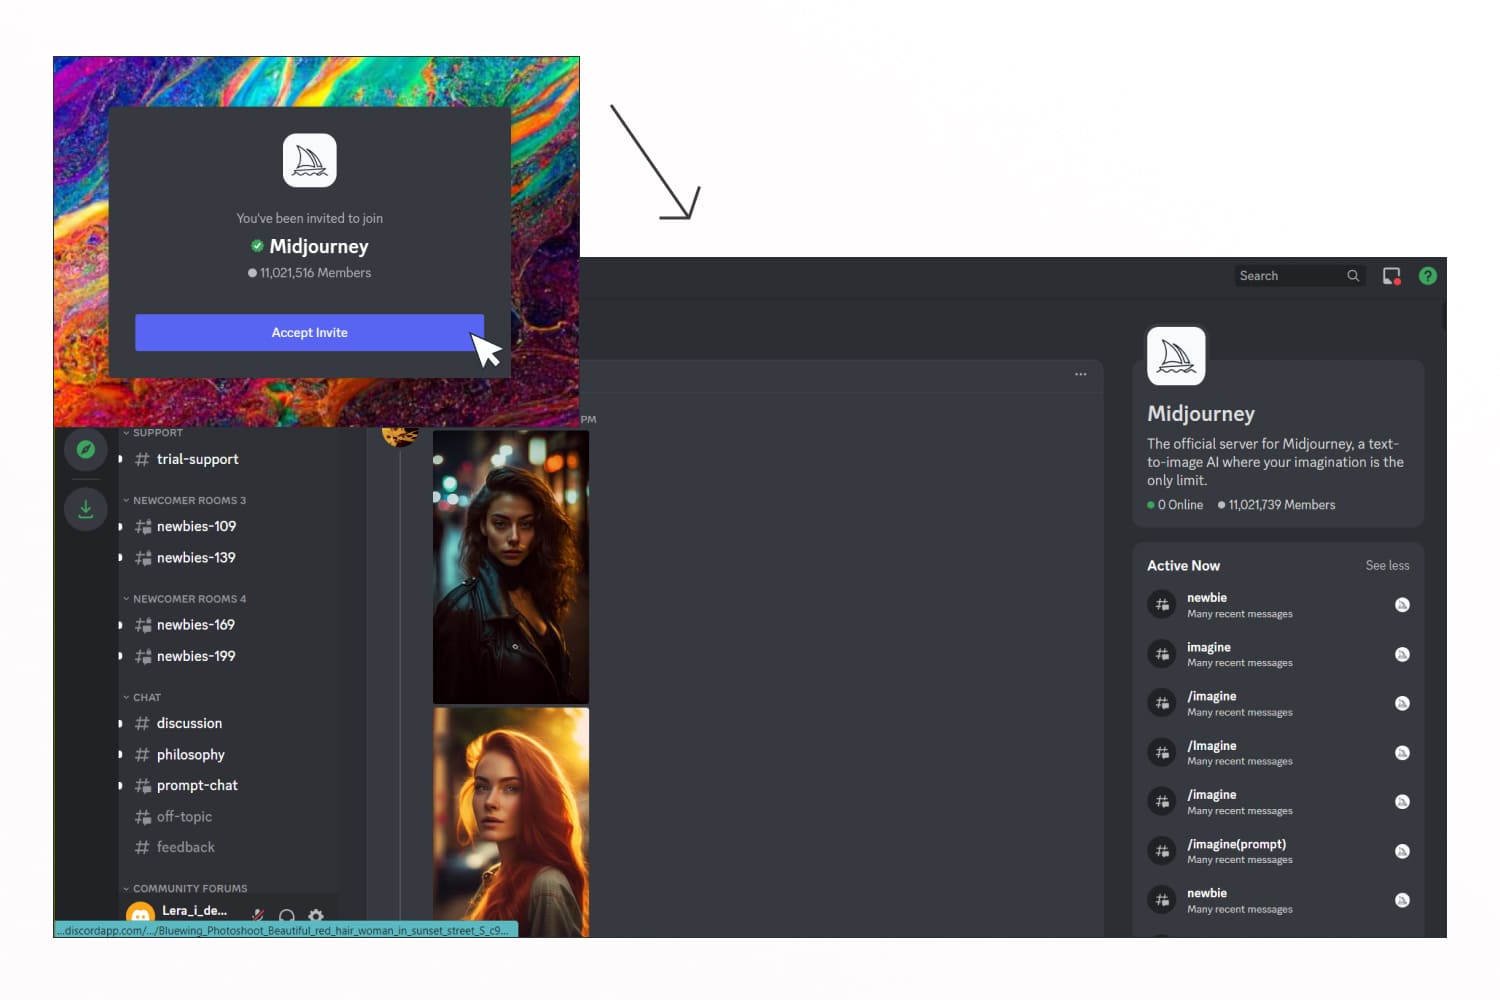
Registration on the platform.
Registration goes through the binding of your discord. Go to the site and choose the registration method.
You can use the trial period to get started with the system or design it for yourself. In this case, your discord will be emulated.
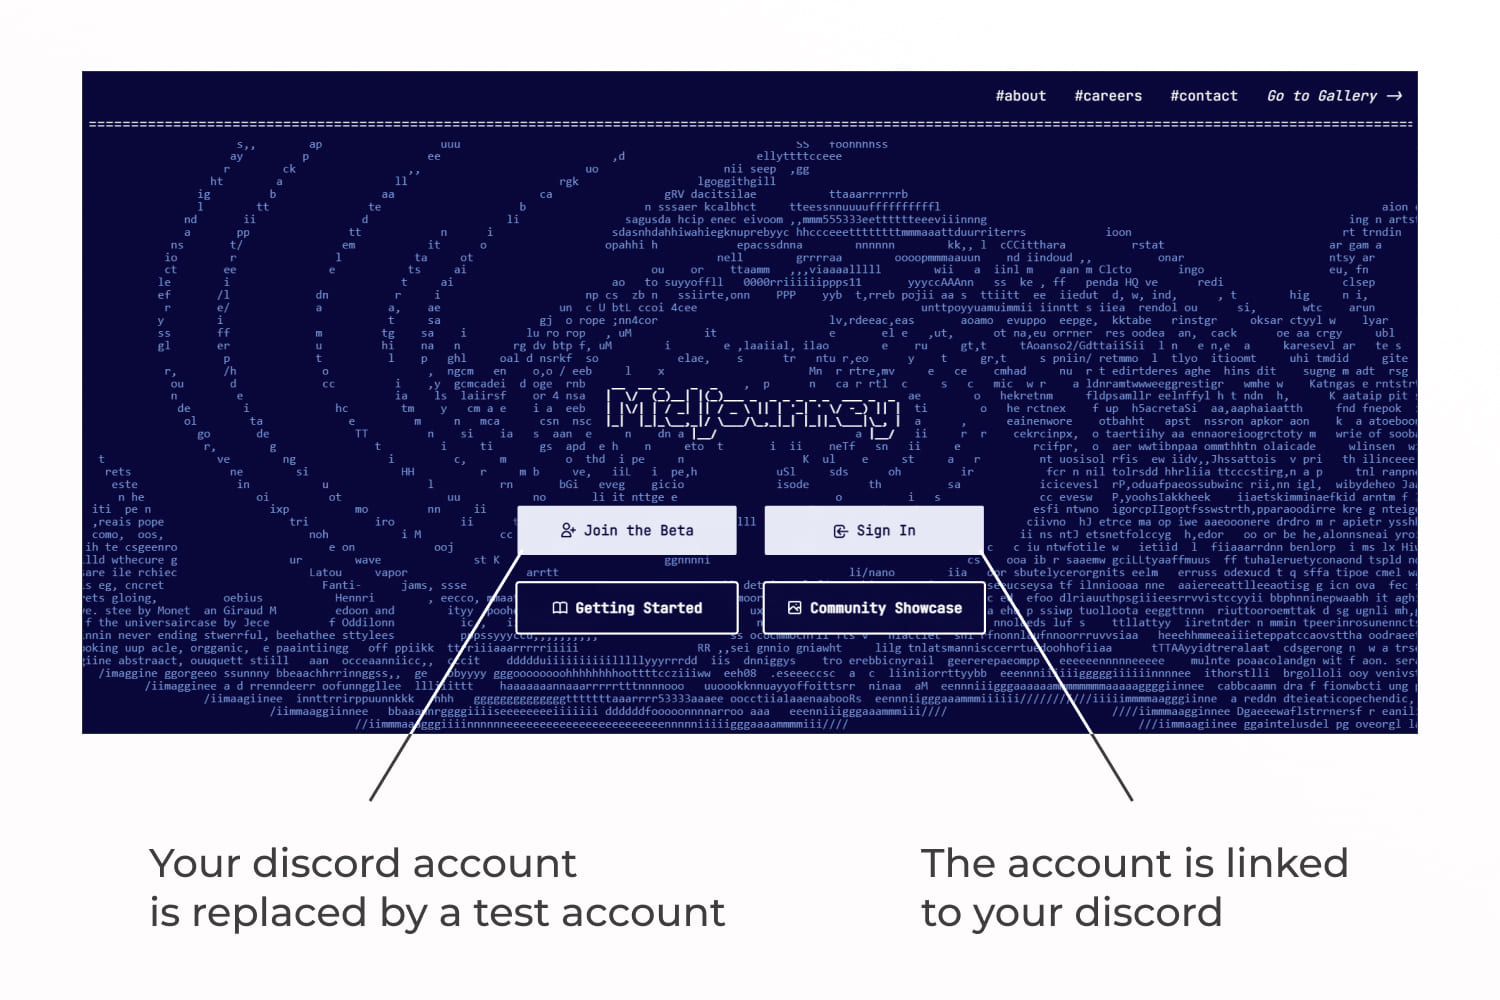
If you plan to sell these works, then you need to register and pay a subscription.
To register, enter your email, name, and date of birth, and create a strong password.
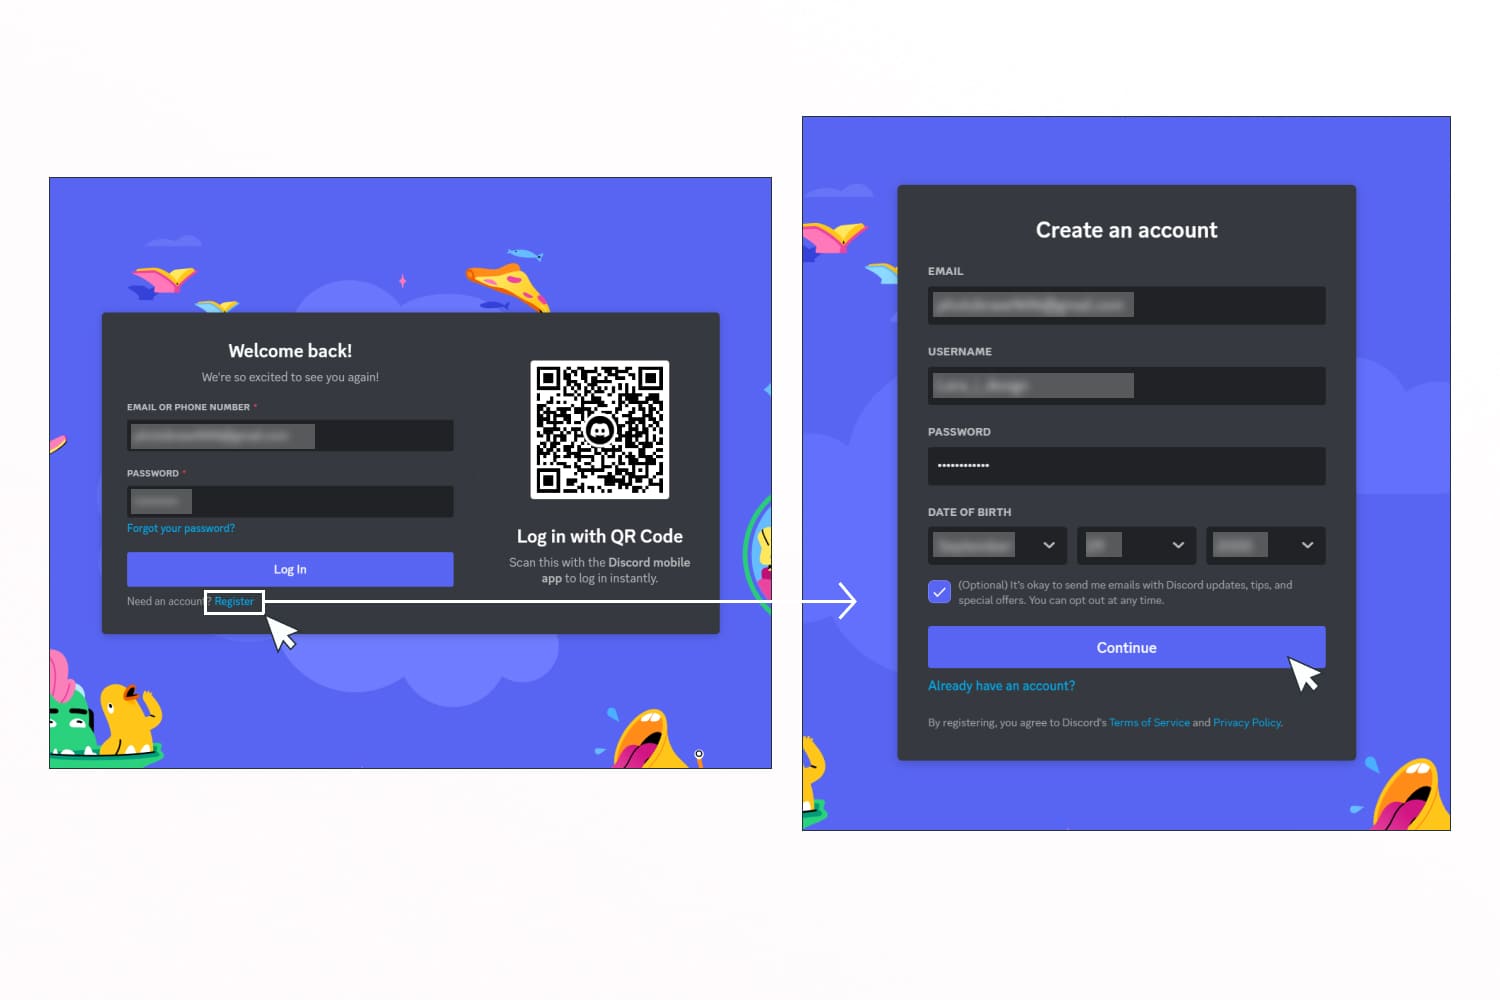
After that, you will need to go through the captcha and be sure to confirm the authorization letter in email. Most likely you will be transferred to the discord, so go back to the AI website and log in.
Request Settings
After authorization, you get to your main page in Midjourney. You will need a link at the bottom of the main screen.
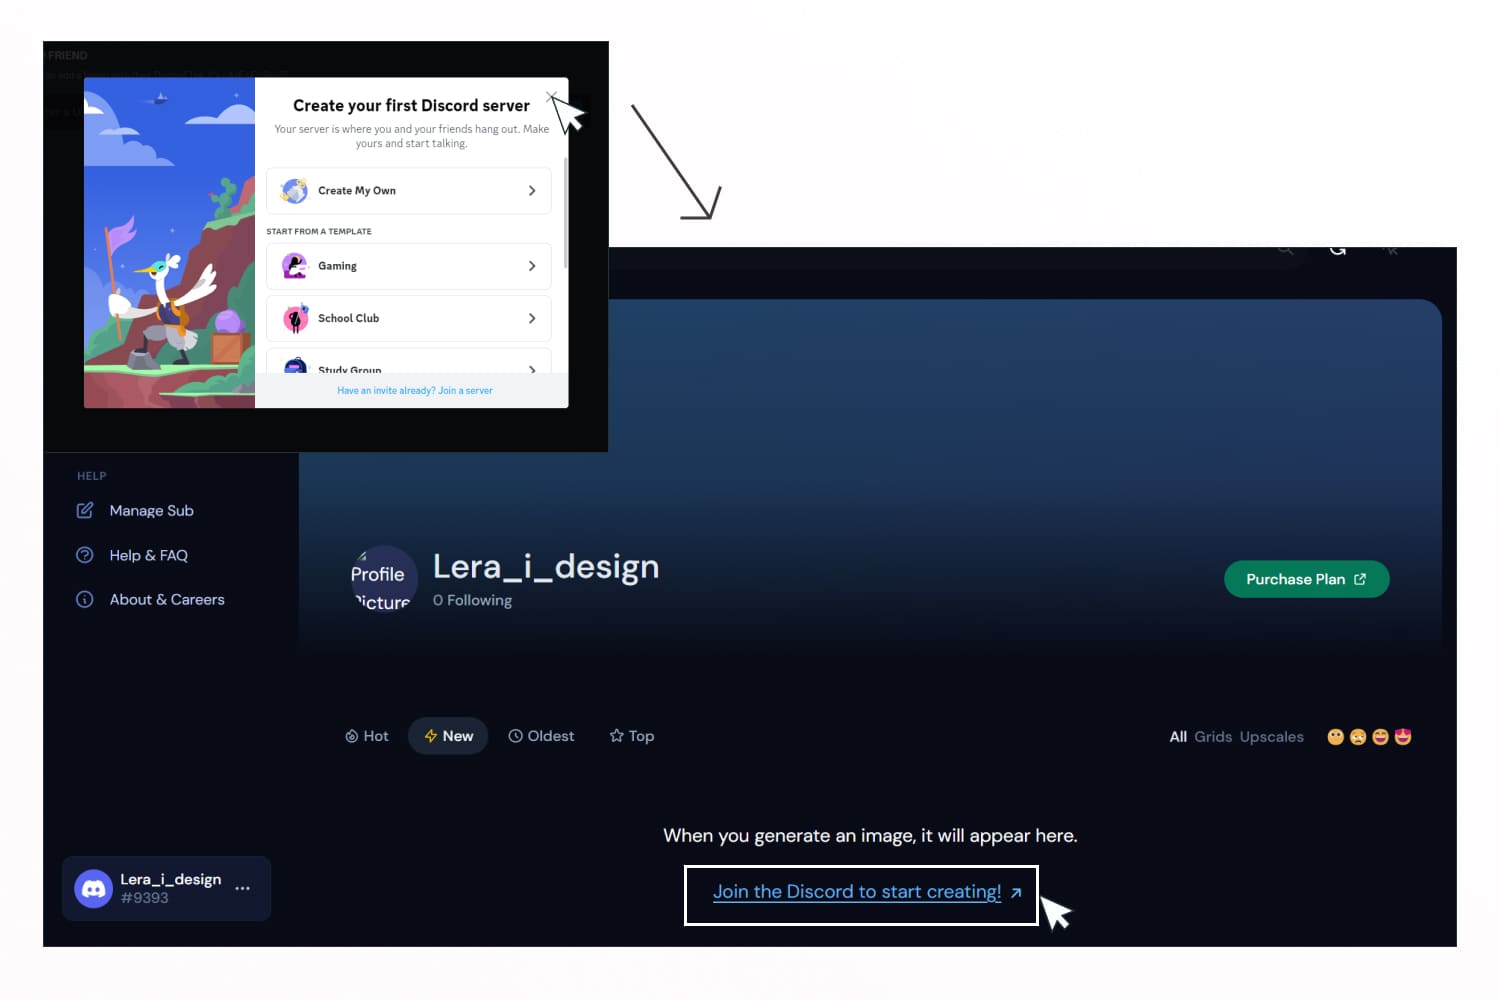
An invitation window will appear – accept it. Next, you are taken to the Midjourney channel.
Now you need to go to any “newbies” server. This is where the generation of those same pictures takes place.
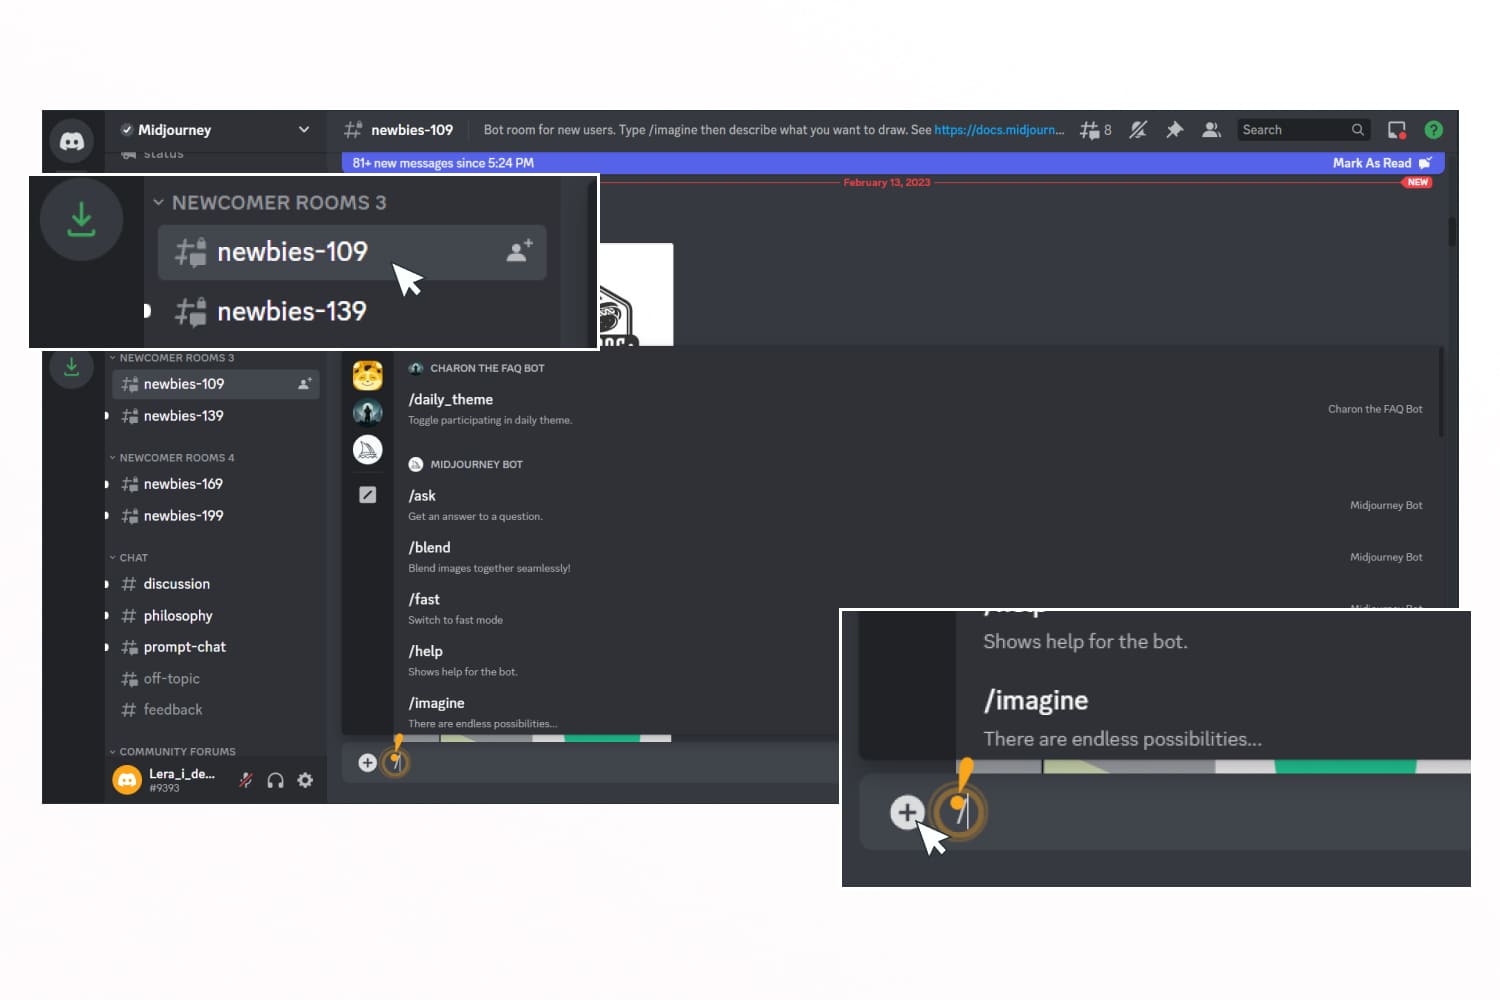
Let’s check the settings to improve the generation of the result we want. To do this, at the bottom there is a line with a “+” sign. Click on this “+” and select “/ settings” from the drop-down list. Press “Enter”.
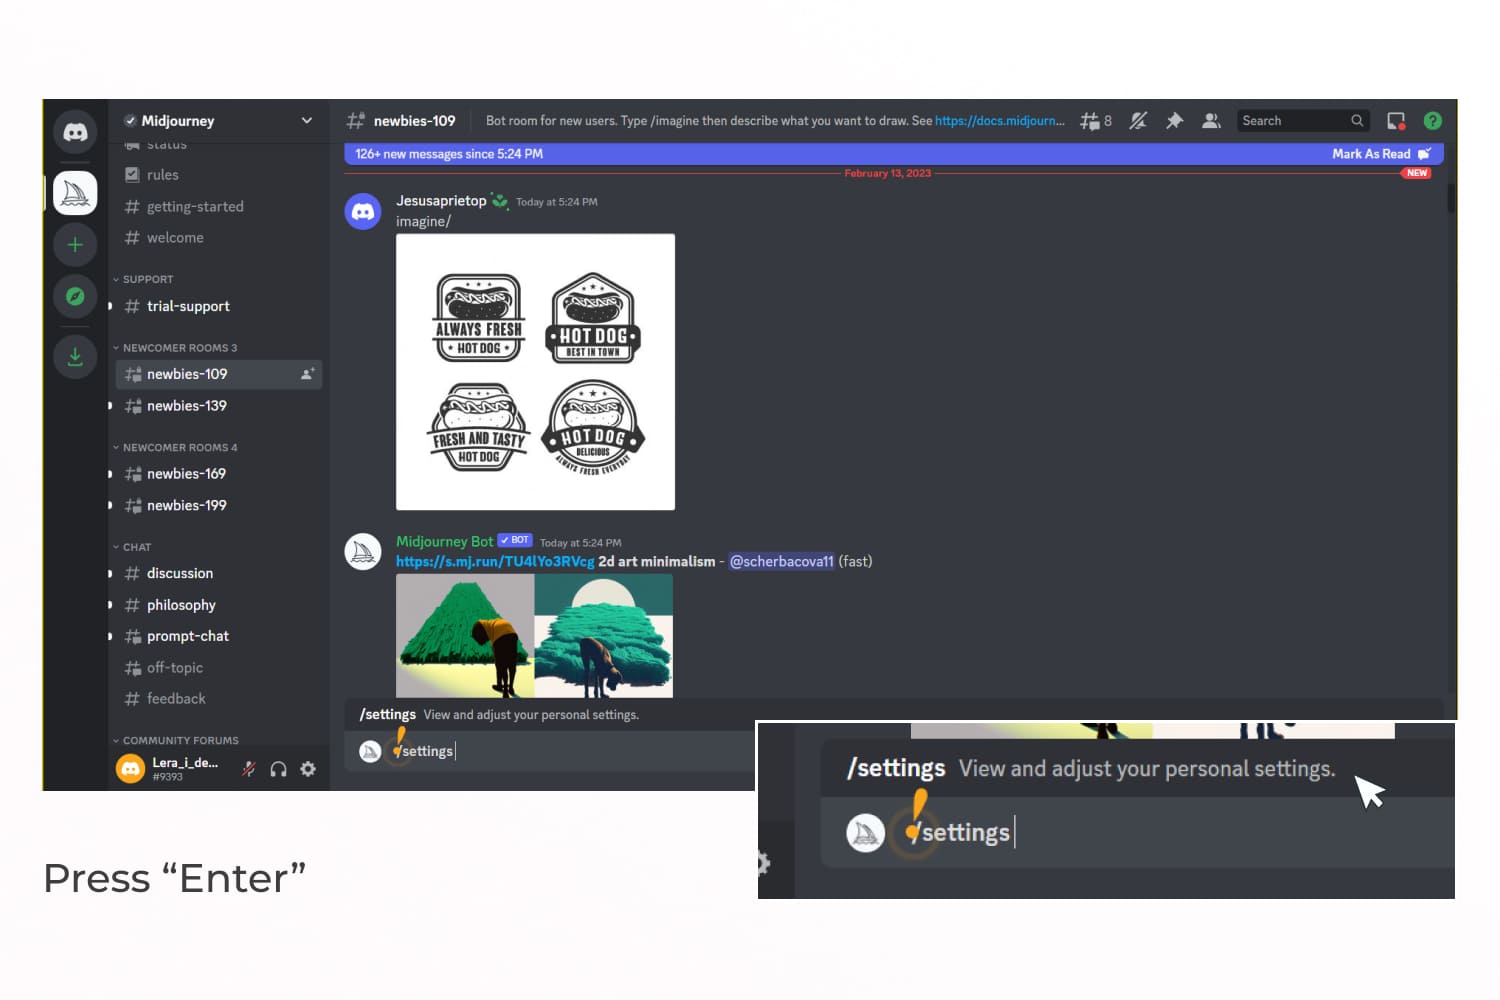
A message will appear with the settings that you can change. By the way, the flow of messages here is very fast. You will often have to flip through a lot and carefully look for your messages.
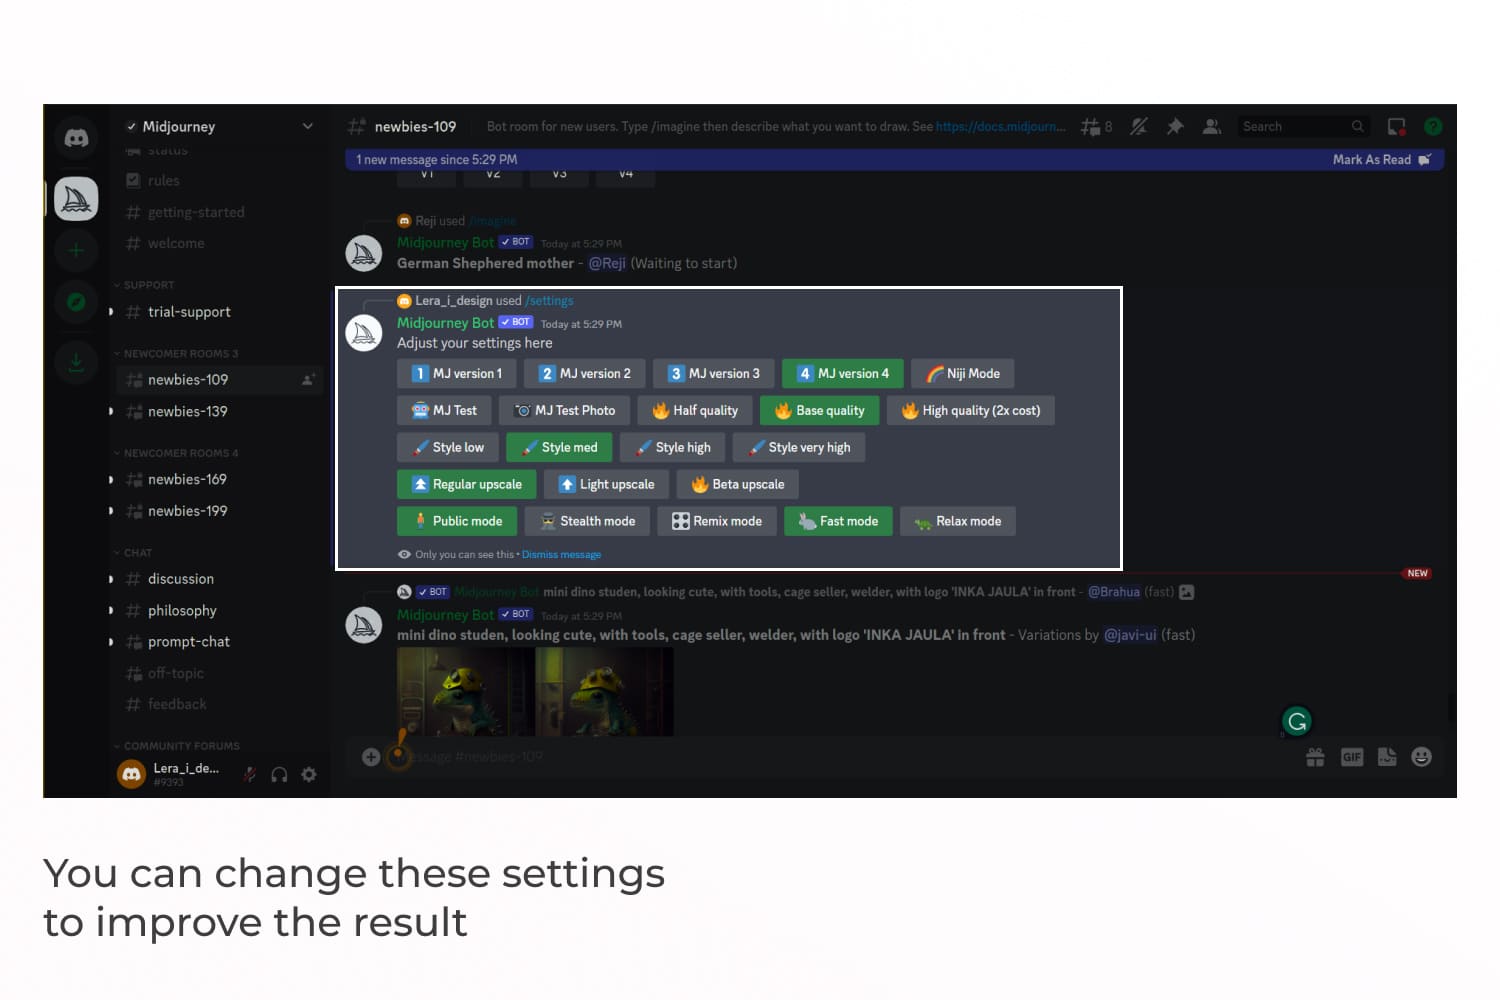
What do these lines mean?
- Engine. We choose MJ4 – the more the better. With MJ Test you will get two experimental images instead of four, and with MJ Test Photo you will get a photorealistic result.
- Image quality. We select Base quality for less wait.
- Styling level. I’ll set Style low because I want to get a minimalistic linear image. Basically, it is better to set Style to med so that the neural network does not go too far with the generation. For example 10 eyes, 7 fingers, and the like. Although it often slips like this 🙂
- Image enlargement algorithm. Choose the optimal Regular upscale. Because Light upscale increases the resolution, but you get less detail. Beta at least allows you to get a large size, but so far it is unstable.
- Access mode – that is, who can see the picture generated by your request. Depends on your rate.
Processing mode – generation speed. Depends on your rate.
Remix mode. With this, you can merge pictures and work with the finished image. For example, you want to get your photo in Pixar style.
Now you know what those buttons are. Let’s move on to the most interesting – design generation.
Design Generation
First, imagine in your head what you want to receive. It is better to build on the main character that will be central in your picture – a person, a cat, a dinosaur, a building, etc.
Next, think about the style of the finished work. Will it be anime? Maybe in the style of Van Gogh? Ask yourself similar questions and formulate the answers in a clear description of the request.
You can also prescribe what should not be using the prefix --no.
Tip: If you’re designing for a marketplace sale, see what sells best first. Analyze what topics are relevant and where your design can be used.
Keep in mind that you get the result in PNG and it is suitable for printing at small sizes and for digital design.
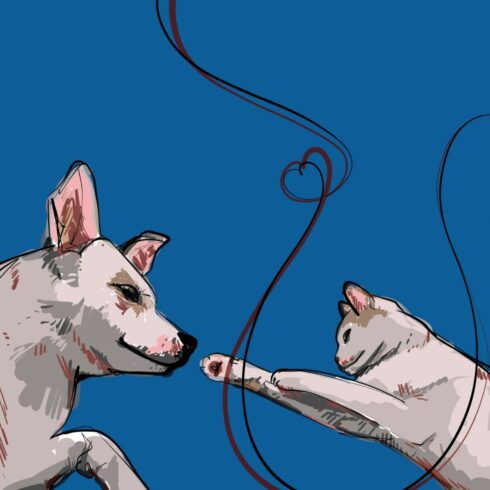
I want to end up with an SVG format, so I’m going to generate a one-line design for Mother’s Day.
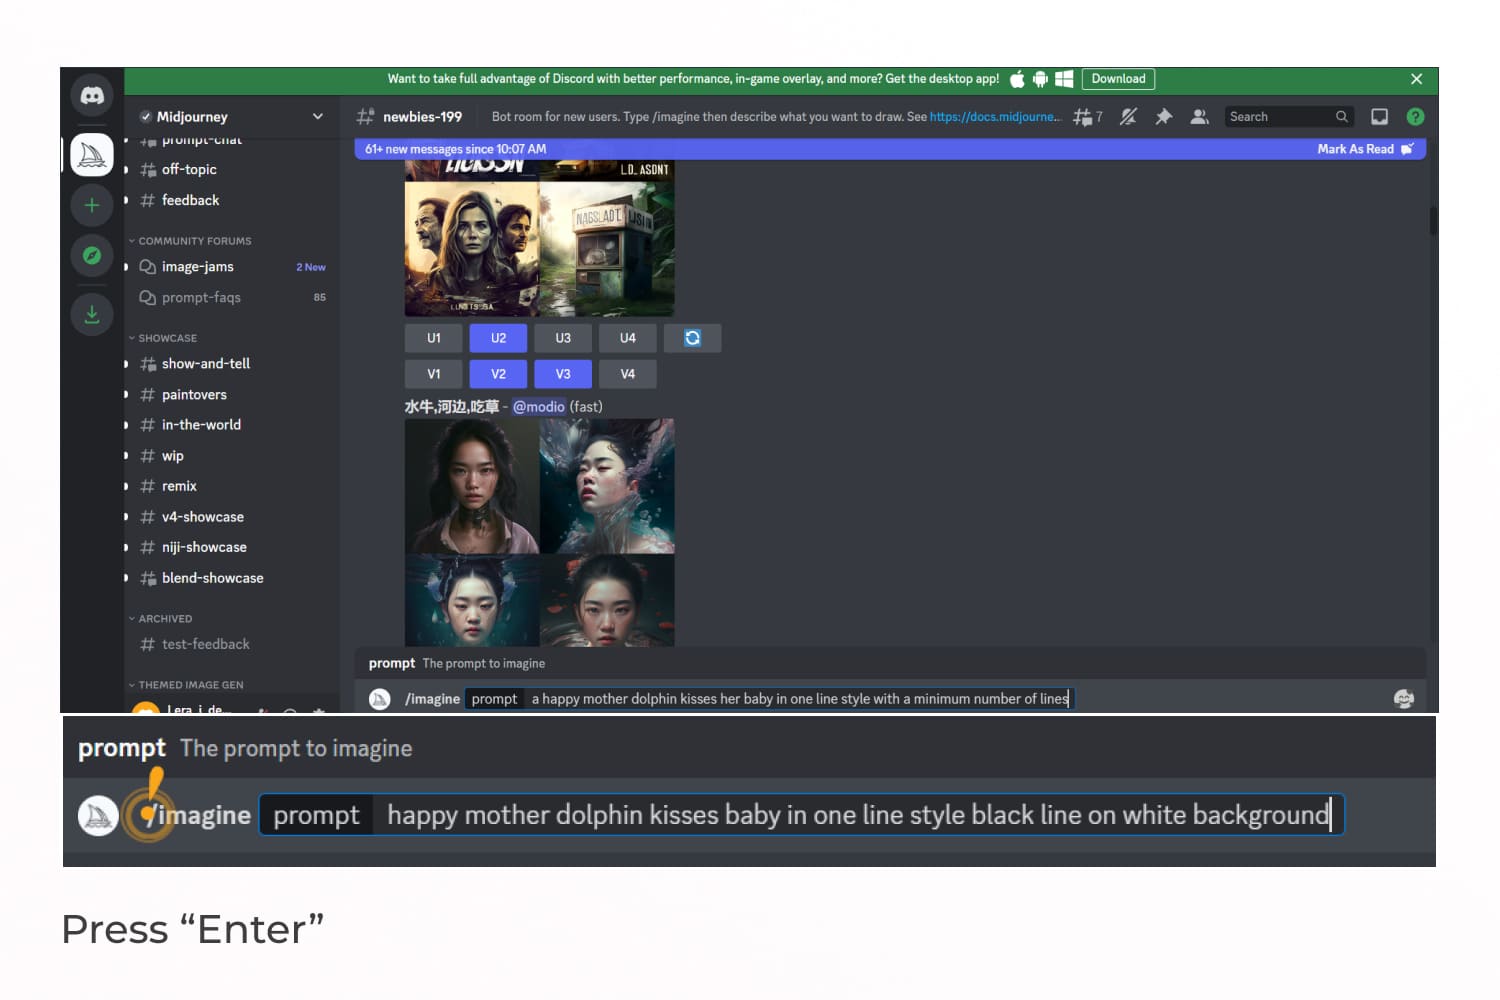
After you imagine it in your head, describe it as accurately as possible. For example, my query is: “a happy mother dolphin kisses her baby in one line style with a minimum number of lines”.
To generate, you need to click on + at the bottom of the screen and select the /image command. In the prompt, you need to enter your request and press enter.
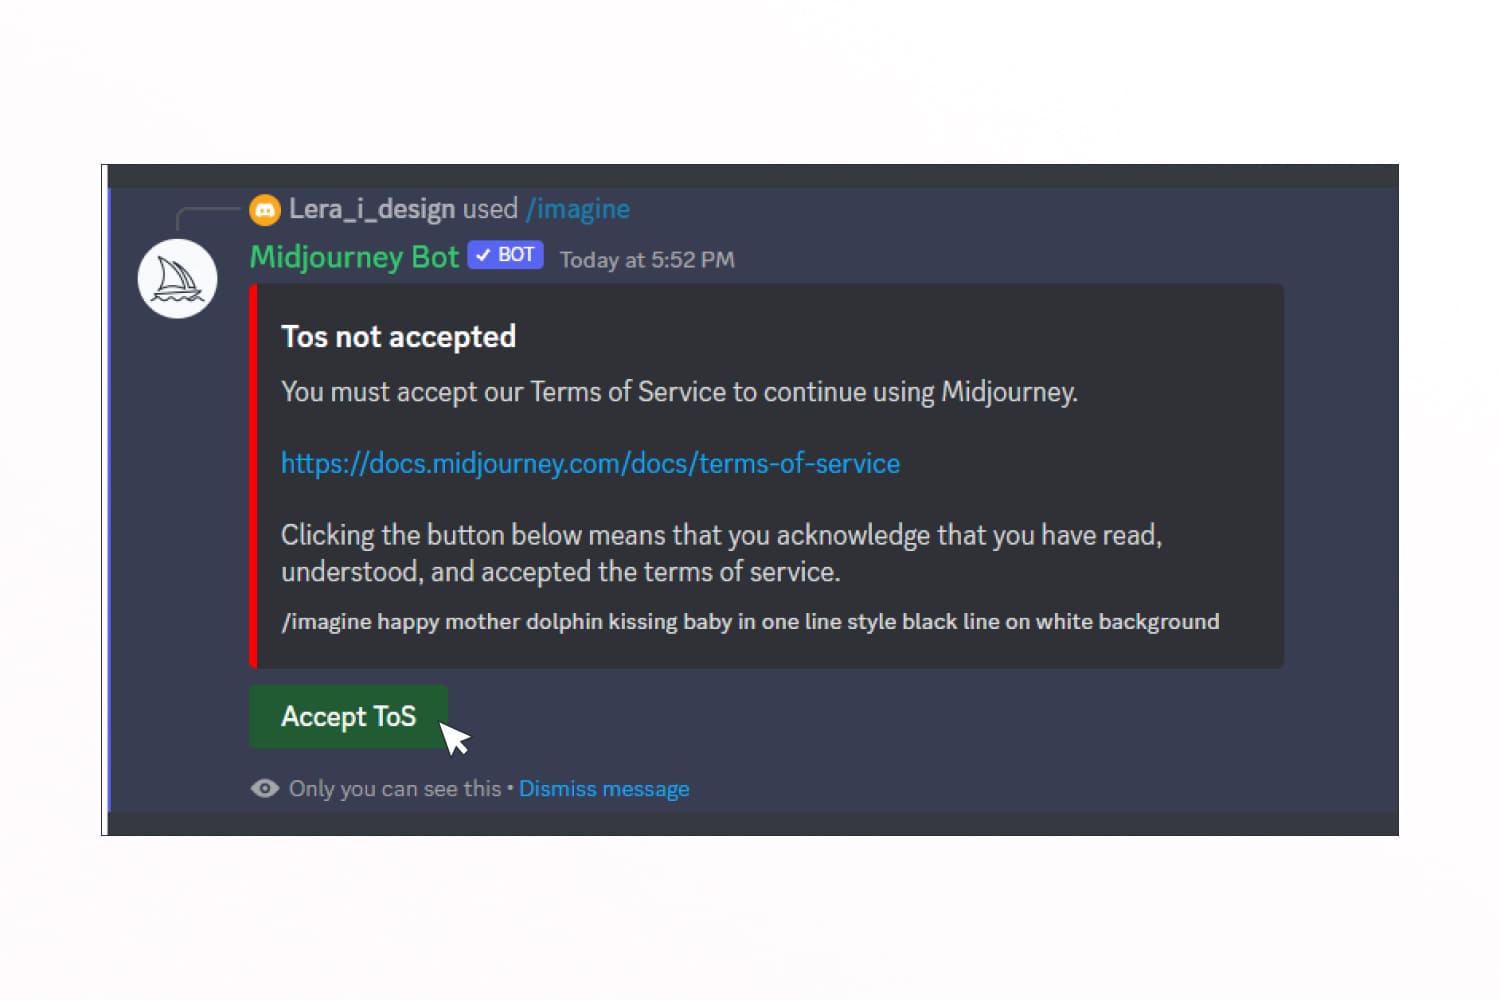
The first time you will need to accept the agreement to use the AI. Click Accept Tos and oversee the messages. Your design is already being generated 🙂
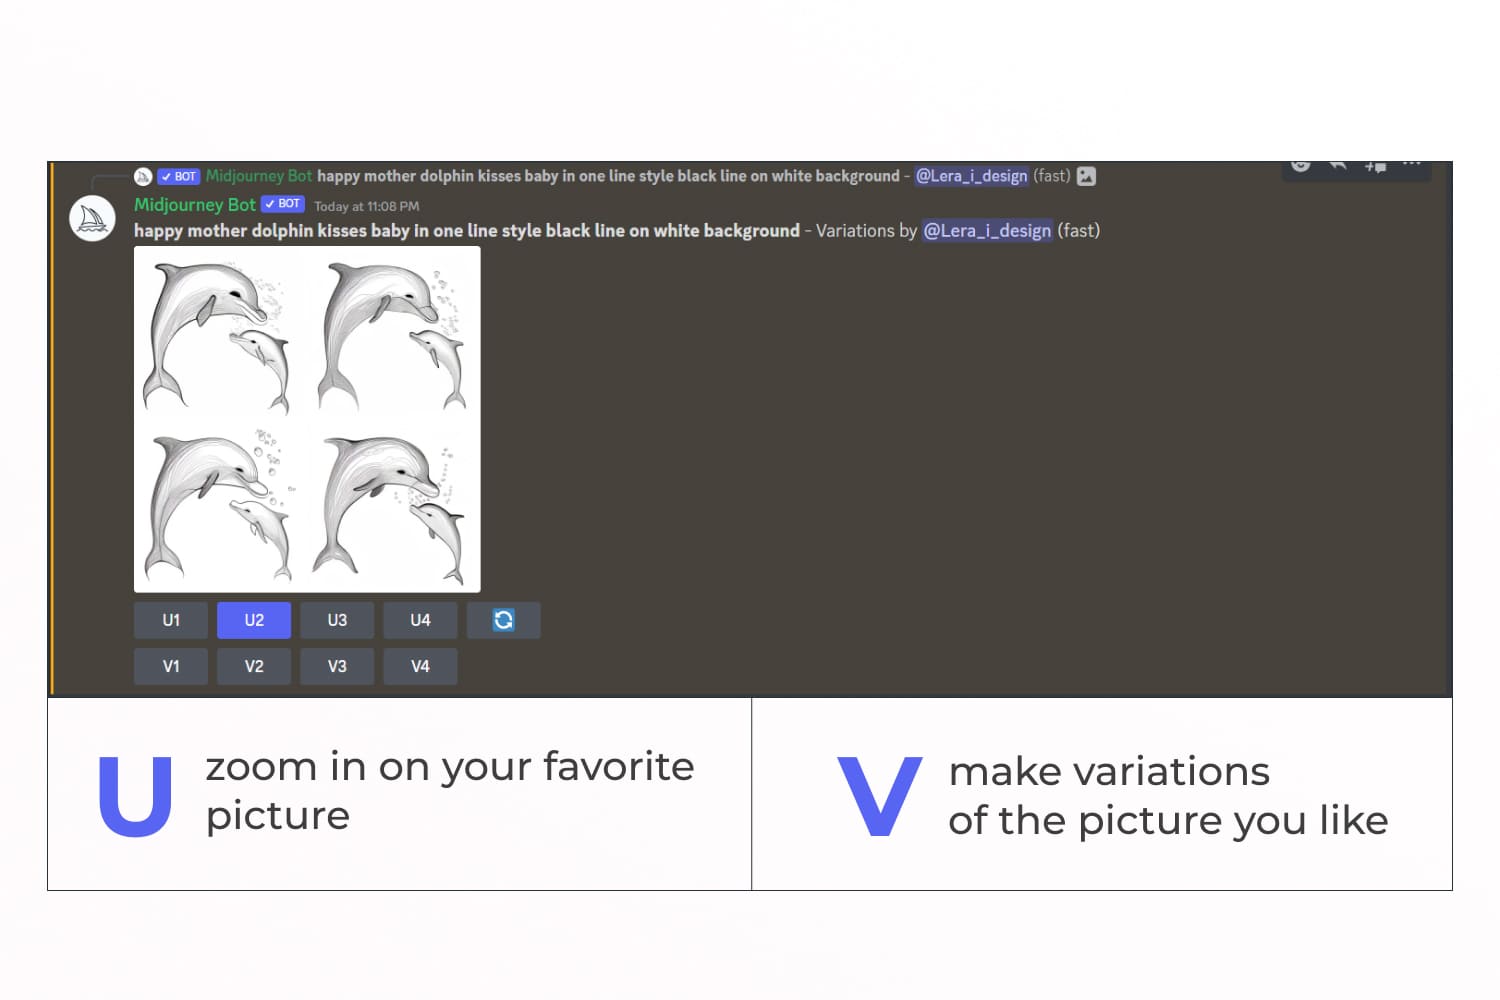
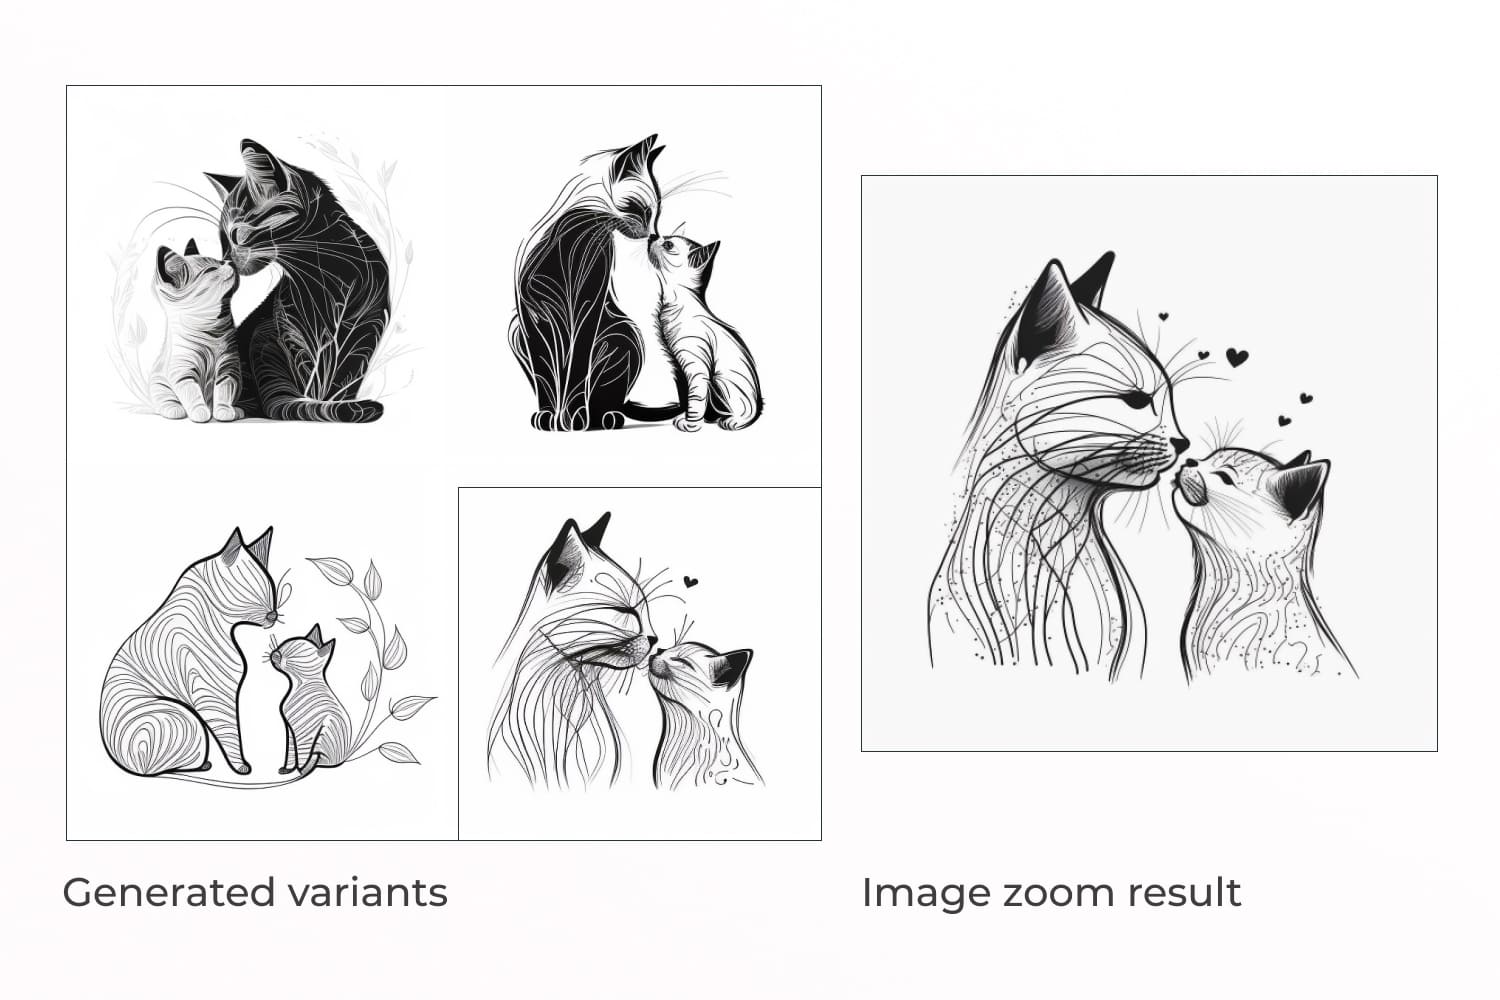
Within a minute or less, and then you get 4 generated pictures. I noticed that images are often generated faster in the morning. I think that in the evening more people have free time to experiment with it and therefore the load on the system is higher.
After AI work, you have the opportunity to zoom in on the one you like (U button) or make variations for it (V button).
What if you don’t like the options? You can do an update generation by clicking on the arrow button. Better yet, refine the description and submit a completely new request.
Save Design
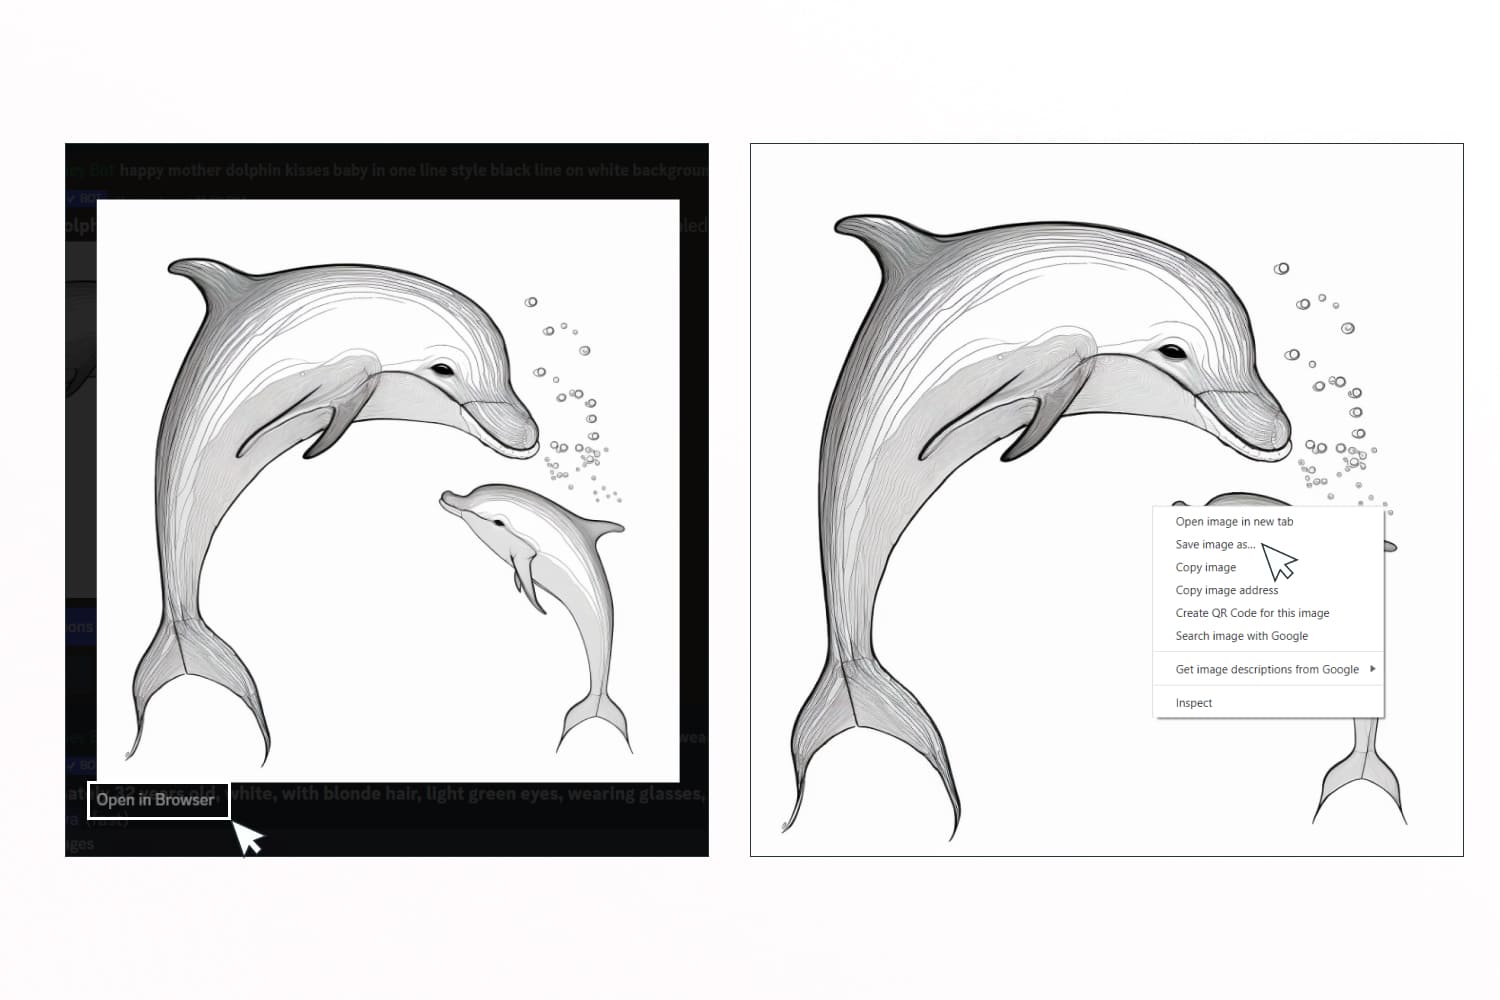
When you get a suitable option, then press the U button with the desired number. Next, click on the image and follow the link below it. This image will open in your browser in a higher quality.
Click on the right mouse button and save it to your computer. Ready!)
AI-Generated Design Post-Processing
Most likely, the generated design will require improvements. For example, remove unnecessary details in Photoshop or, on the contrary, add missing details.
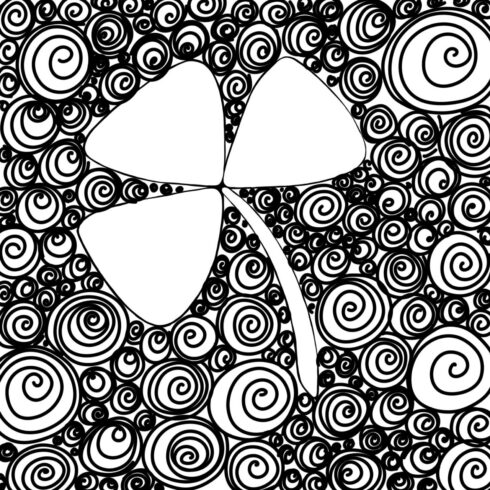
In my case, I need to convert the PNG to SVG because I want to get a vector image that can be edited.
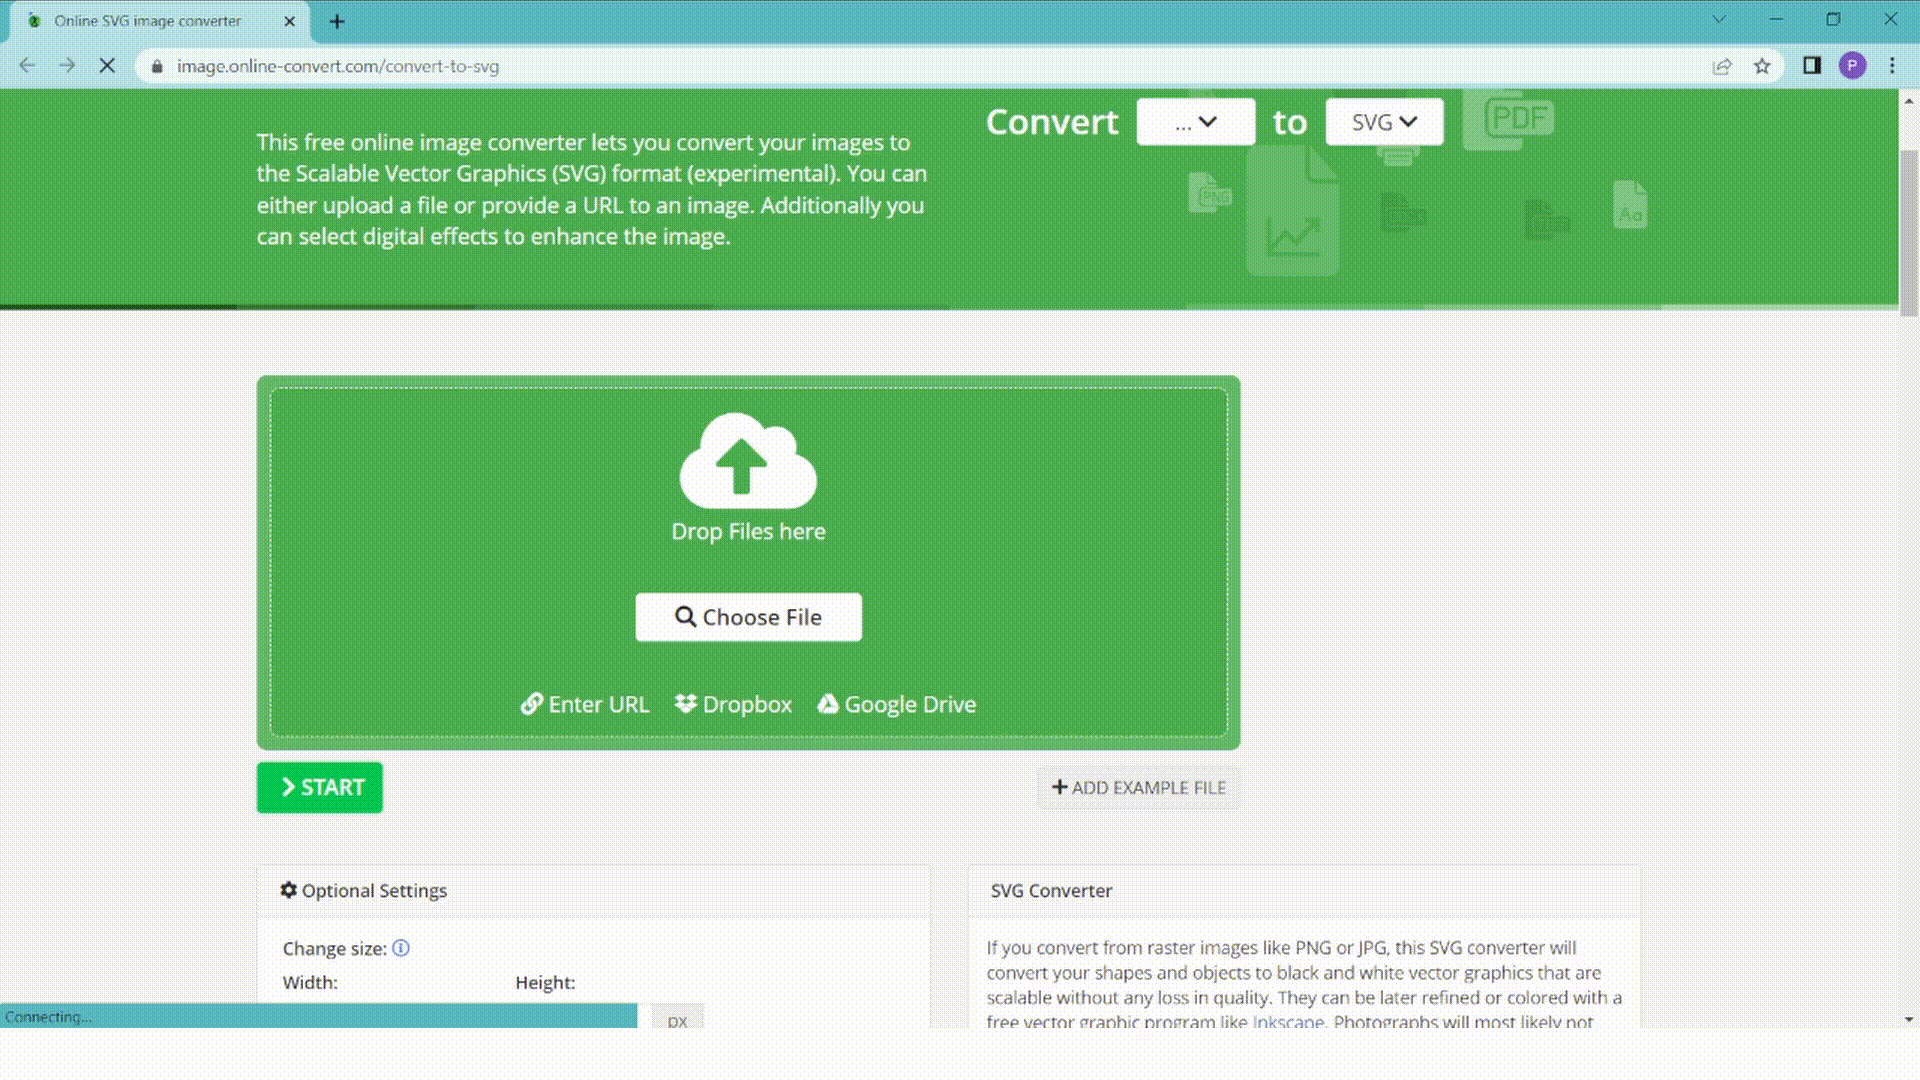
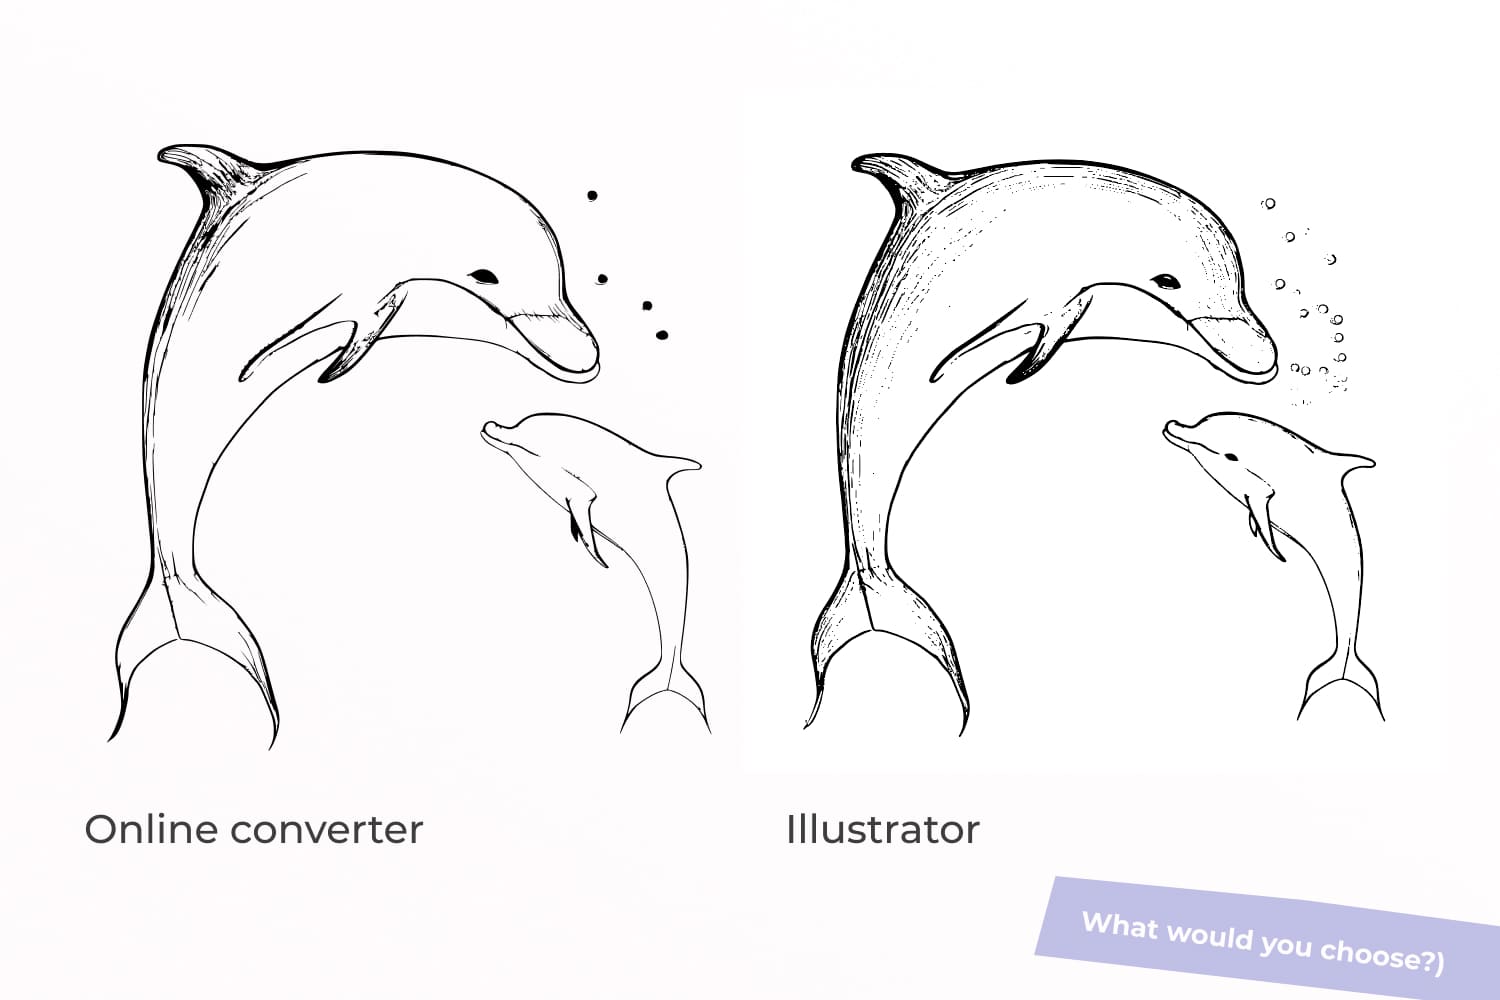
For this task, I tested converting files to SVG in Illustrator and in the online converter. This service is suitable for simple black-and-white illustrations where there are few lines and they are very clear. For example, icons or very simple one-line illustrations.
Using such a service is simple: go to the site – drag and drop your image – upload SVG.
Tracing through Illustrator gave a better and more professional result, so I recommend using it for such tasks.
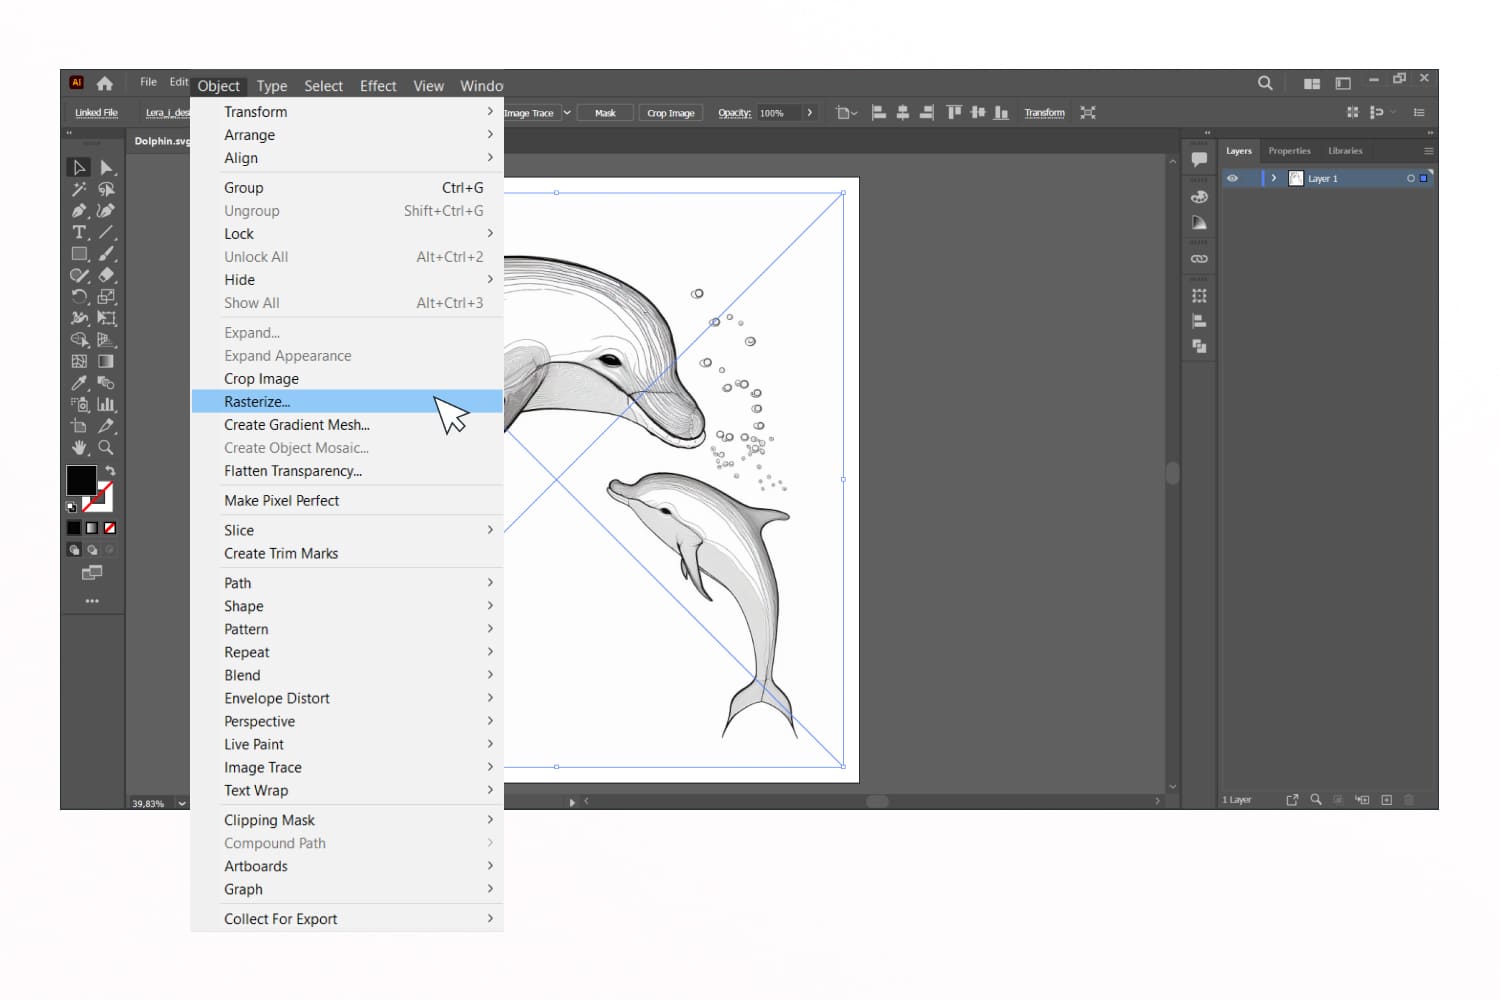
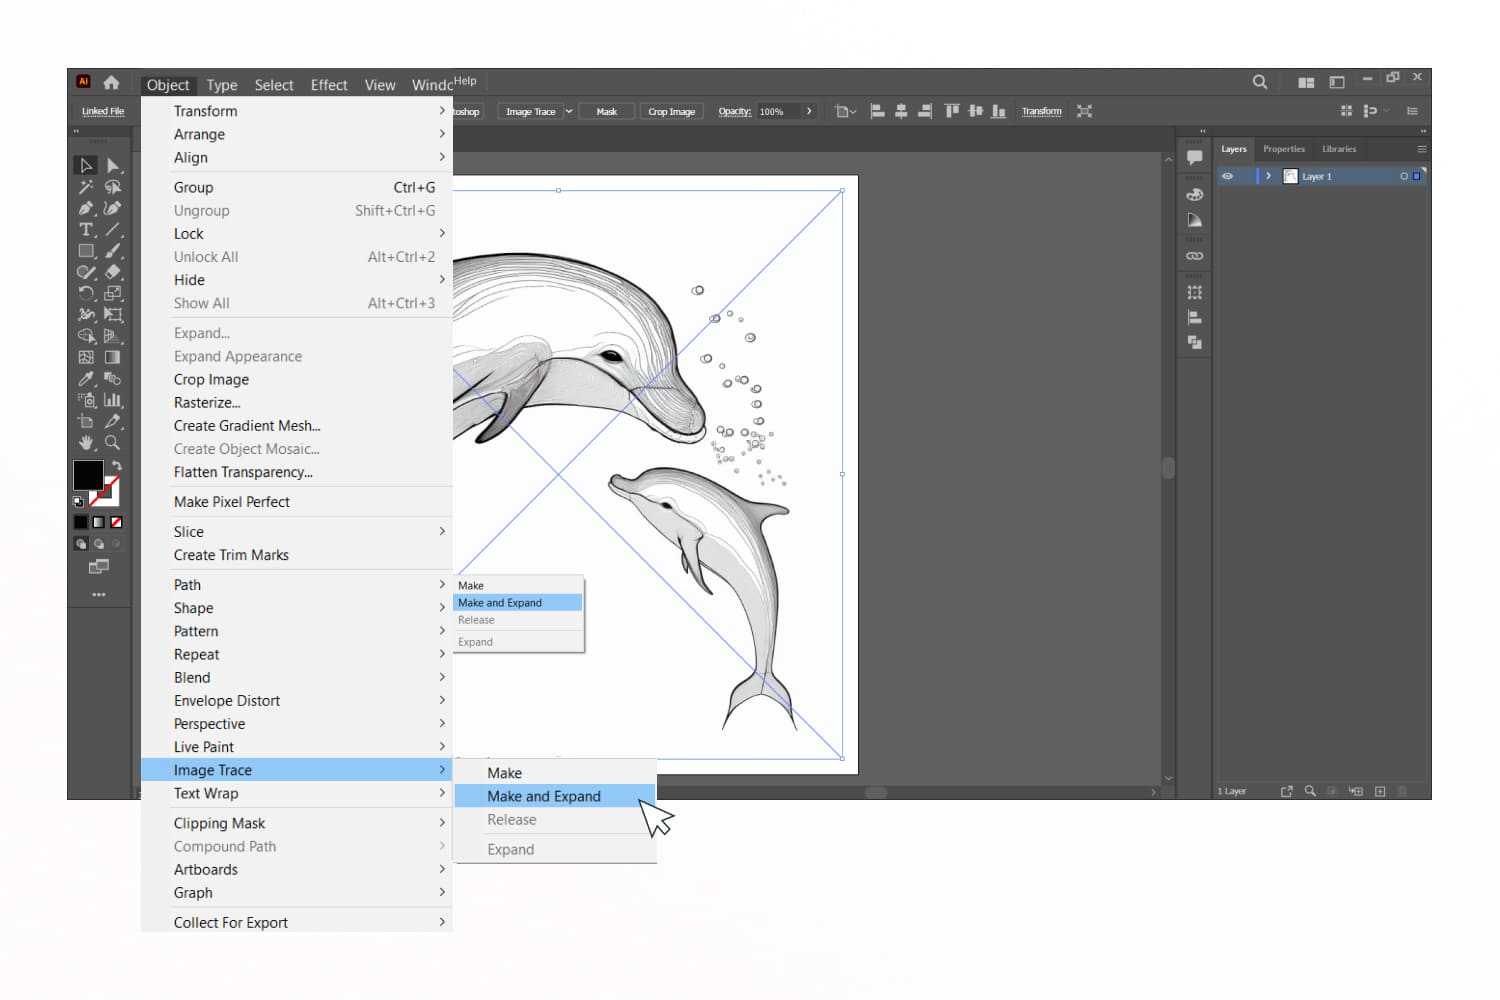
Okay, now go to Illustrator. I create a new project and add the resulting image there. Next, I use the image tracing function – this is how I get a vector contour.
It came out without clear lines, but I liked this sketchy effect as if drawn with a pen. I think that such an illustration would look great on a minimalist postcard 🙂
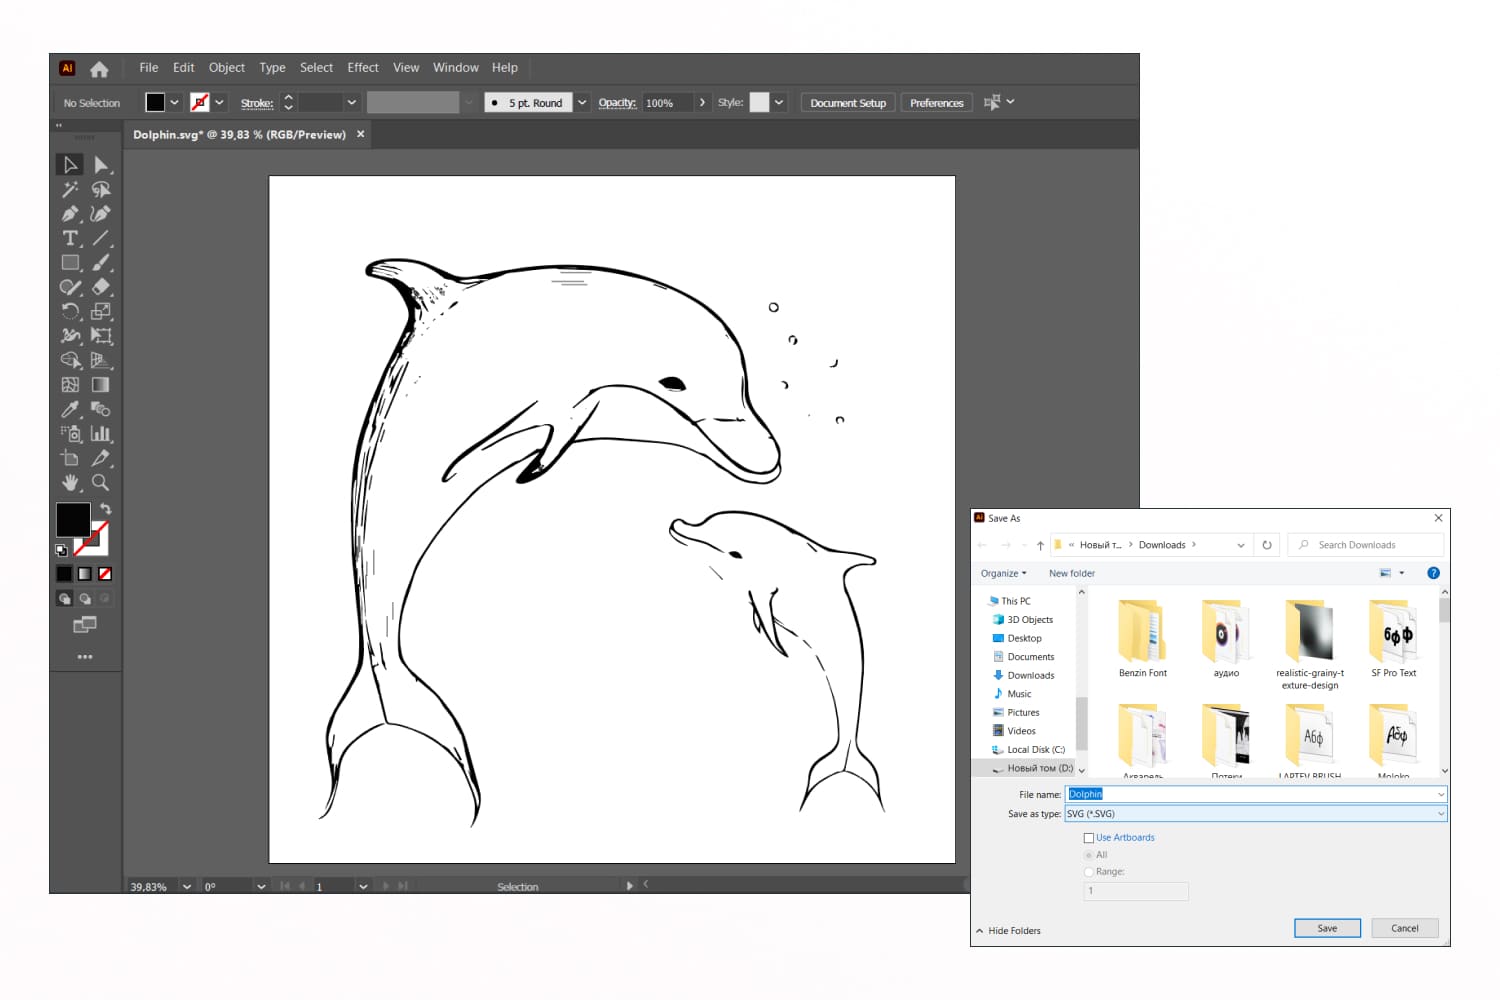
Now I’m saving this as an SVG and doing the same with the others for my collection of SVG illustrations for Mother’s Day.
Okay, the main work is done. Now it remains to design the product cards beautifully, and add mockups with illustrations so that it is clear how to use them. Always use mockups – it’s simply a must-have for presenting your design.
![Mother\'s Day Animals Cute Illustrations [SVG included] cover image.](https://masterbundles.com/wp-content/uploads/2023/02/preview-image-1-1-469-490x490.jpg)
The Real Experience of Working with Ai
When creating these products, I was faced with the fact that the anatomy is very distorted. My dolphins were wrinkled, three-finned, or looked like a shark 🙂 Although I tested different queries with refinements, I still did not get the perfect result. And so it was almost through one job. AI is especially bad at working with text and letters/numbers in general.
Basically, a cool result is obtained on futuristic queries, 3D animals, landscapes, abstractions, silhouettes, and cartoon characters. Although, I have seen some very cool options with realistic people, but less often than the list above.
I also don’t recommend using logos generated by Ai. They are more like illustrations – complex, multi-layered, and non-adaptive. But I’ll give a firm YES to using this network for inspiration and new ideas.
A very interesting point that should be taken into account is that when you choose to enlarge the image, the result will be slightly different. That is, you do not get an image 1 in 1 with the one you chose.
How to Sell Your Work?
I uploaded my work through the handy Sell Your Deal form. I like that everything is clear and convenient here. There are also detailed instructions so that there are definitely no questions left. It’s very user-friendly.
MasterBundles has convenient payments and account management, cool technical support, and they are actively engaged in attracting people to the platform.
Hooray! I showed the complete process of creating a design product using AI. It wasn’t as easy as it might seem. For a good result, you need to put in enough effort.
Train and use all new discoveries as tools, not as your “enemy.” Develop your thinking, upgrade yourself as a person, and then no AI can replace you.
What are your concerns?
Thanks for your response!
Disclosure: MasterBundles website page may contain advertising materials that may lead to us receiving a commission fee if you purchase a product. However, this does not affect our opinion of the product in any way and we do not receive any bonuses for positive or negative ratings.