How to Add Fonts to Google Docs and Google Slides
Fonts are a very important aspect of any online or offline project. Sometimes it seems impossible to find a great typeface for a presentation. Or maybe you want to find some unusual typography for an essay and do not know what to do or how to do it.
If you are wondering how to add fonts to Google Docs and Google Slides, let’s figure it out. Google Docs and Google Slides have long been very popular applications with many people. And for good reason, because you can do anything there and not worry about it being lost or deleted. After all, Google stores all the data securely in the cloud.
Nevertheless, many people feel limited by the small selection of fonts they can use. Google offers more fonts than it seems at first sight. However, if you need an elegant script or a monospaced font that isn’t already available, you can easily add it.
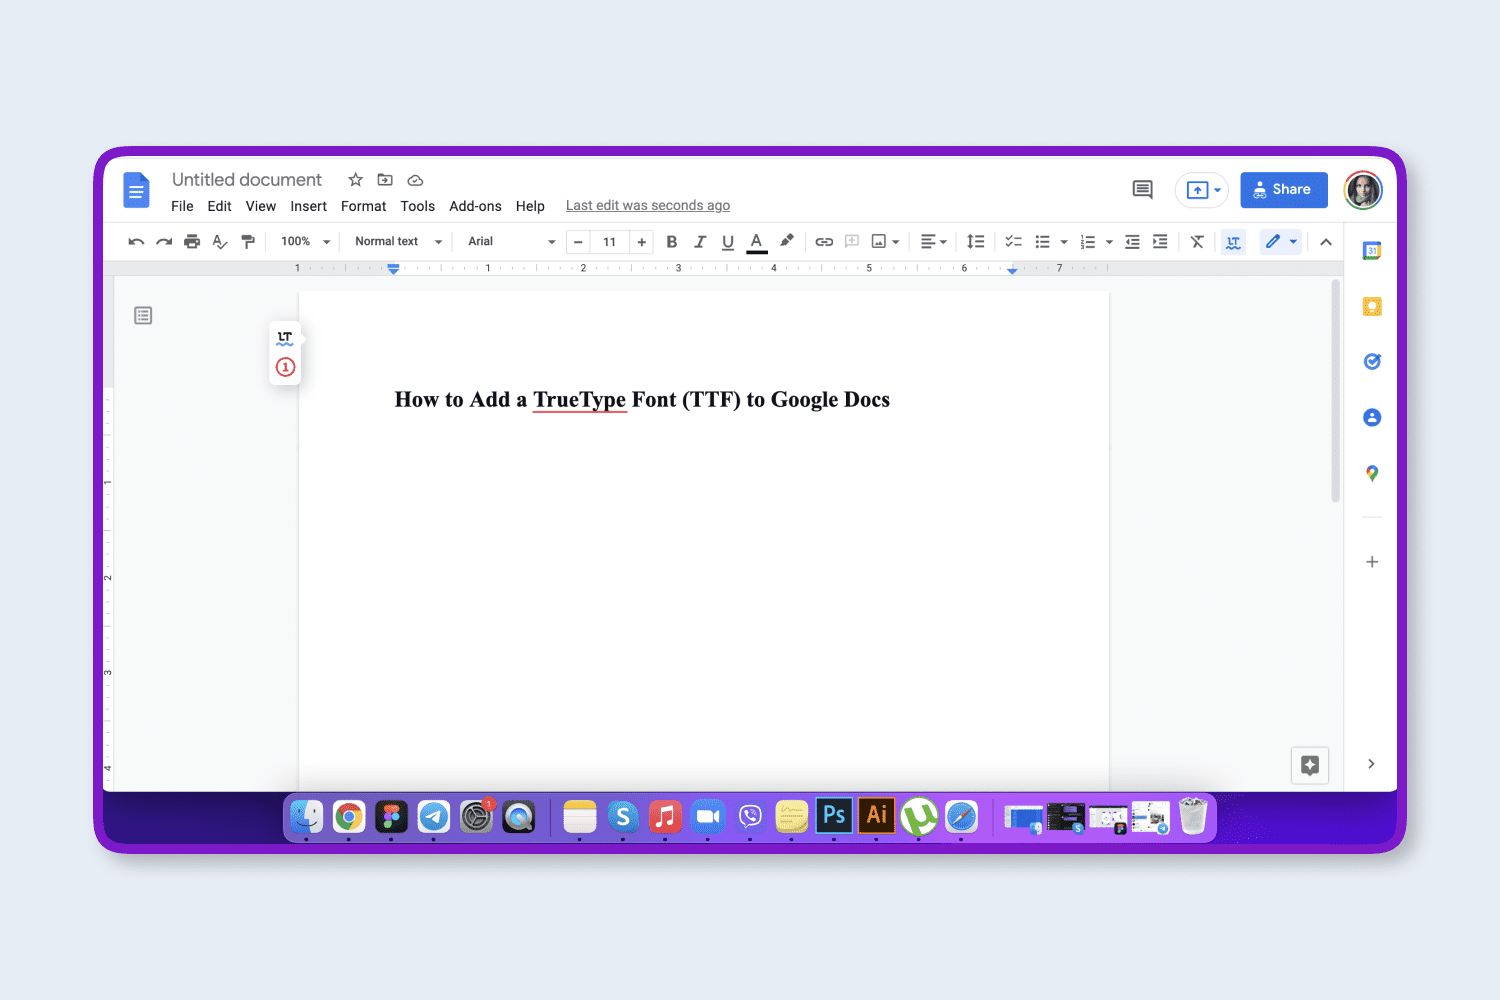
How to Add a TrueType Font (TTF) to Google Docs
Unfortunately, you cannot add typefaces found on different sites to Google Docs. Instead, you will have to rely on Google’s built-in font selection. A quick and easy way is to use the Google font library. Follow these steps to add some amazing scripts from the library to the standard list:
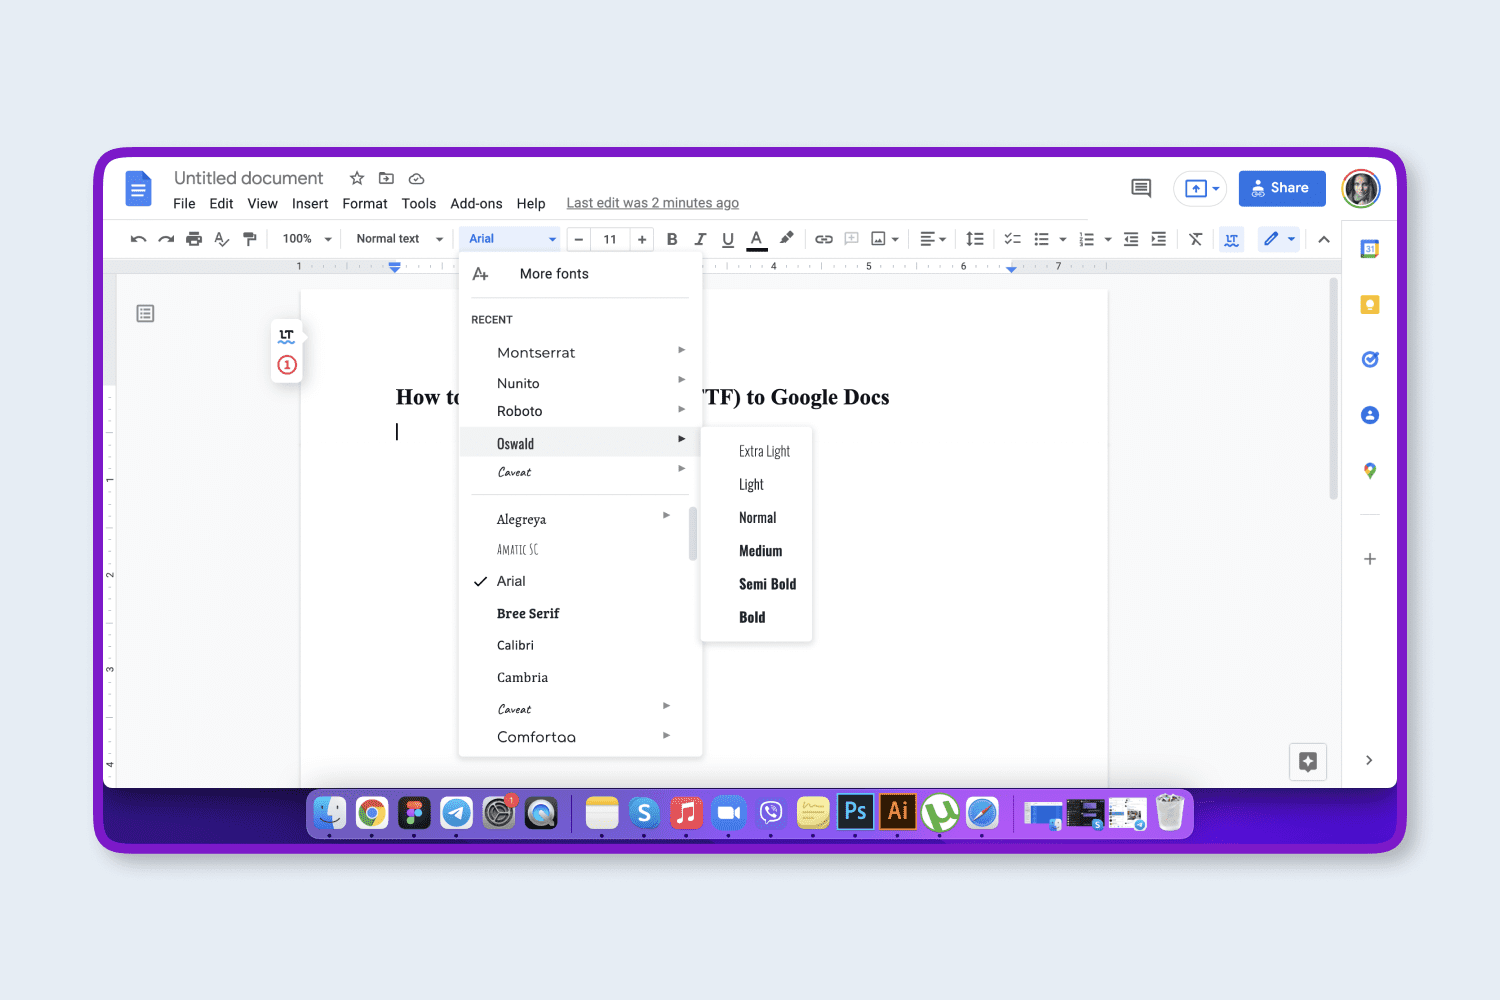
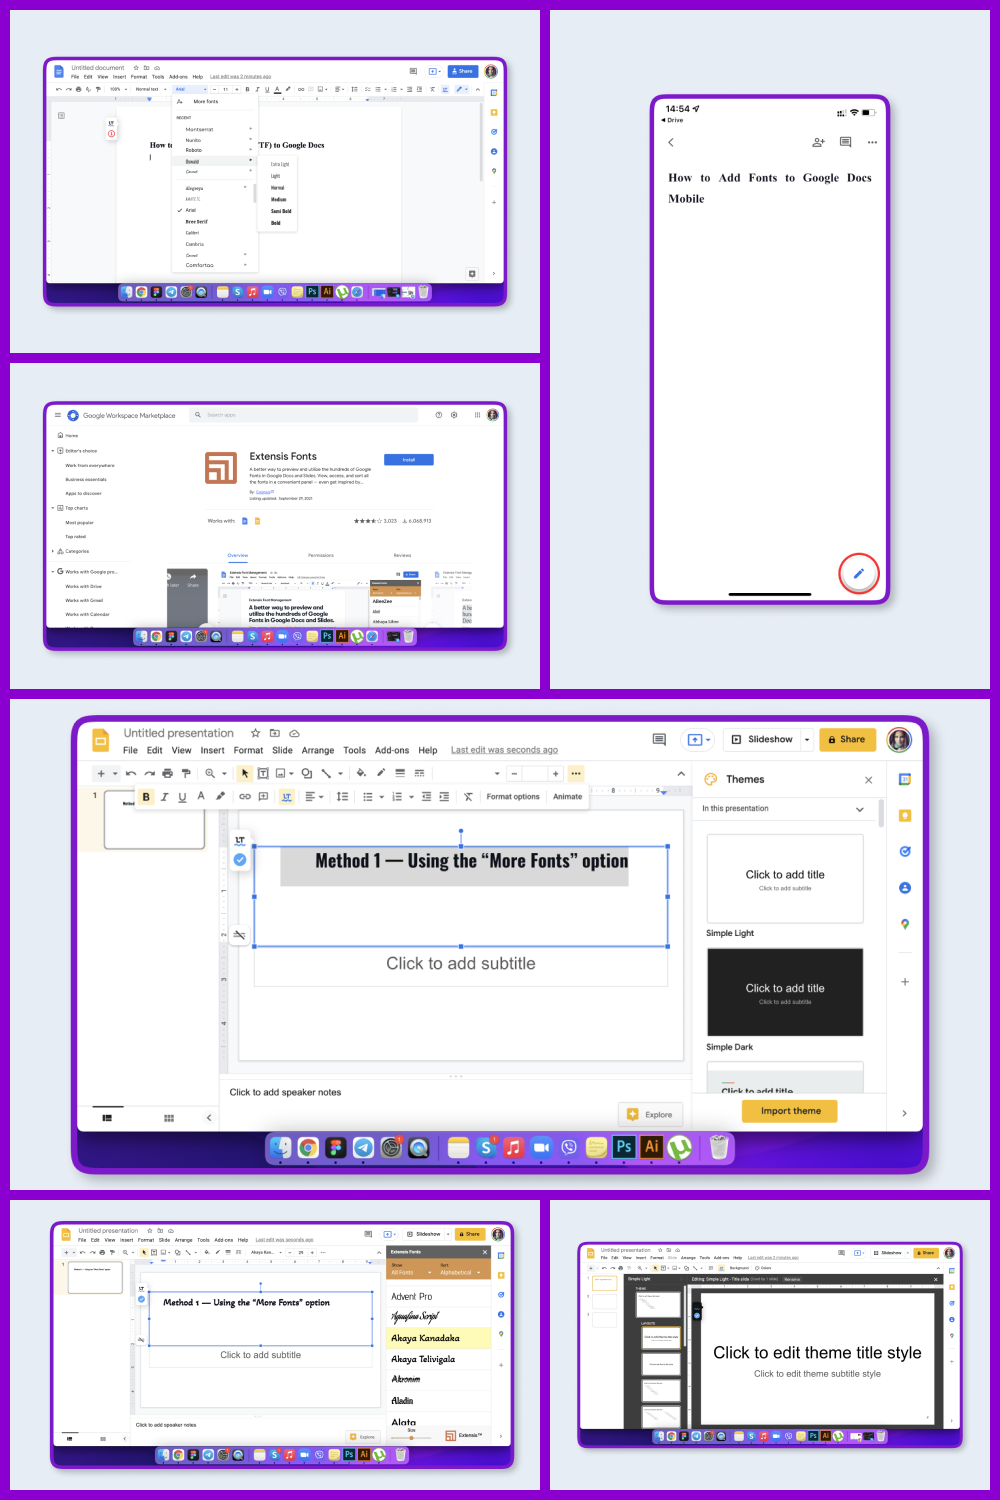
Open Google Docs and click More Fonts in the font selection menu.
In the window that opens, select the typefaces you want.
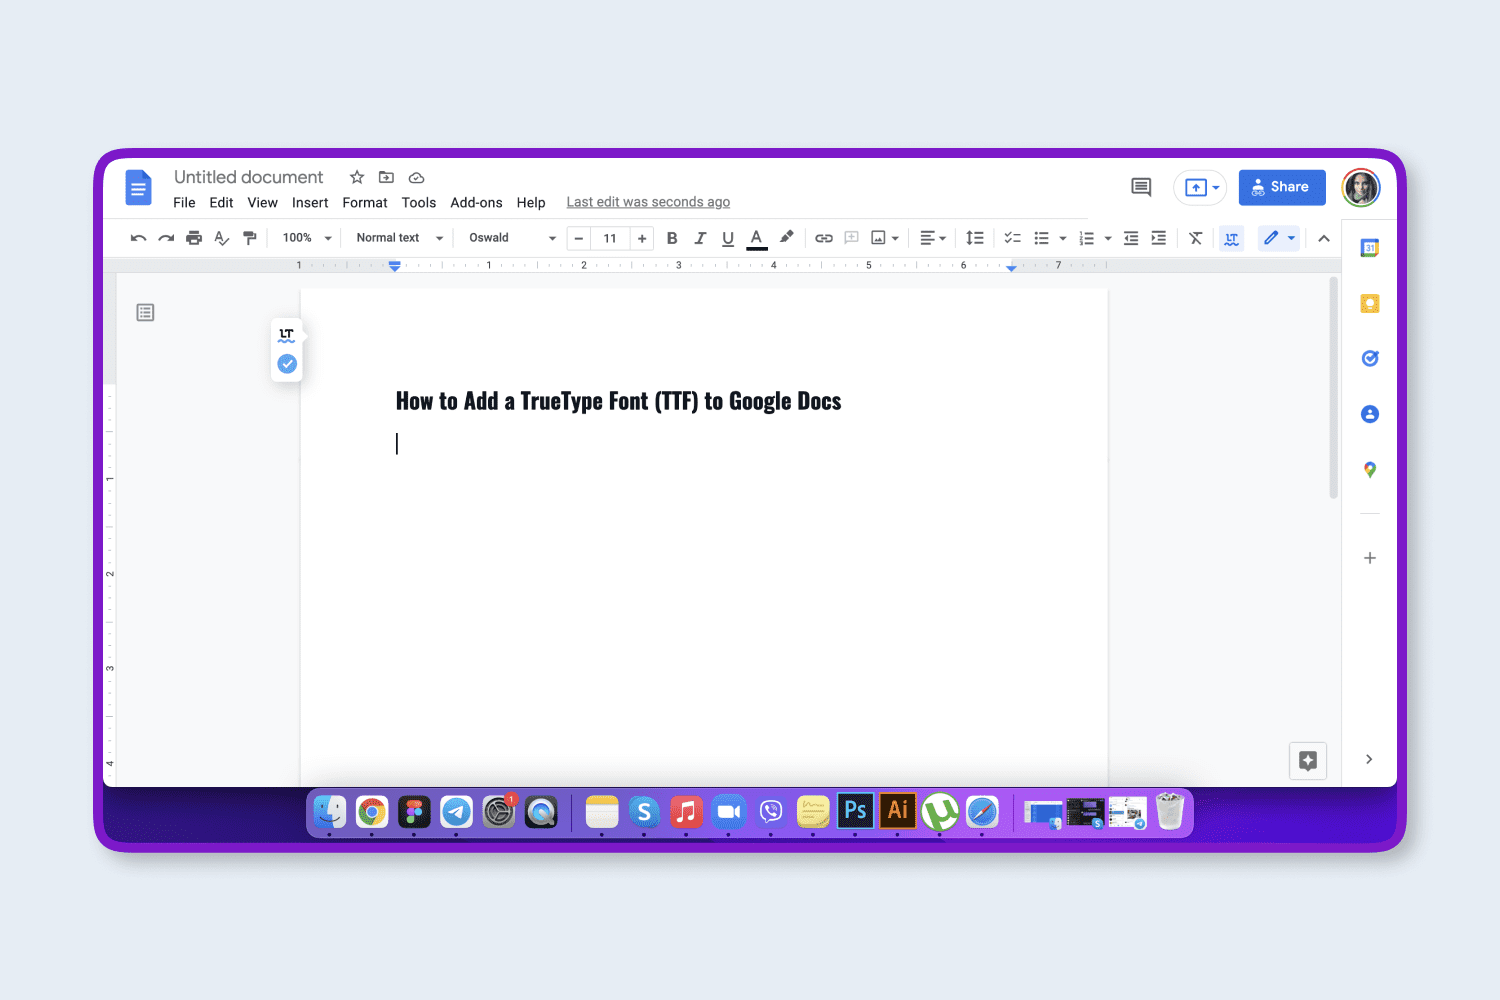
Then you must click OK, and now they can be used along with the standard set.
How to Add a TTF to Microsoft Windows
For the Microsoft Windows operating system, you can download any font from a variety of sources. This also applies to the TTF format, because such typefaces work perfectly in this operating system. To add a TTF font in Microsoft Windows, do the following:
Download the font files. Most often they are distributed in archives, as there may be several variants of the same font, such as saturated and unsaturated.
After downloading, unzip the files if they are compressed. Then you will see all available font files.

Next, simply right-click on the typeface you want and select the Install function.
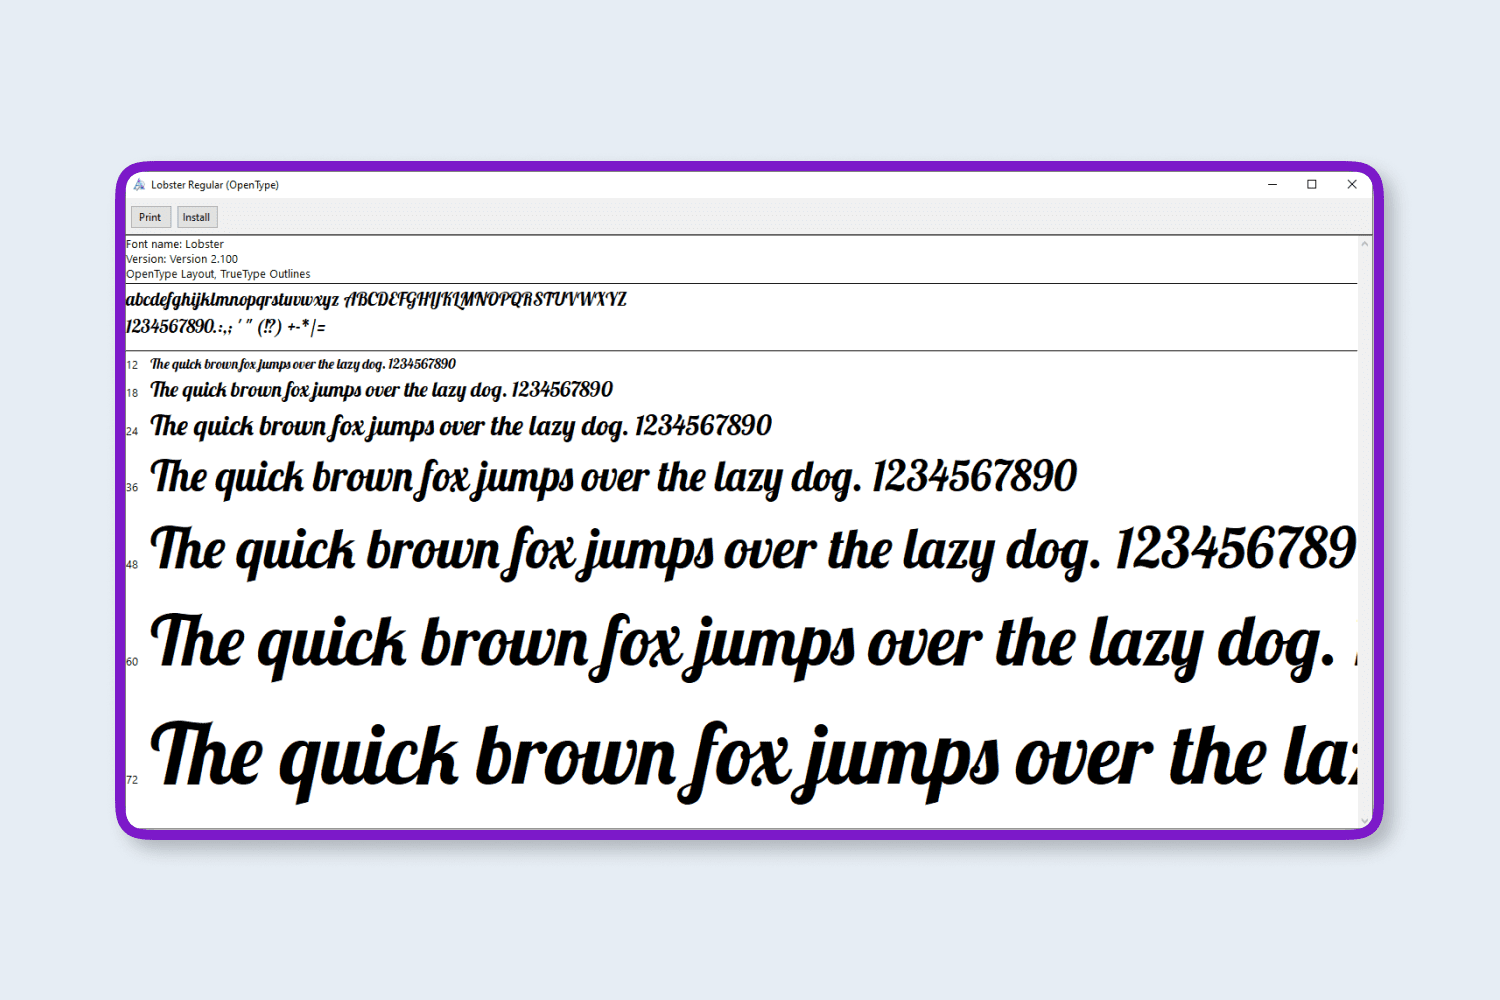
If you are prompted to allow the program to make changes on your computer, and you trust the font source, click the Yes button.
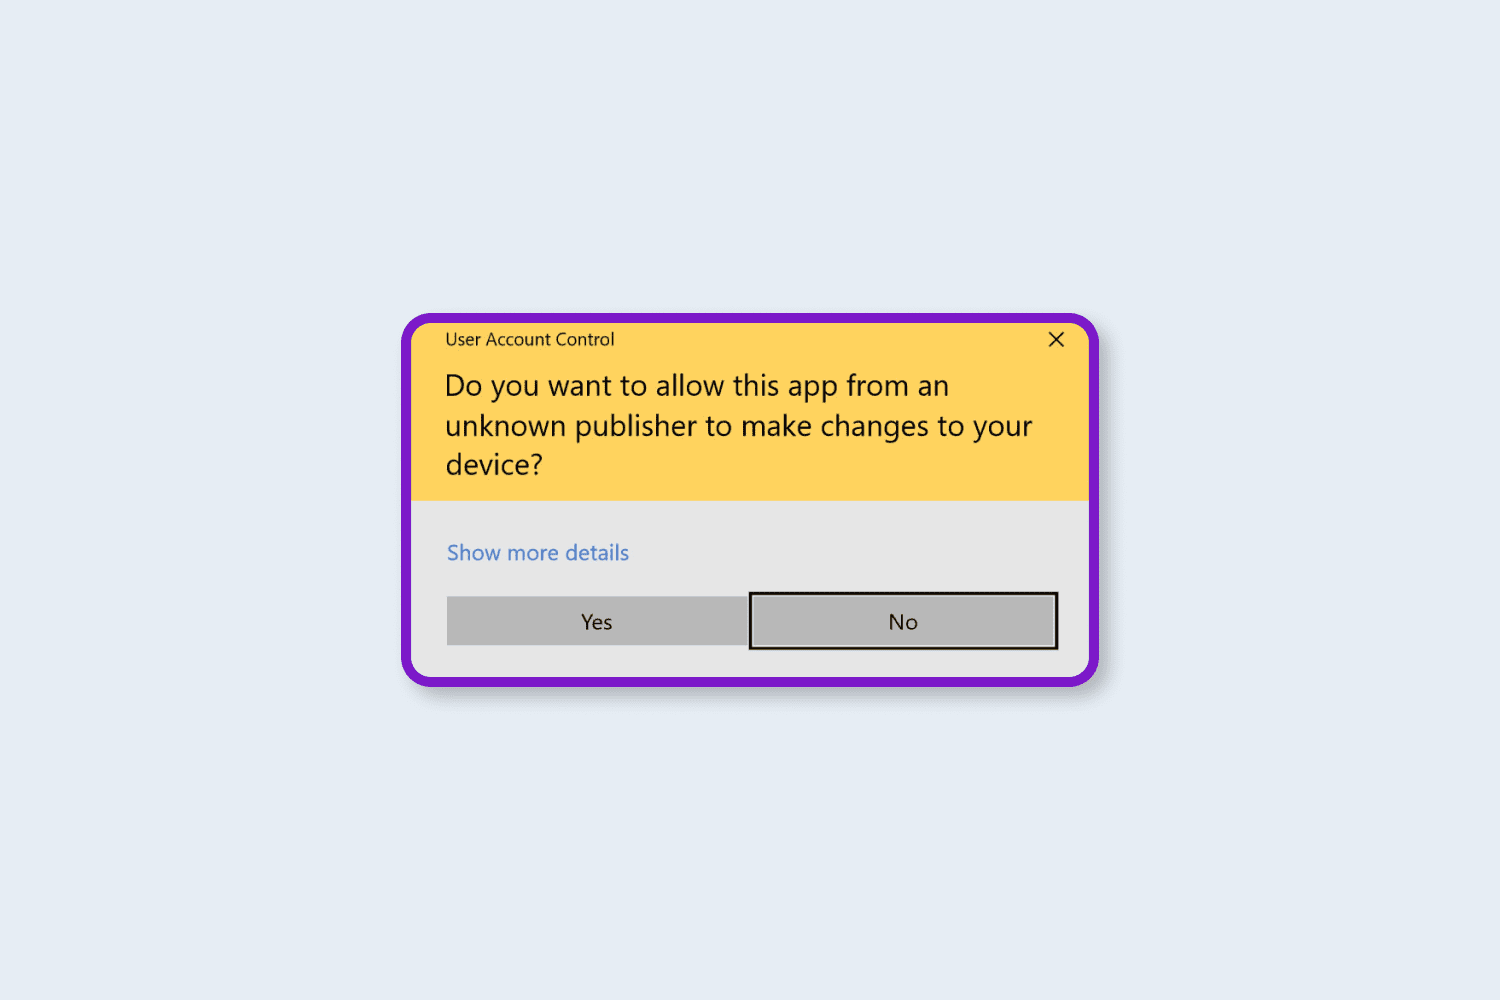
After these simple manipulations, the font will be installed and ready to use in many different ways. However, there is another fairly easy way to install a font in the Microsoft Windows operating system. It can be achieved by this means:
All fonts on your computer are accessible in the folder C:WindowsFonts. To have a font automatically installed, simply drag the unzipped font files to this folder.
How to Add Fonts to Google Docs Mobile
You can also change the font in your documents in the Google Docs app for Android and iOS. This app lists all available typefaces on one screen for selection. Follow these steps to reach your goal:
Launch the Google Docs app on your phone and open the document.
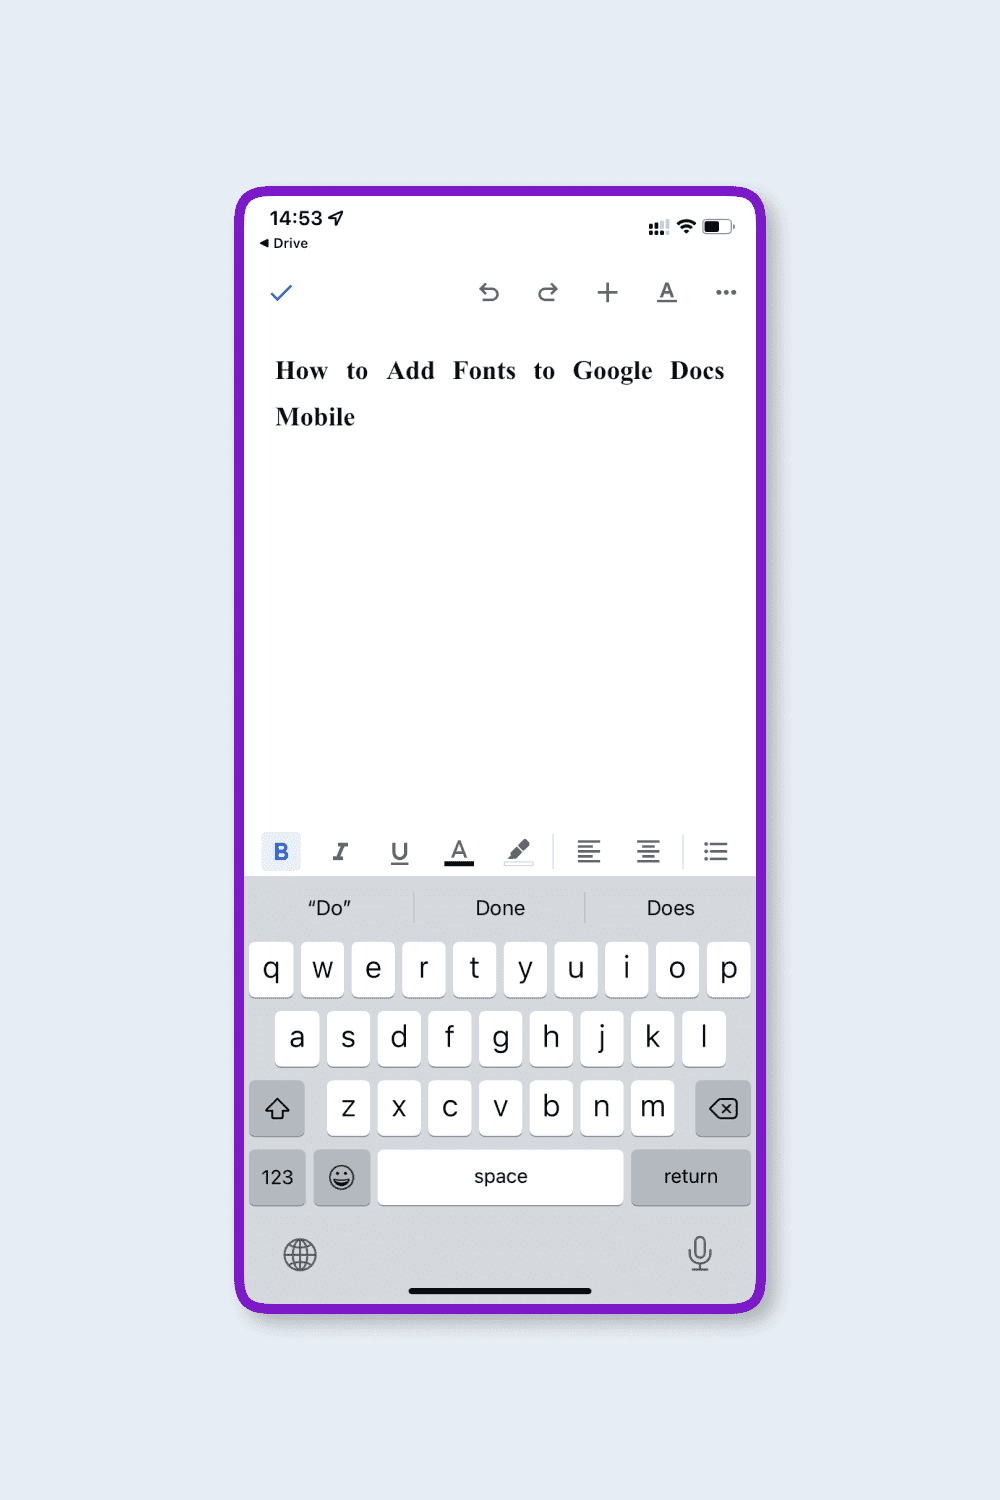
Click the pencil icon in the lower right corner to edit the doc.
![]()
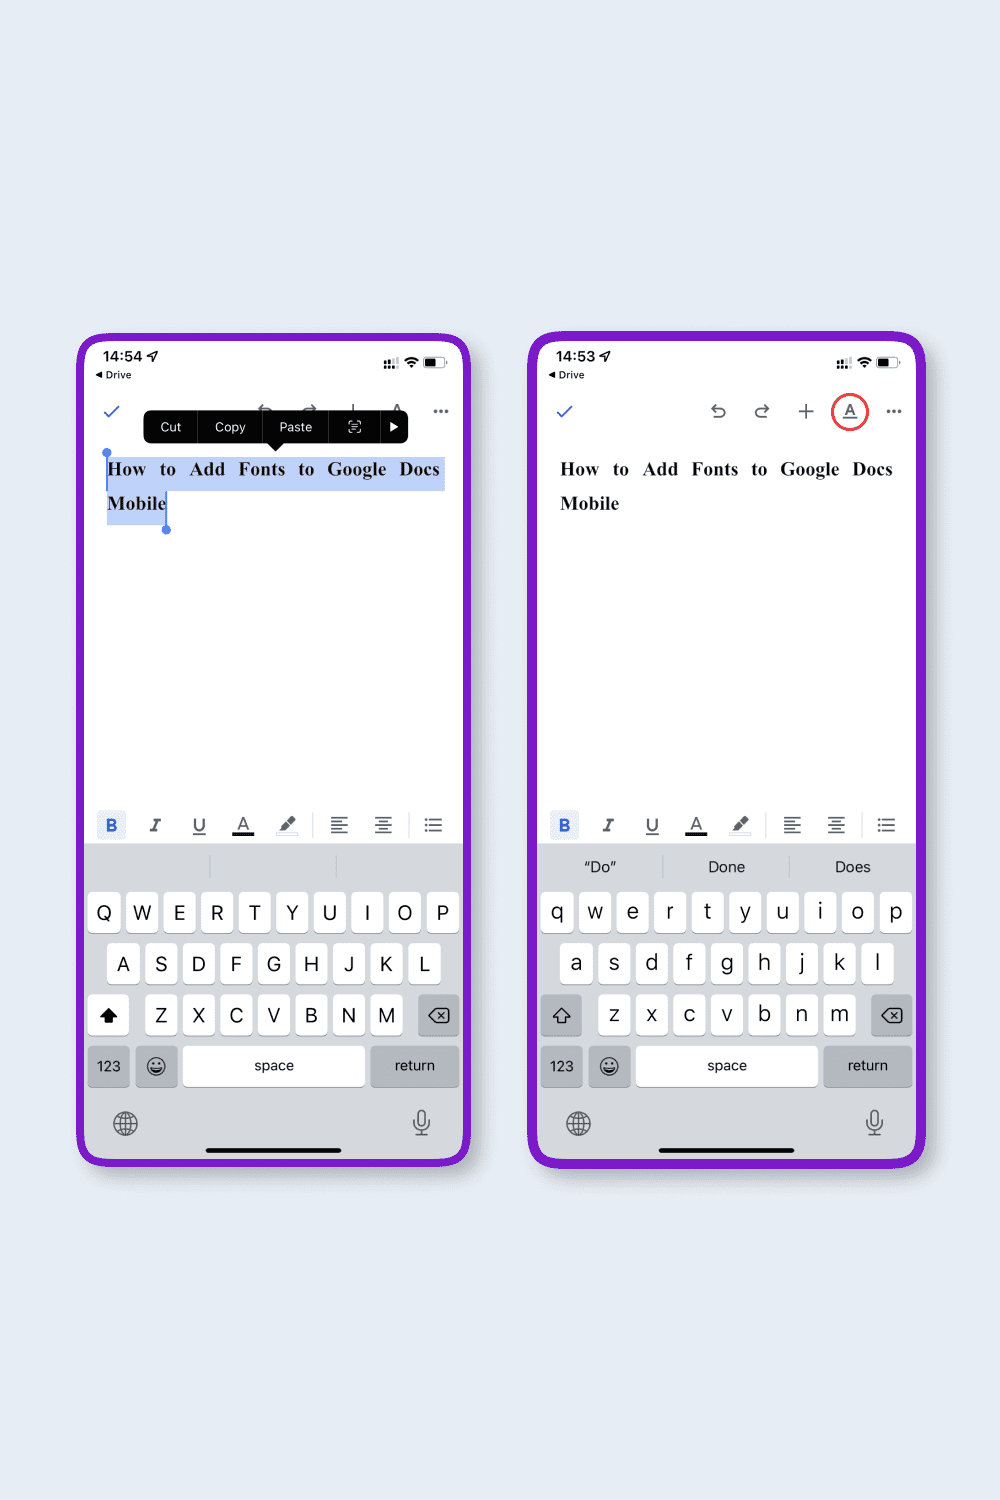
Tap and hold the text for which you want to change the font. Click the A icon at the top to open the formatting menu.
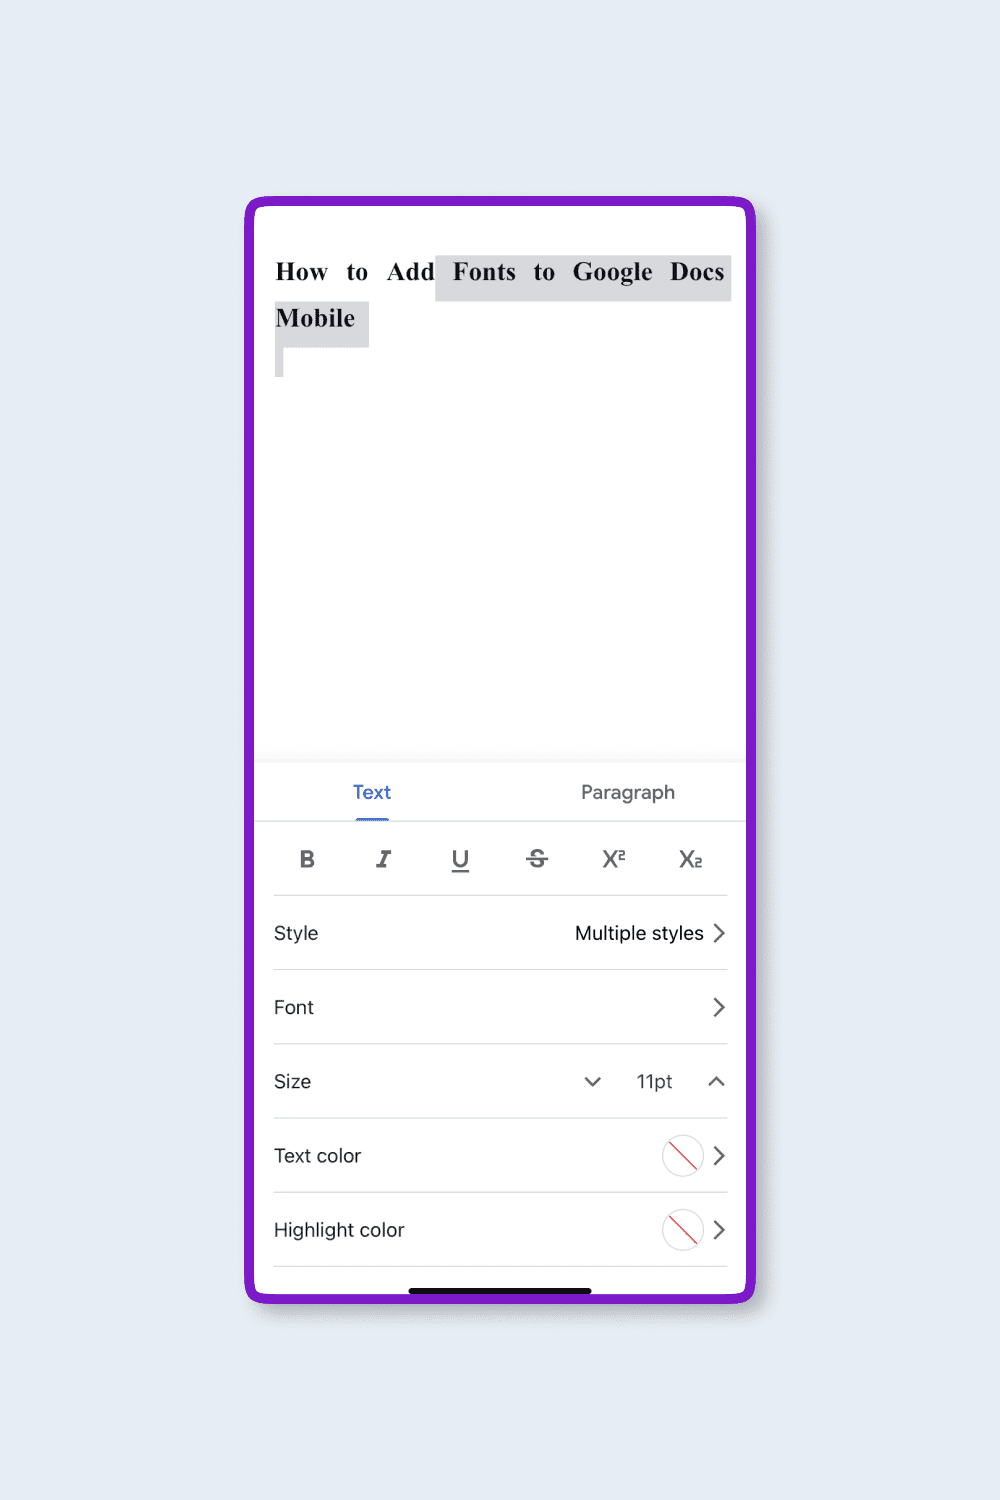
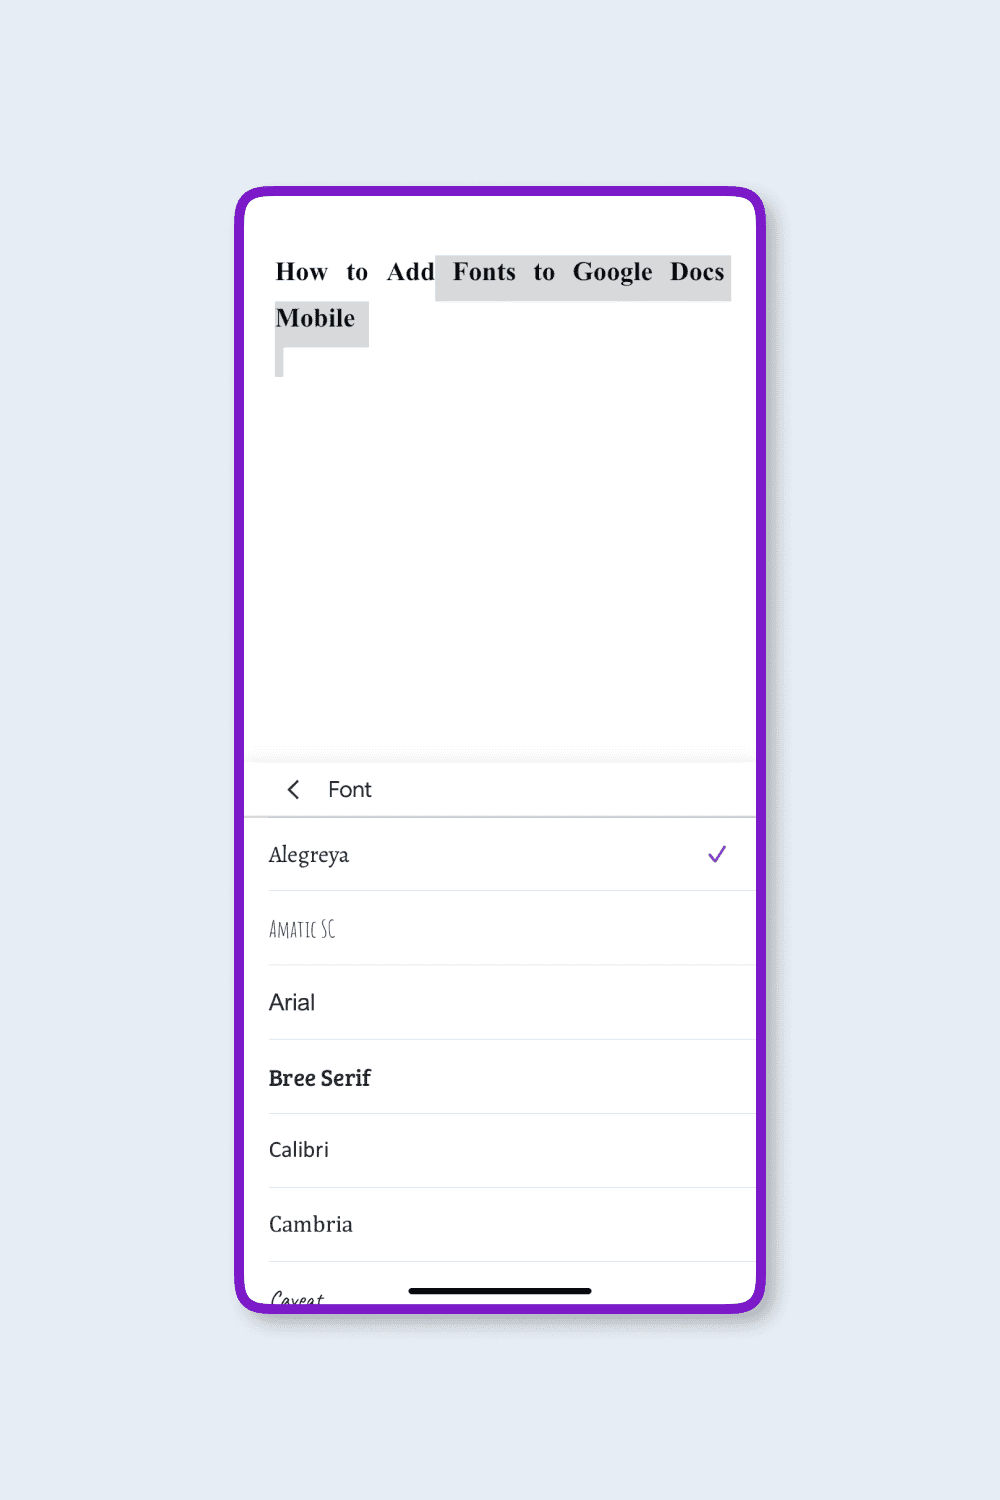
Select the Font option to view the available scripts.
You should now have a scrolling list of typefaces. Scroll down, find a font you like, and click it to use it in your document.
How to Add Fonts to Google Docs on iPad
Google Docs is a convenient service for working with texts. Thanks to the built-in tools you can create text formatting in a few clicks, changing different settings as needed. Many people choose to work not only on the PC, laptop, or phone. They also use iPads for this purpose. Now we will explain the process of adding fonts in Google Docs on the iPad:
Open the Google Docs app.
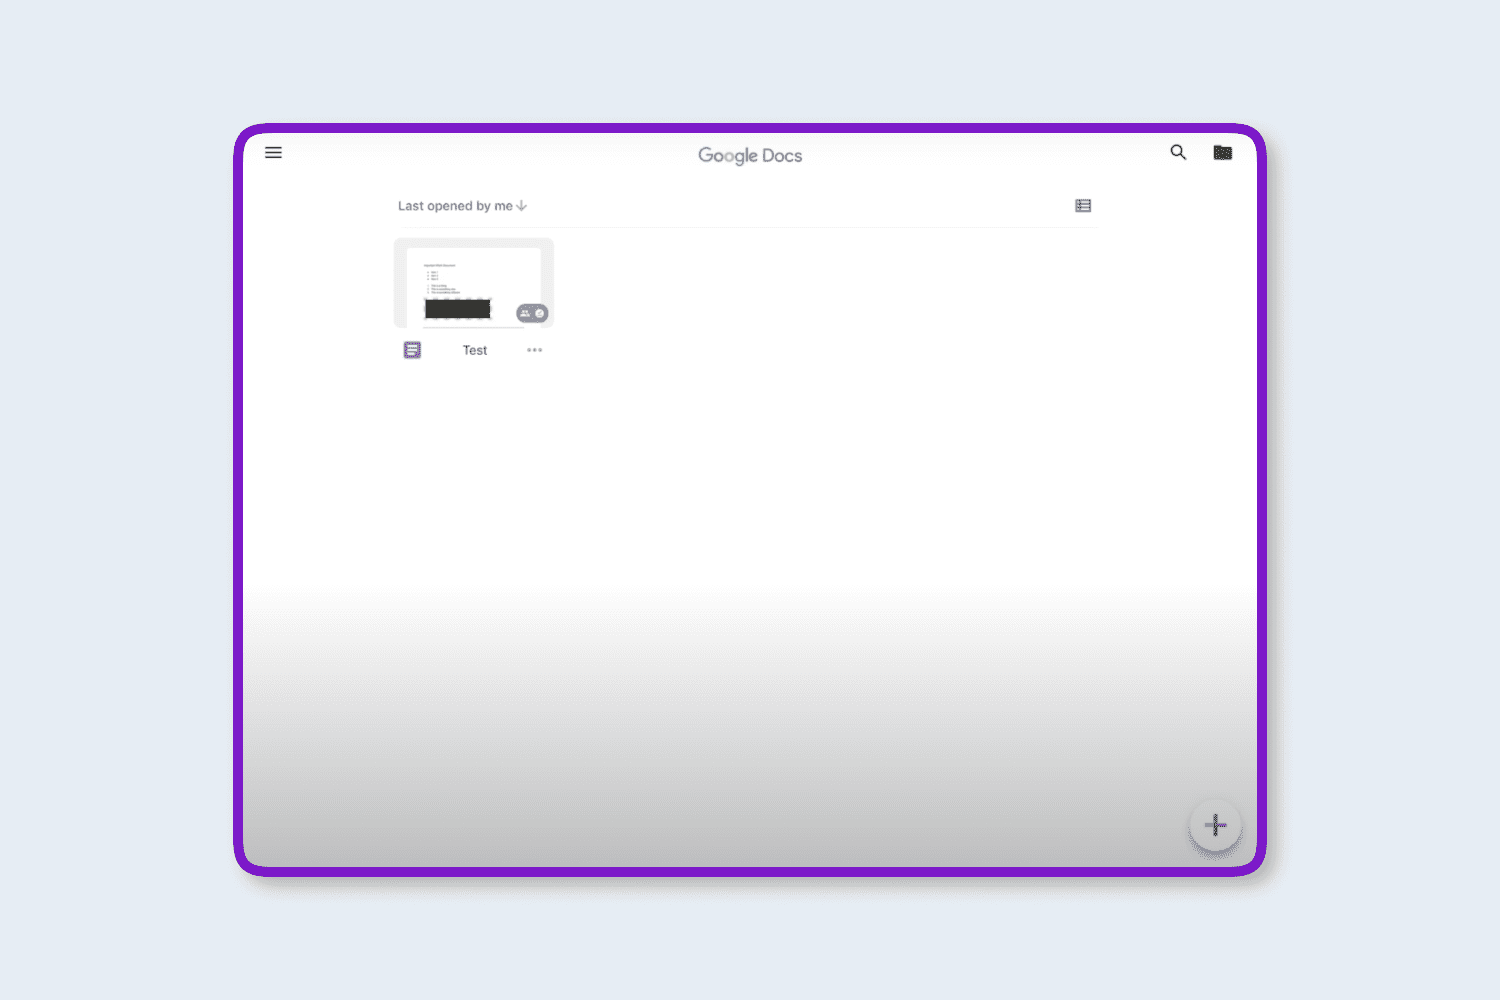
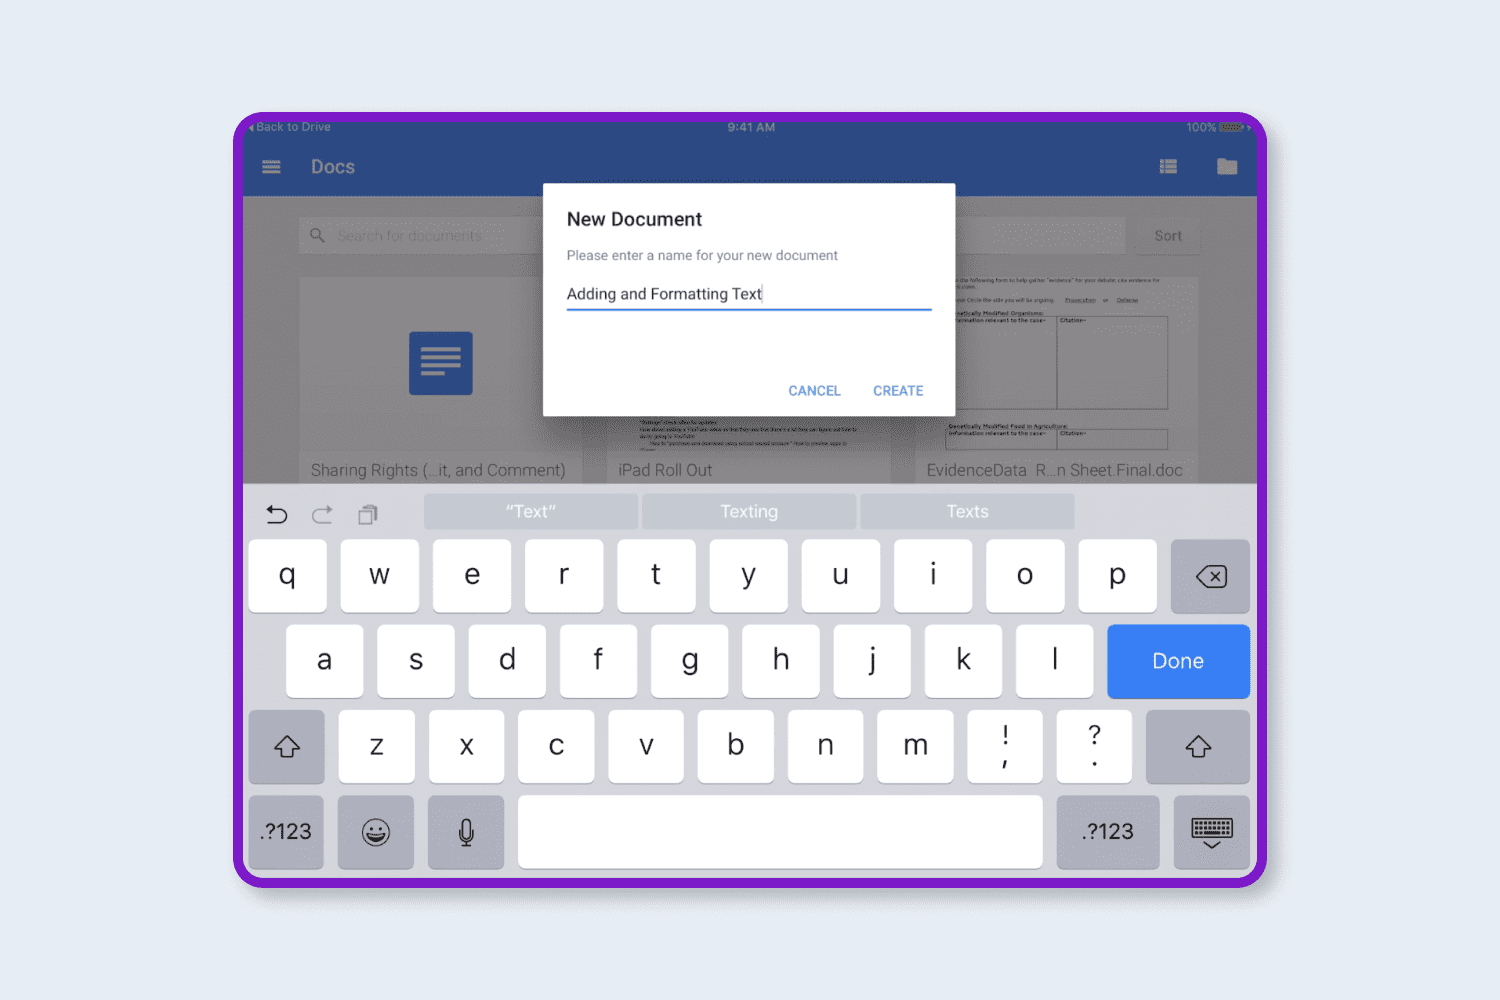
Open the document for editing or create a new document.
Click the pencil icon in the lower right corner of the screen.
![]()
Next, you need to select existing text for editing or touch the place in the document where you want to start printing with the new typeface.
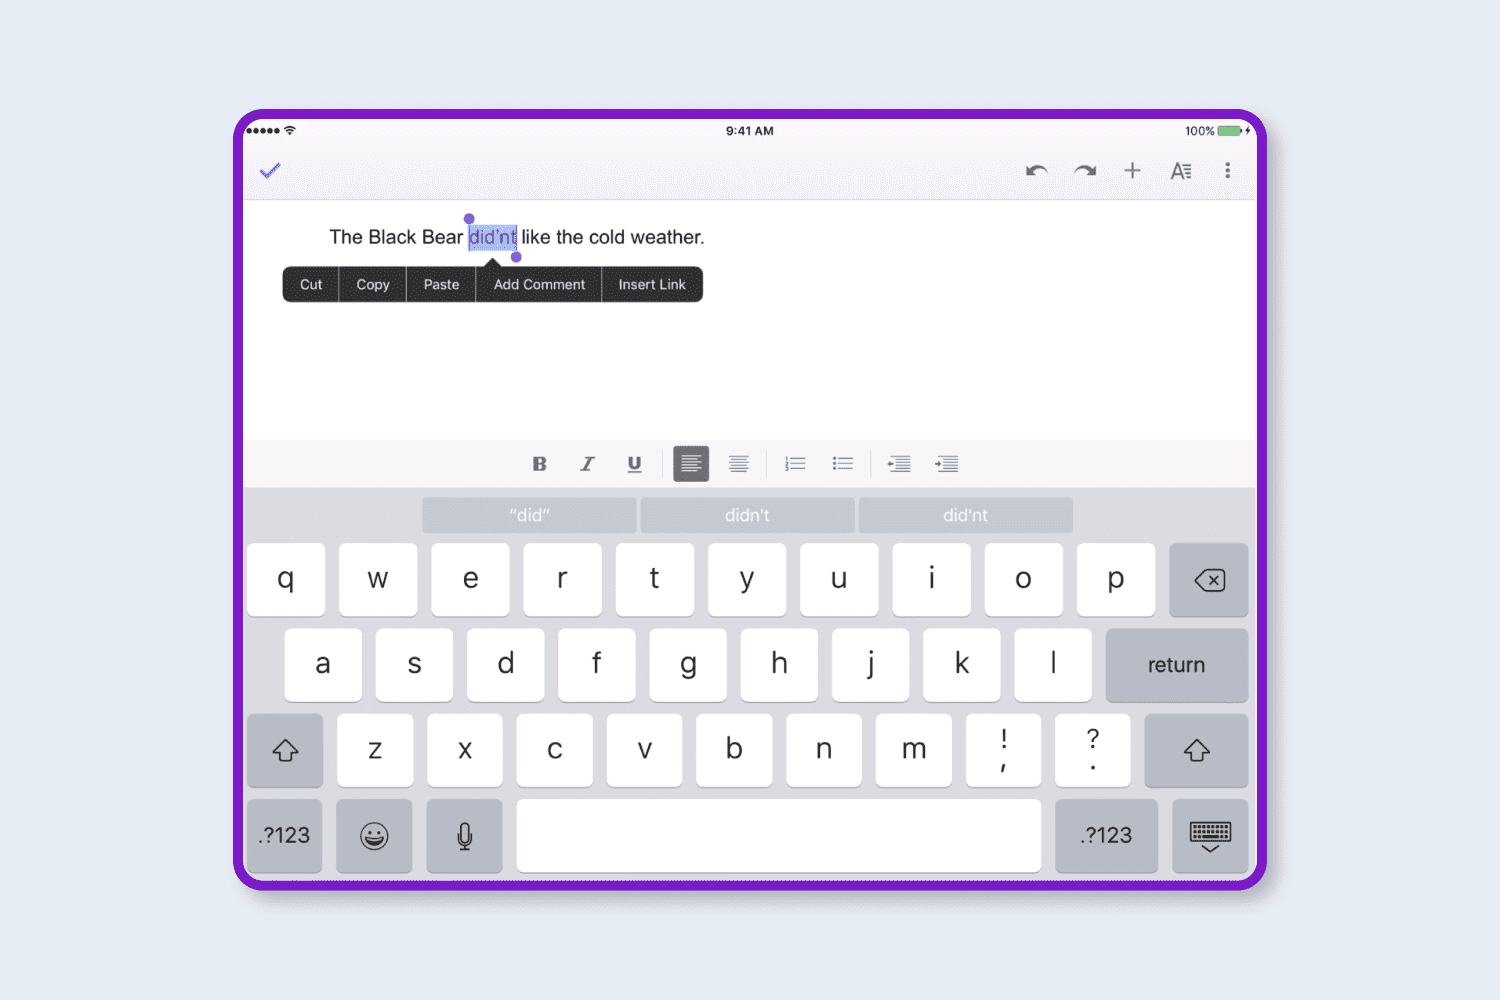
Click the A icon in the upper right corner of the screen.
![]()
Select the Font option.
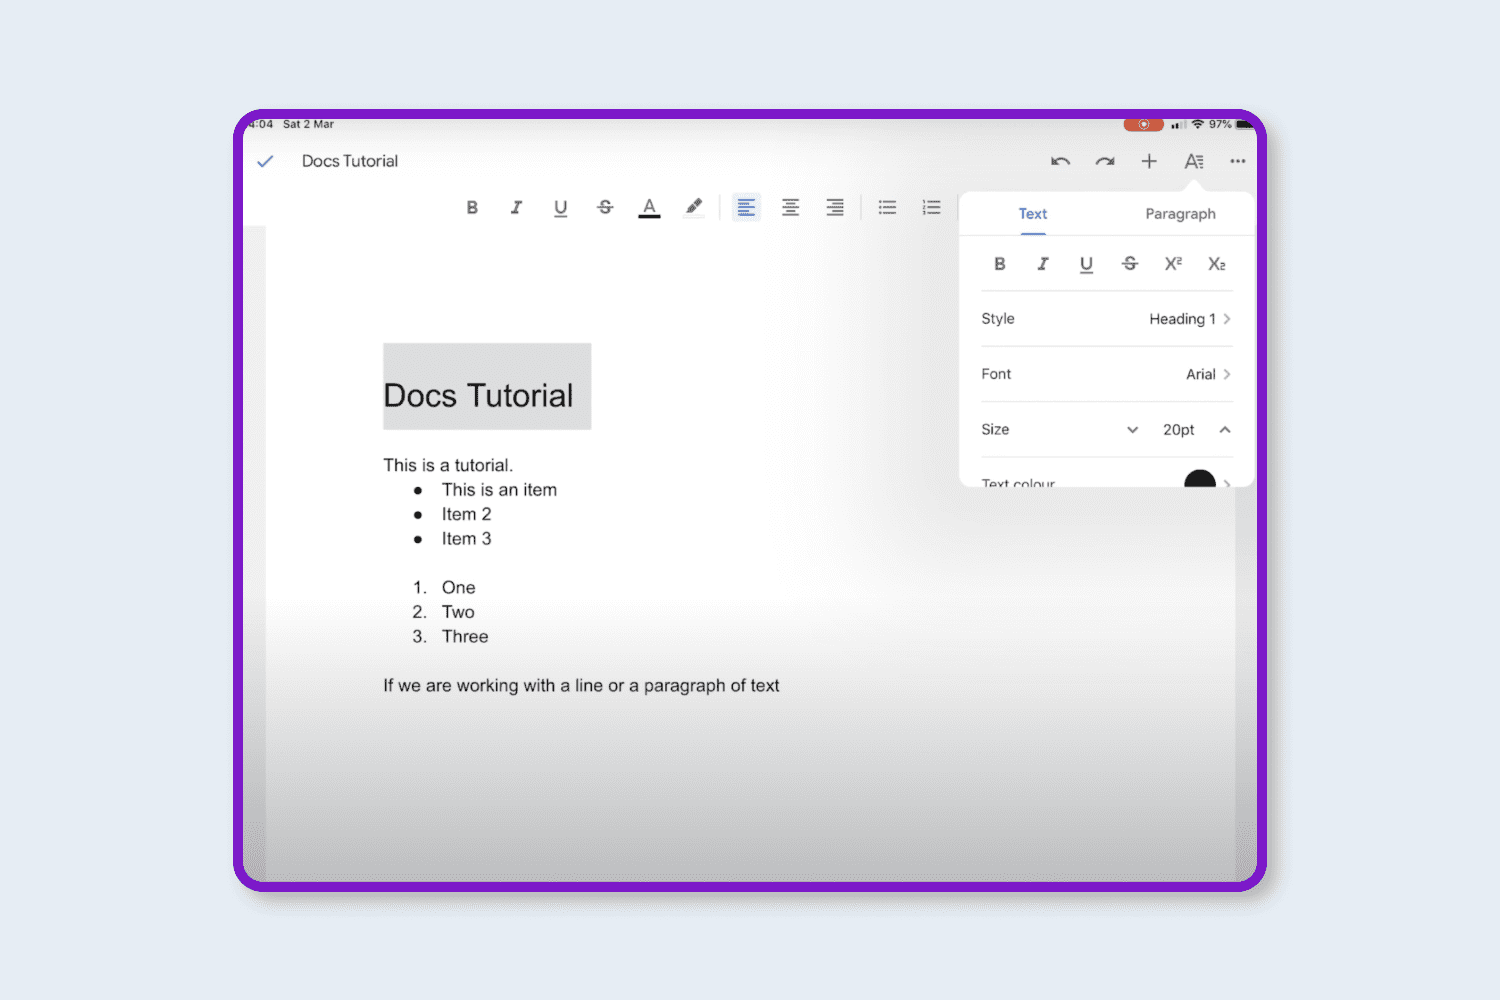
The last step is to choose the font to be used.
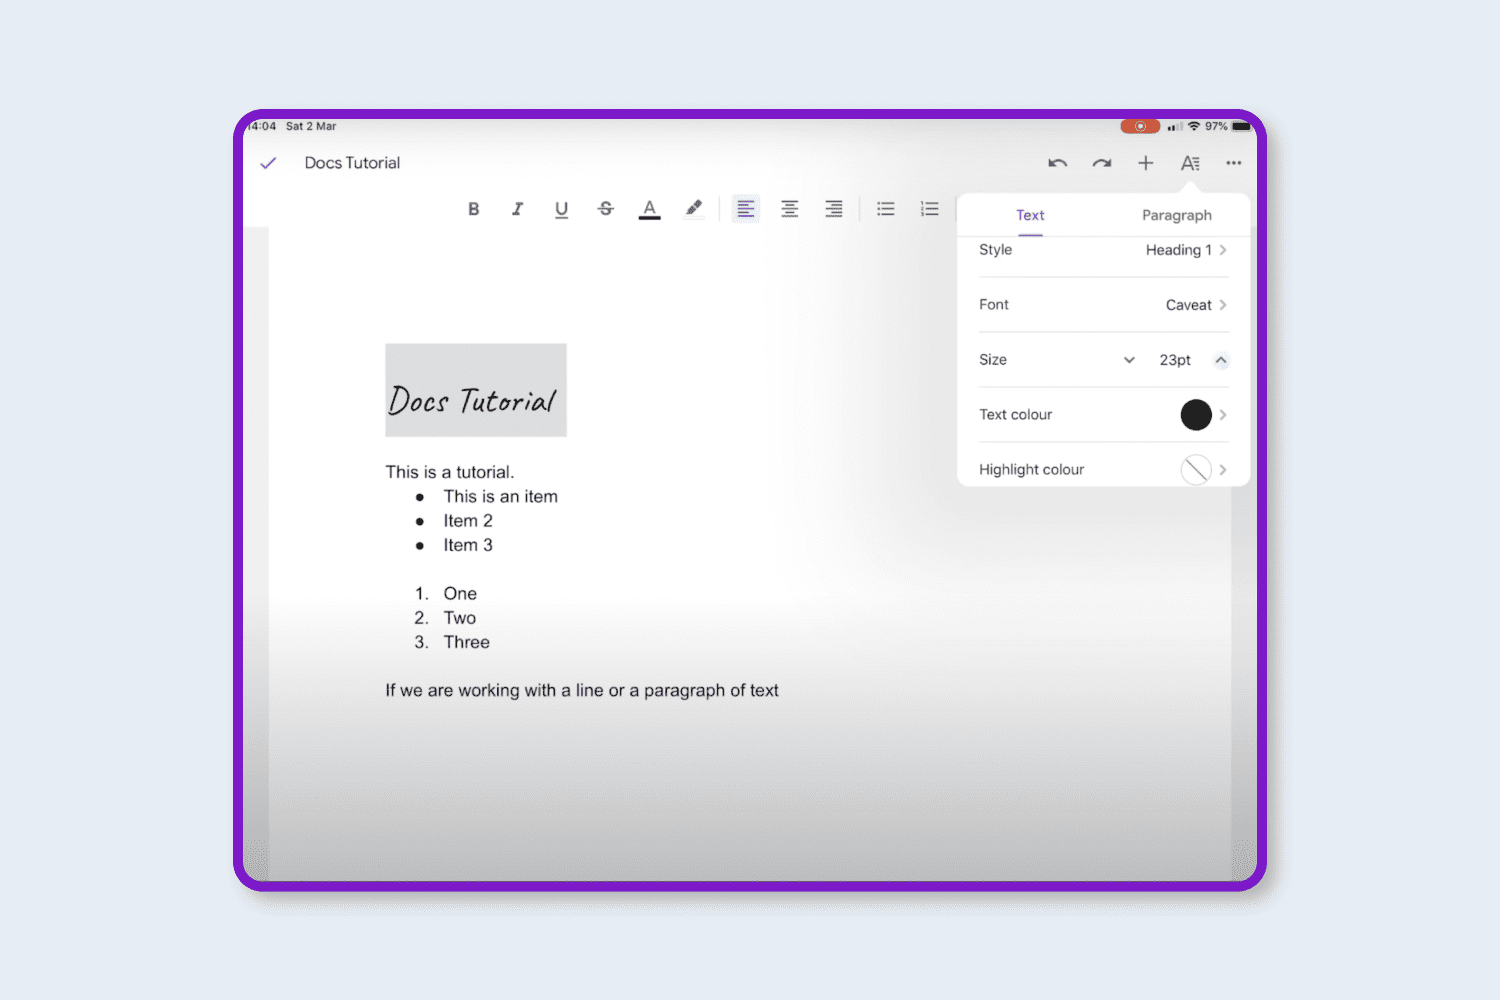
How To Install Custom Fonts for Google Docs
If you want access to even more new and varied typefaces, there is a great addition to consider— Extensis Fonts. If you are wondering how to use extensis scripts, there is no need to worry because it is quite simple. Follow these next steps:
In the add-ons menu, select this product and download it.
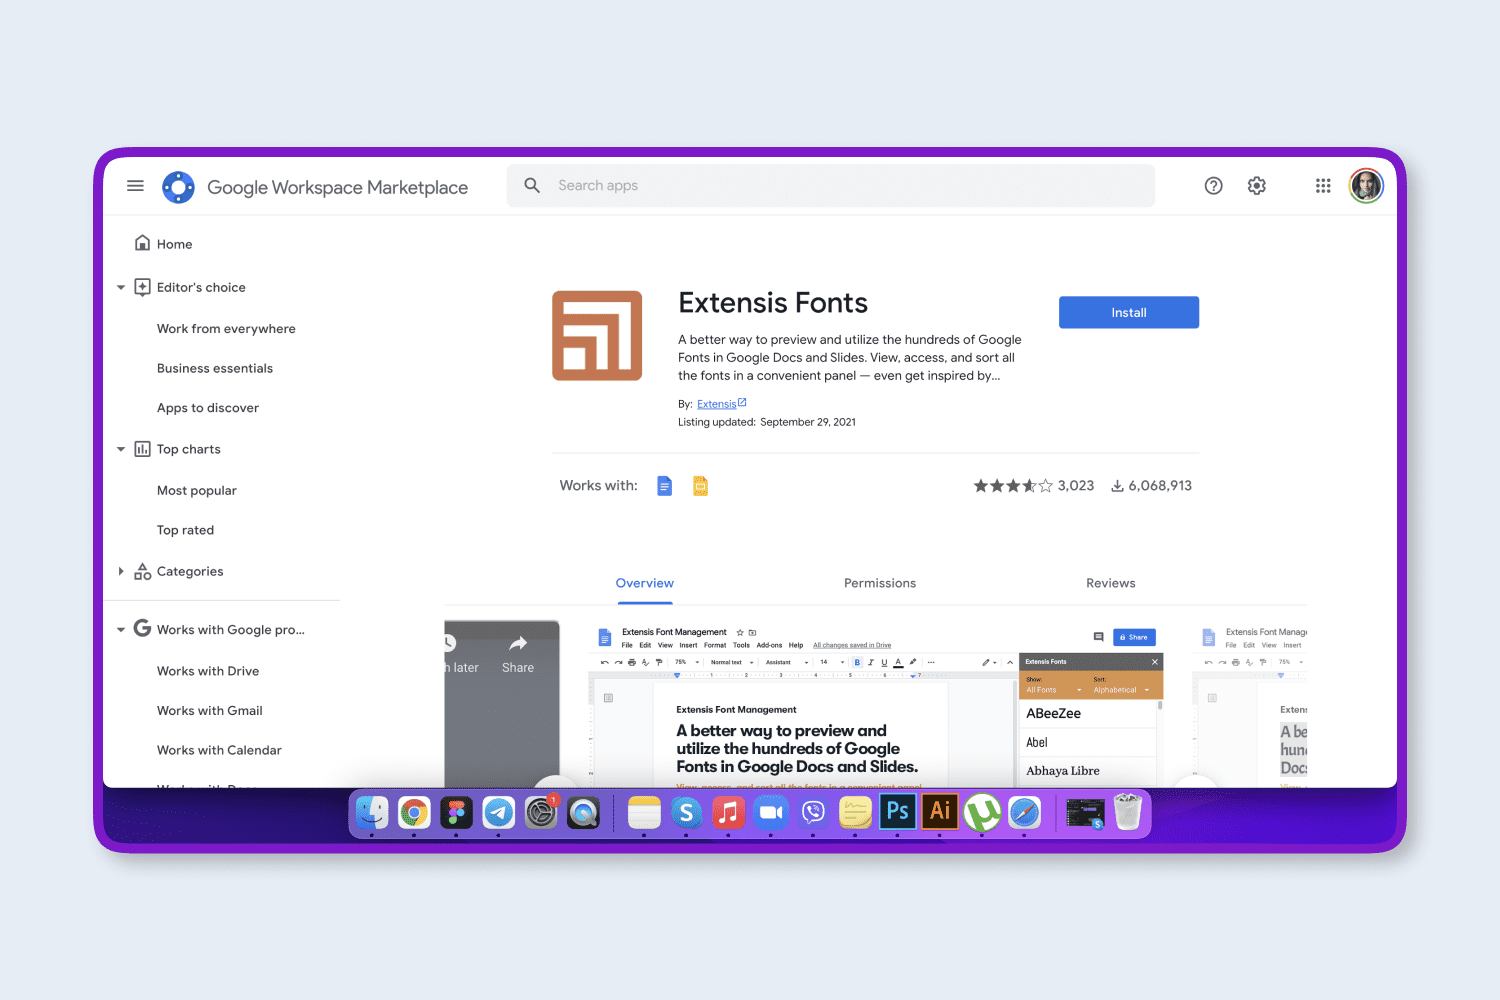
After installation, choose Extensis Fonts from the main menu and click Start.
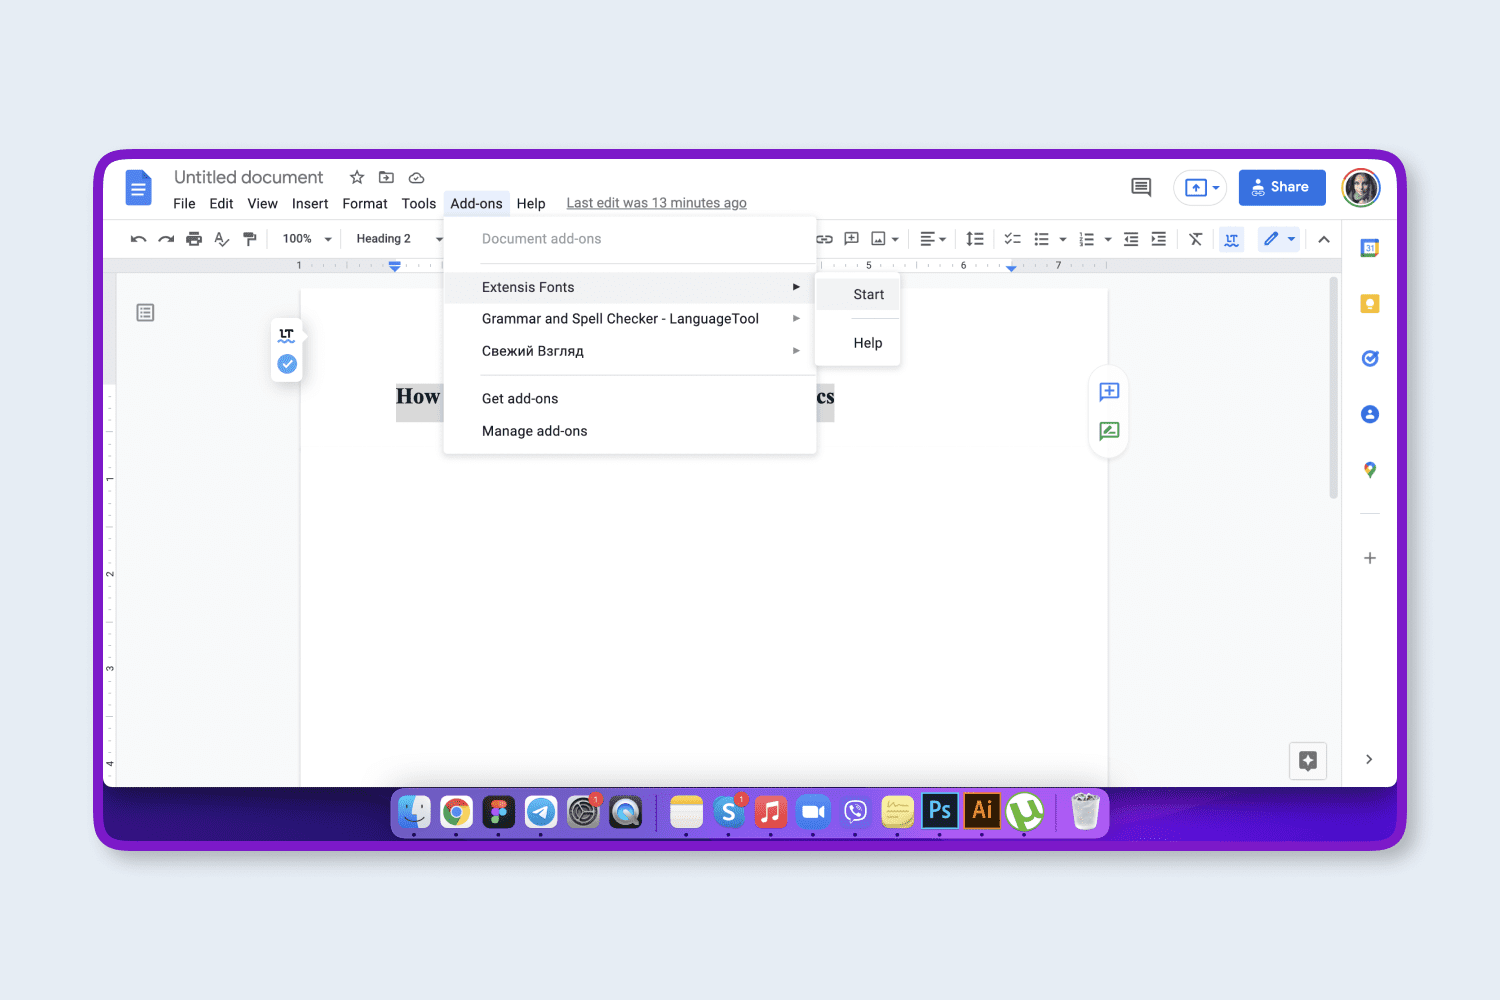
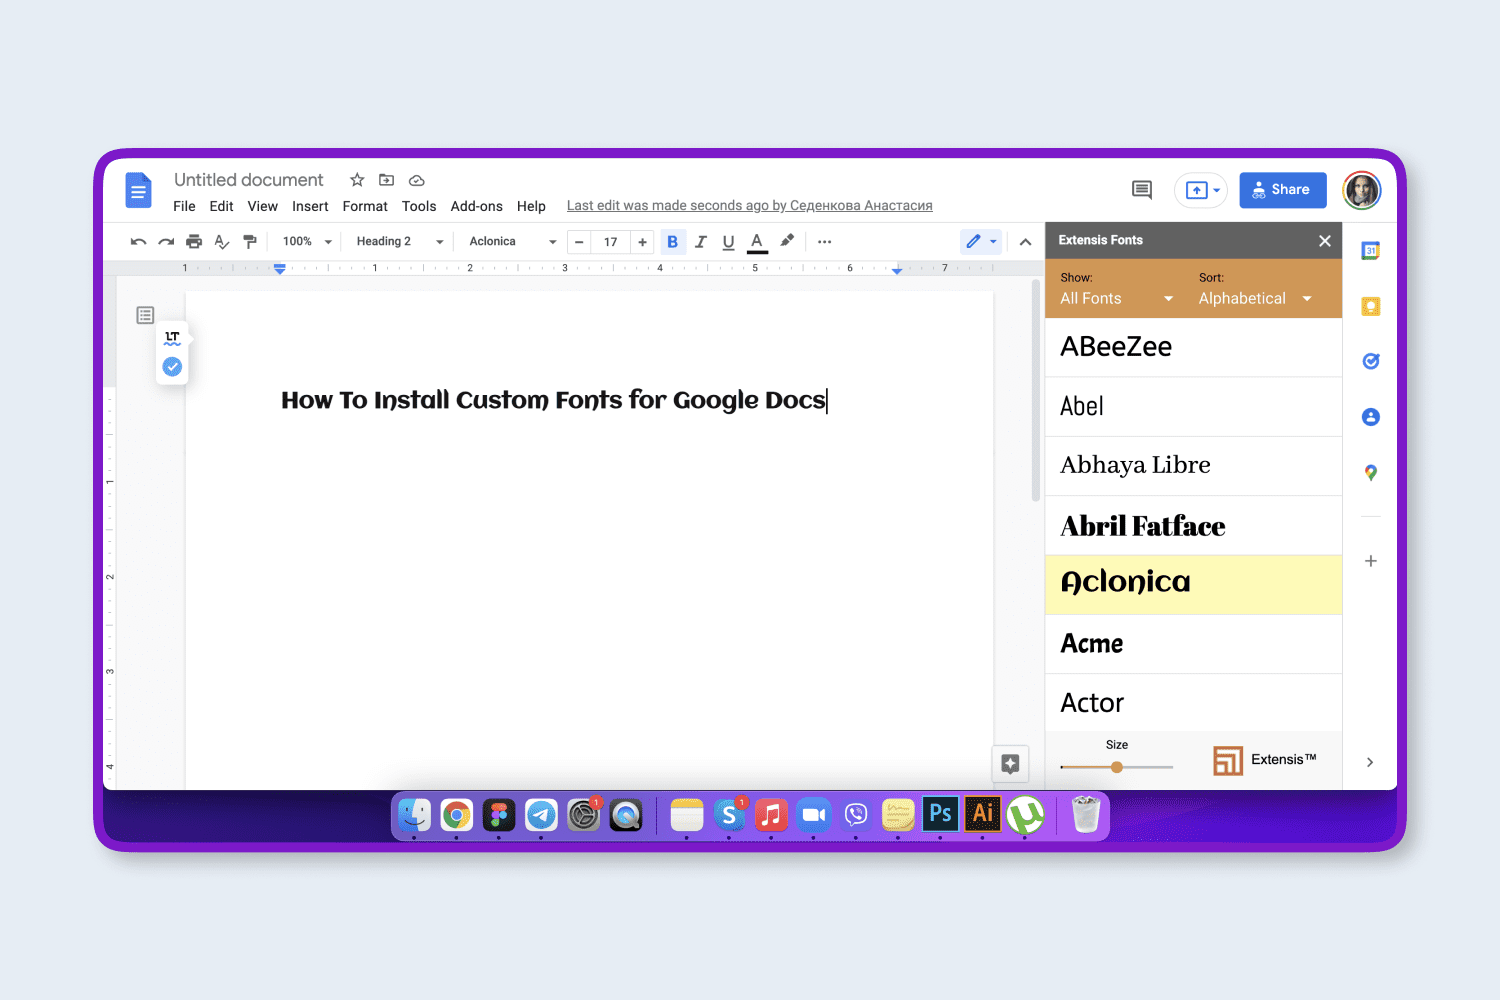
After that, a panel appears on the right with a selection of typefaces from the service’s library.
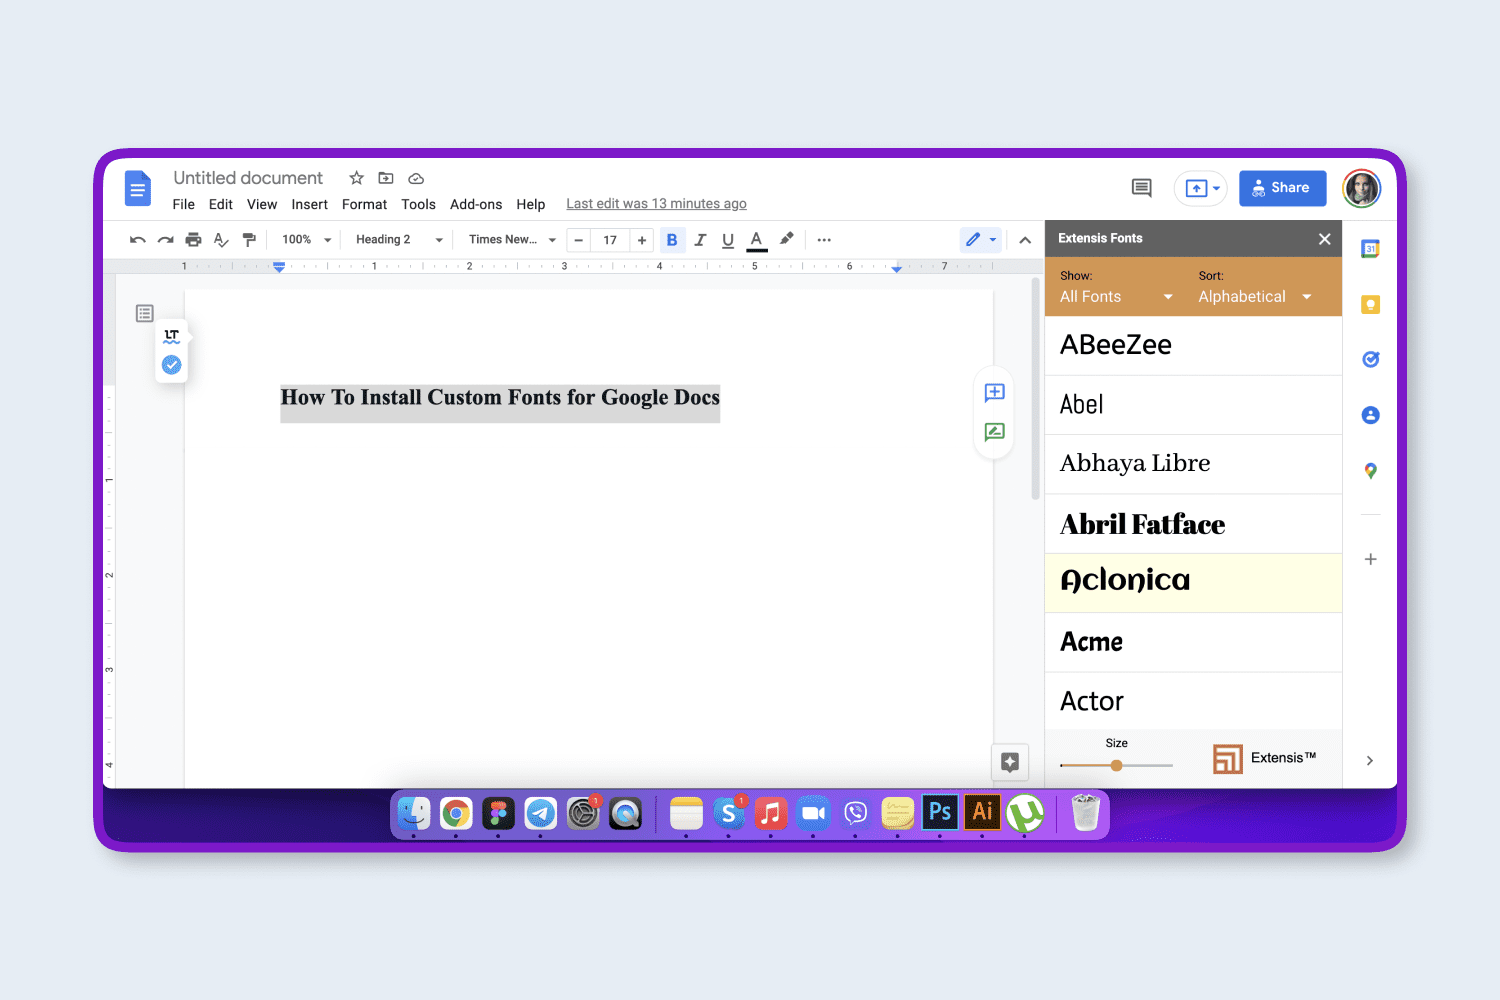
Choose a font and work with it just as you do with the standard fonts.
How to Change Fonts in Google Slides
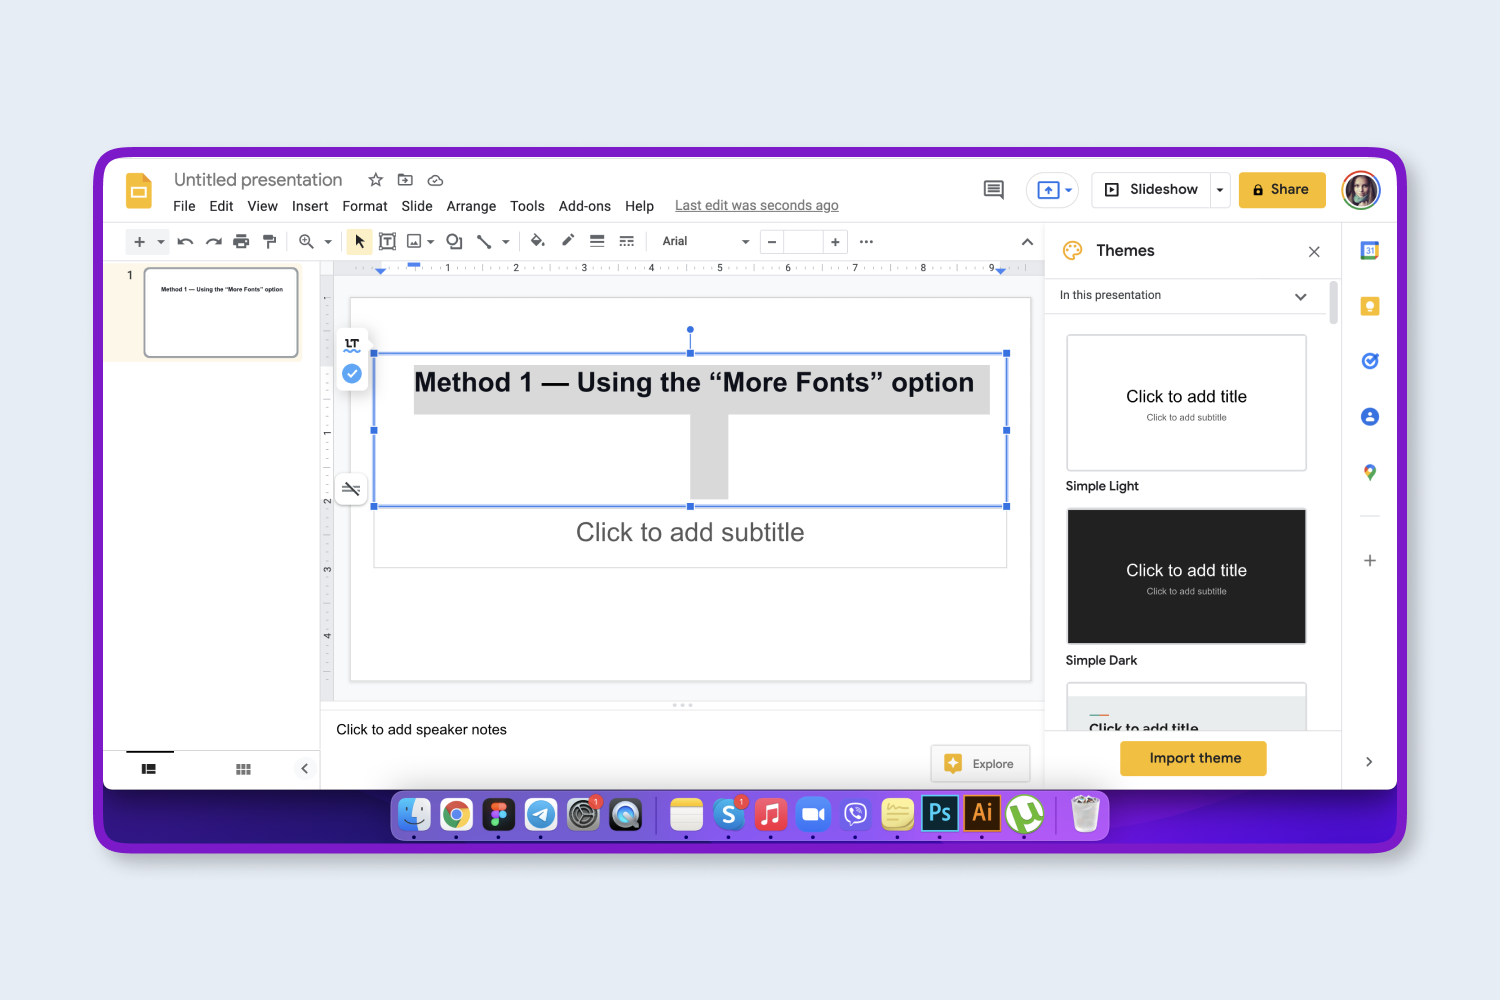
Method 1 — Using the “More Fonts” option
Go to the toolbar, click the Font drop-down arrow and select the typeface that best suits your needs.
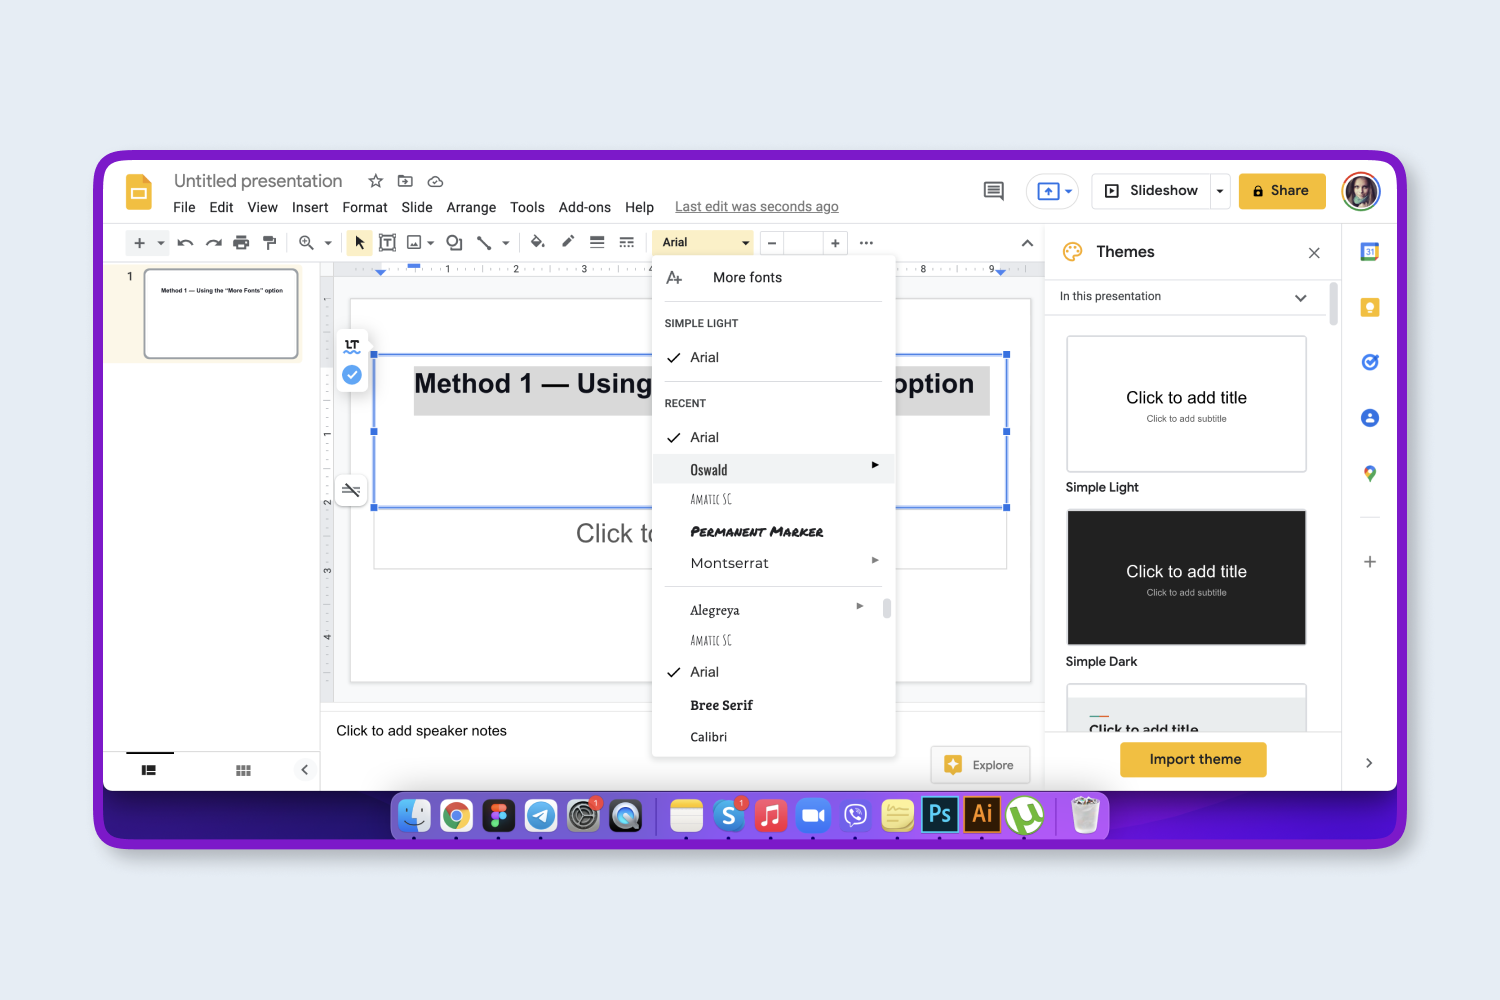
Move the cursor over any typeface you like and choose a style for it.
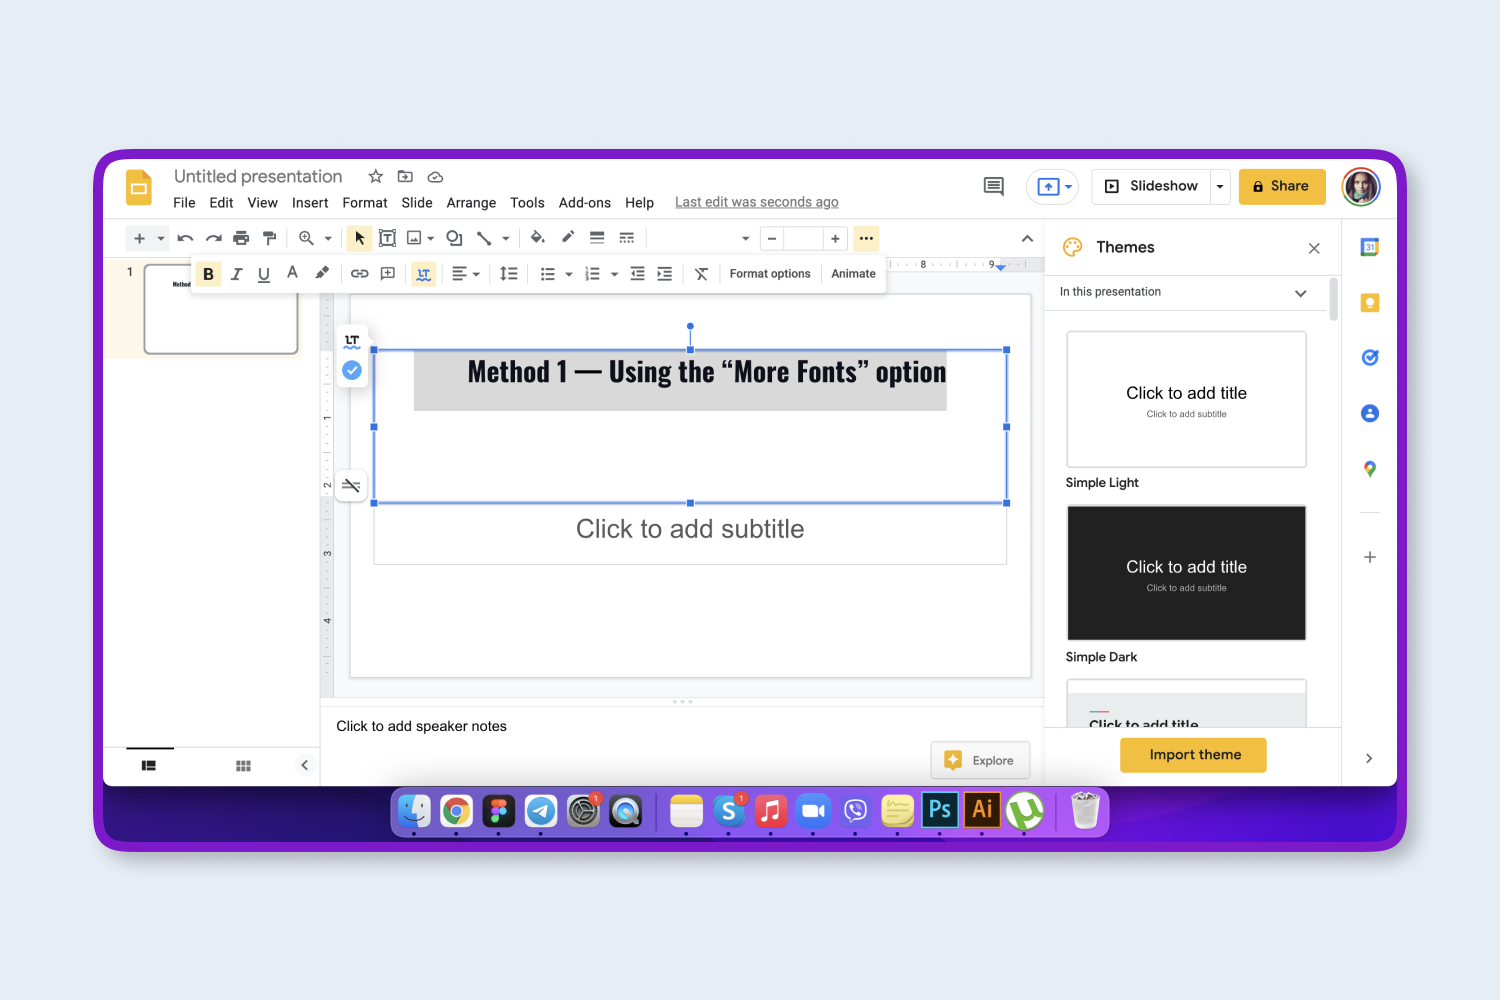
Method 2 — Using the Extensis Fonts Add-on in Google Slides
The process for using the add-on is almost the same as for Google Documents.
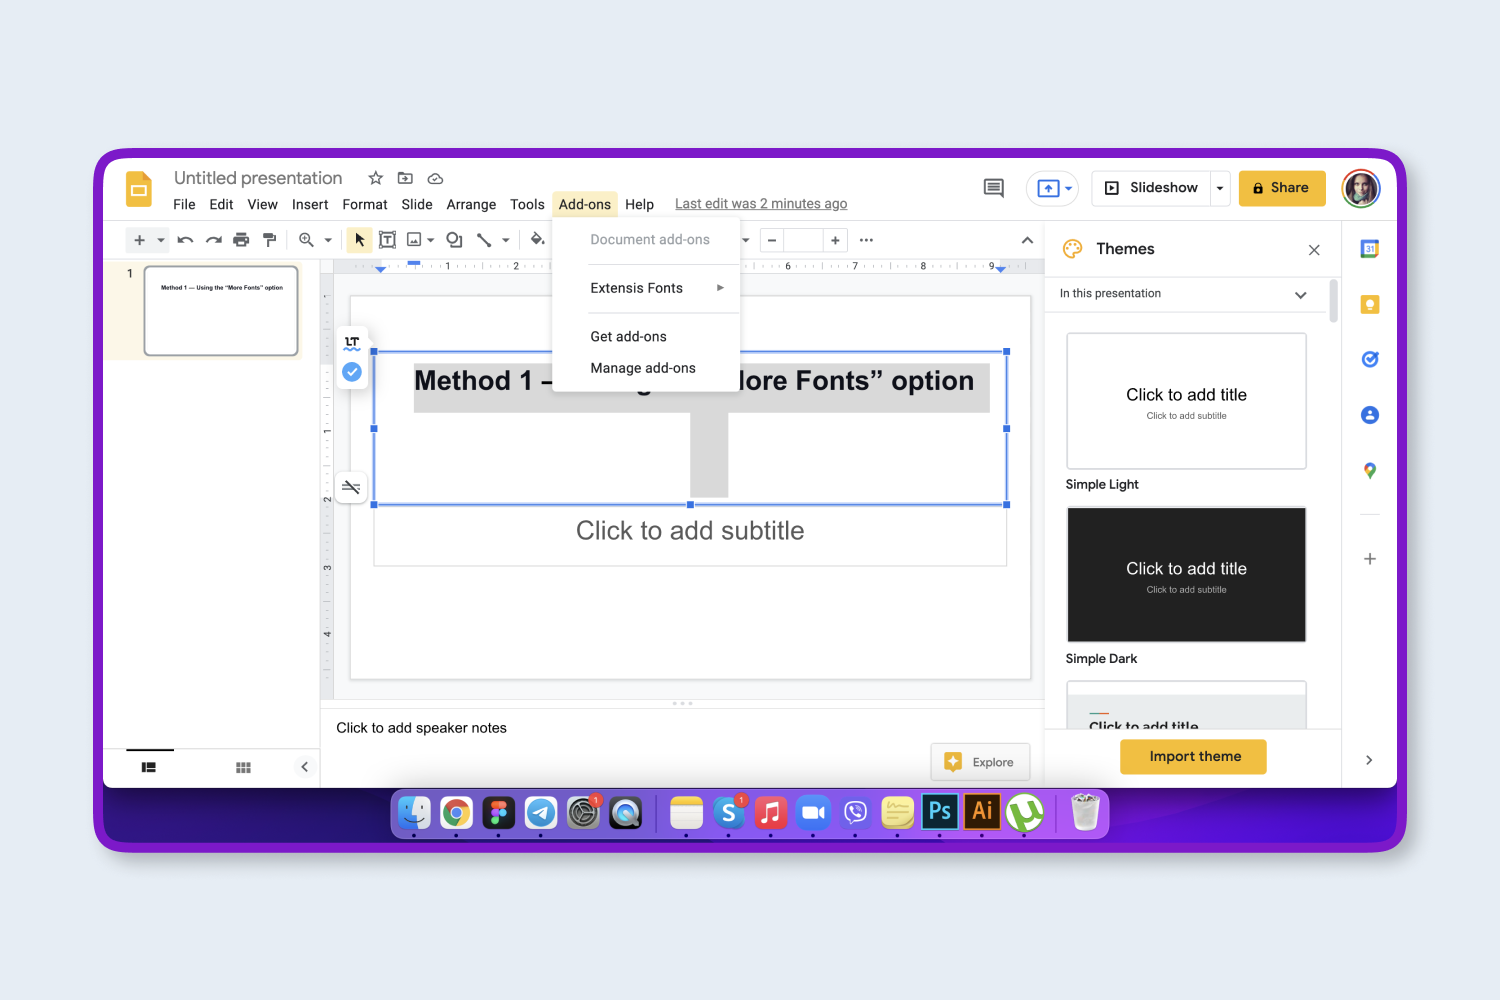
Go to the Add-ons panel and click on Get Add-ons.
Look for the Extensis Fonts add-on and download it.
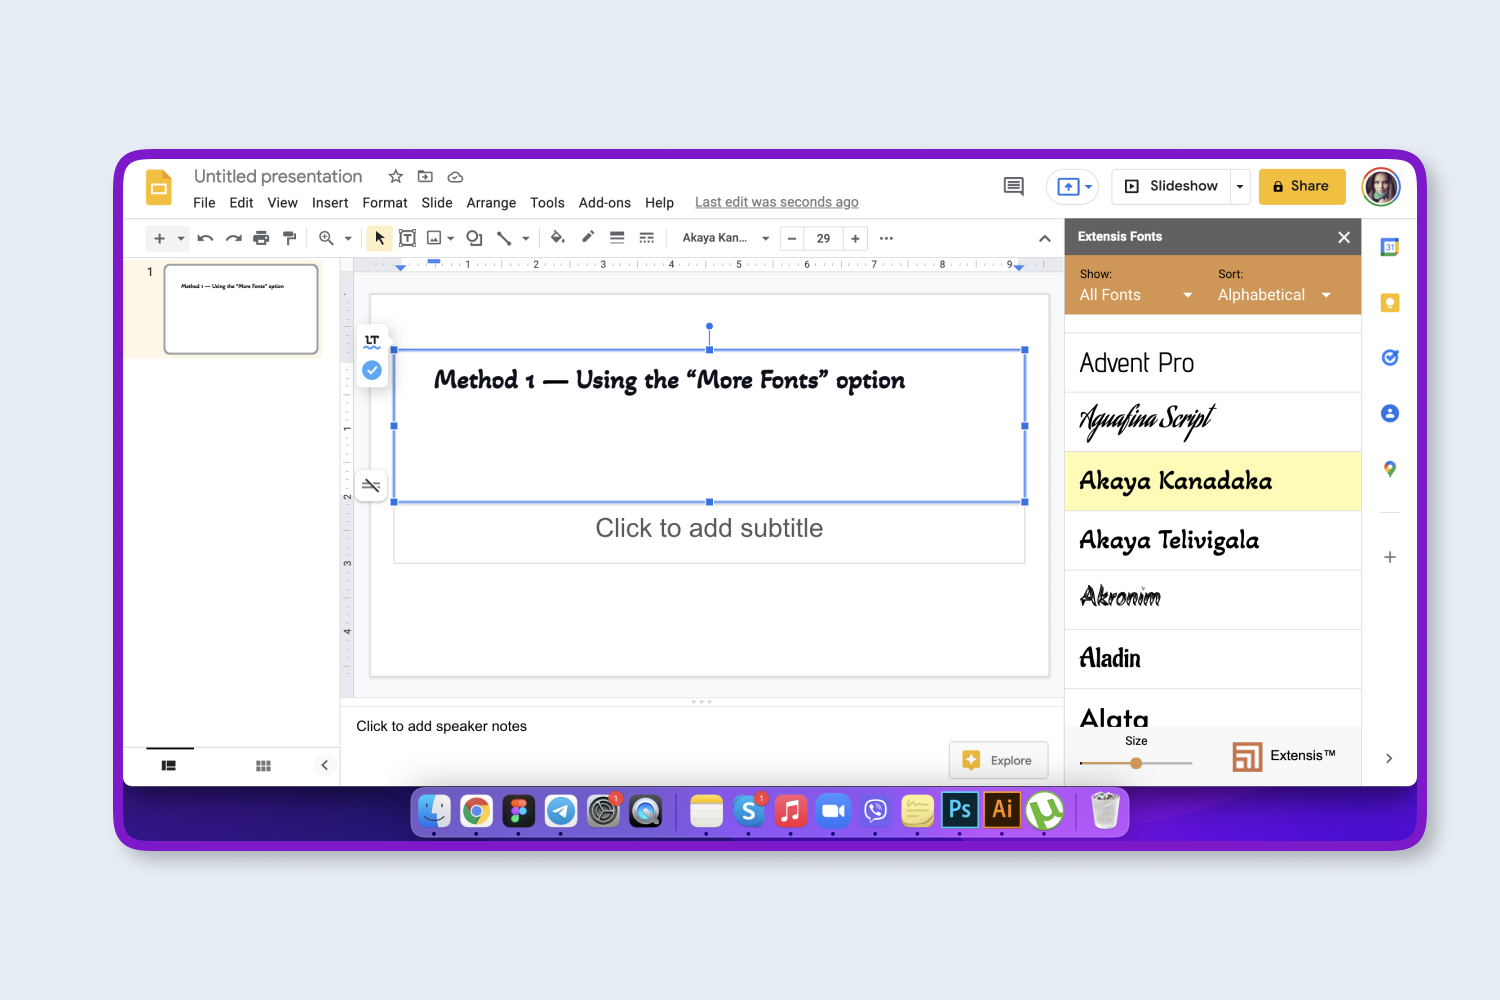
Once you have downloaded it, open the add-on and highlight the text you want to change.
Can You Add Custom Fonts in Google Slides?
A great advantage of Google Slides is that it includes many interesting fonts. But unfortunately, there is no way to add custom fonts to Google Docs. However, you may use special web fonts (since it is a cloud application). The Extensis Fonts add-on is especially convenient for this.
How to Change Fonts on All Slides in Google Slides
One of the comfortable components of working with Google Slides is the possibility to have an alternate layout structure for each of your slides. It helps give the presentation a more professional look and provides a level of predictability that makes editing the content a little easier.
After you have worked with some of your slides, you may find that you do not like the lettering you are using for a certain type of text. Going back and changing each of these font instances manually can be tedious, and it is easy to miss one. Fortunately, Google Slides has a master slide that makes it easy to customize settings for each type of text in the presentation.
So, to adjust the typefaces, you need to take the following steps:
Click the Slide tab at the top of the presentation window.
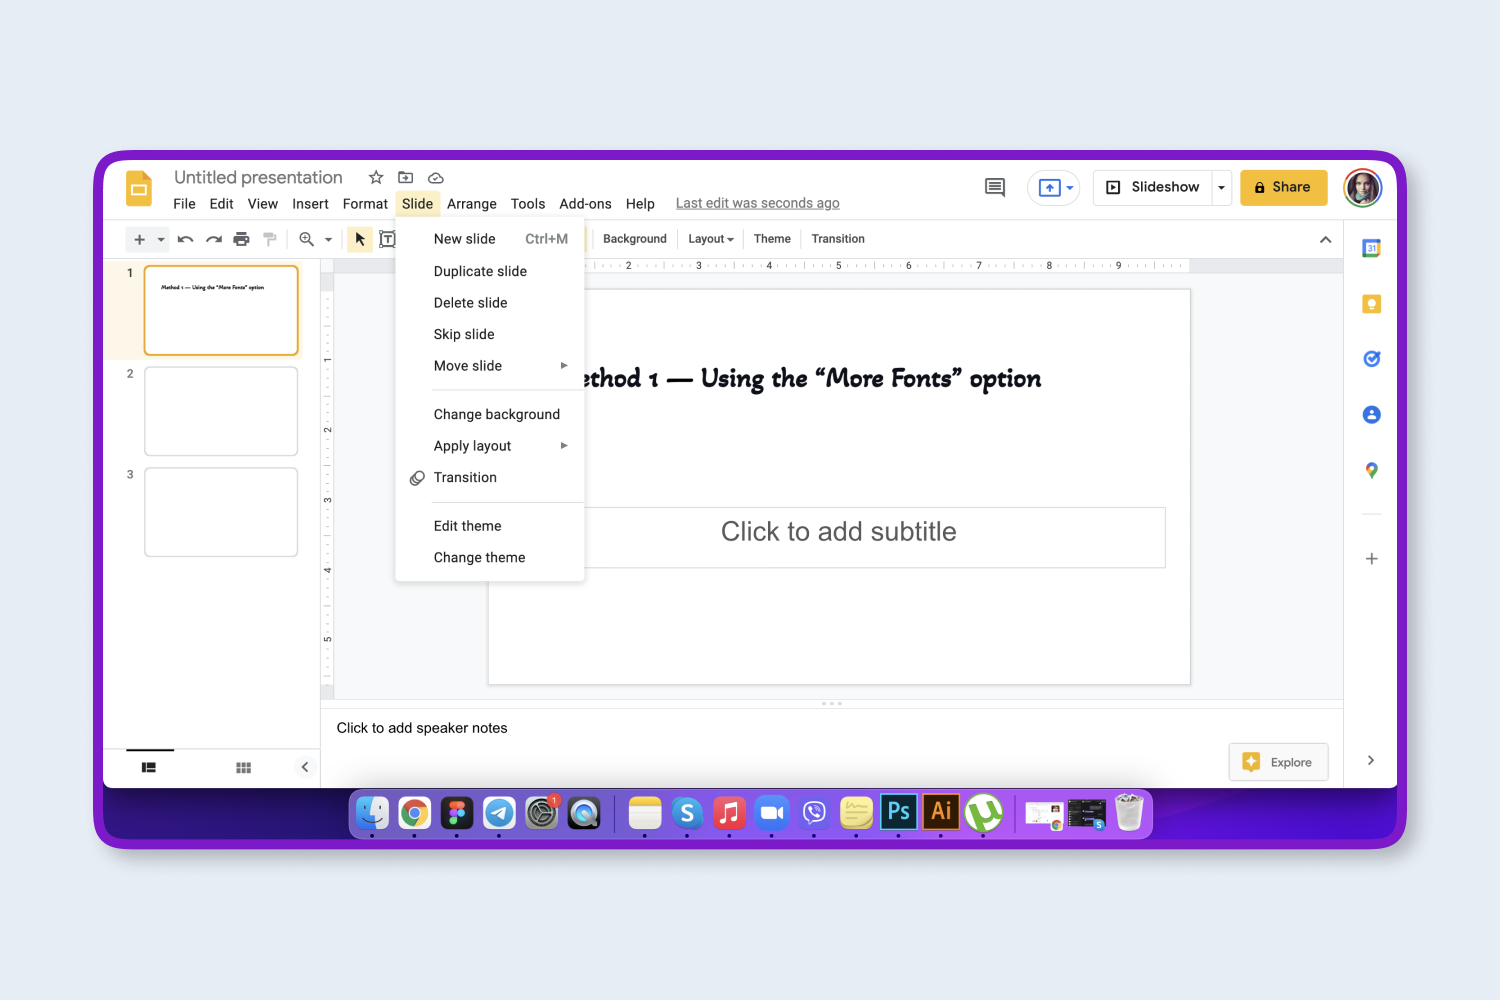
Select the Edit master option.
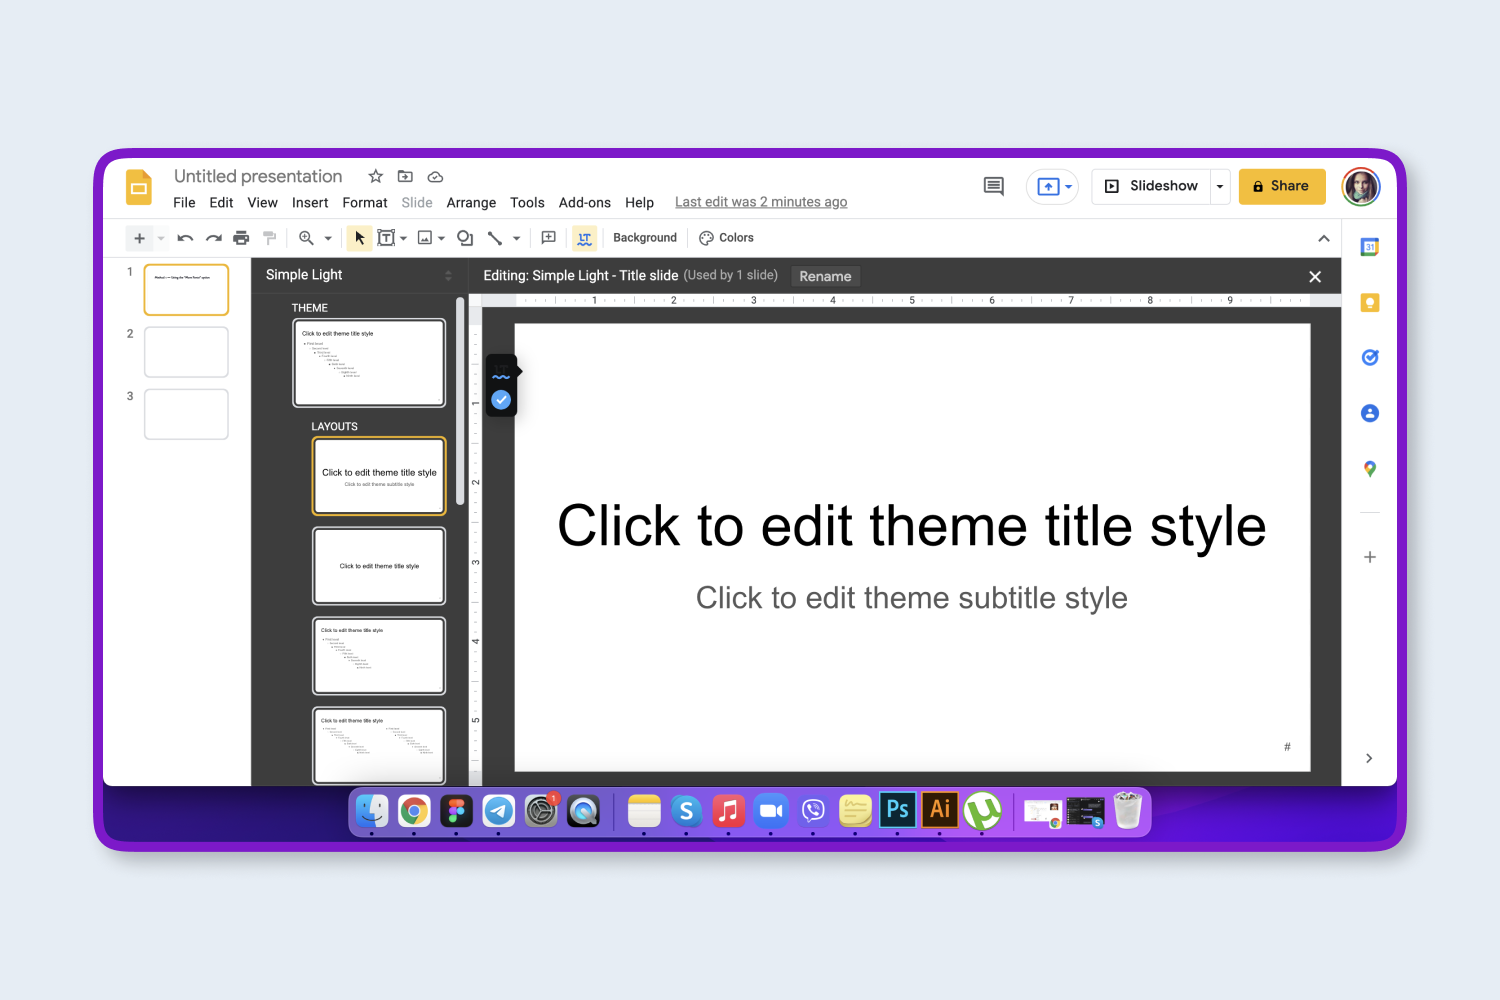
Choose the type of slide layout you want to edit. Note that each sample slide layout will show the number of slides using that template when you click it.
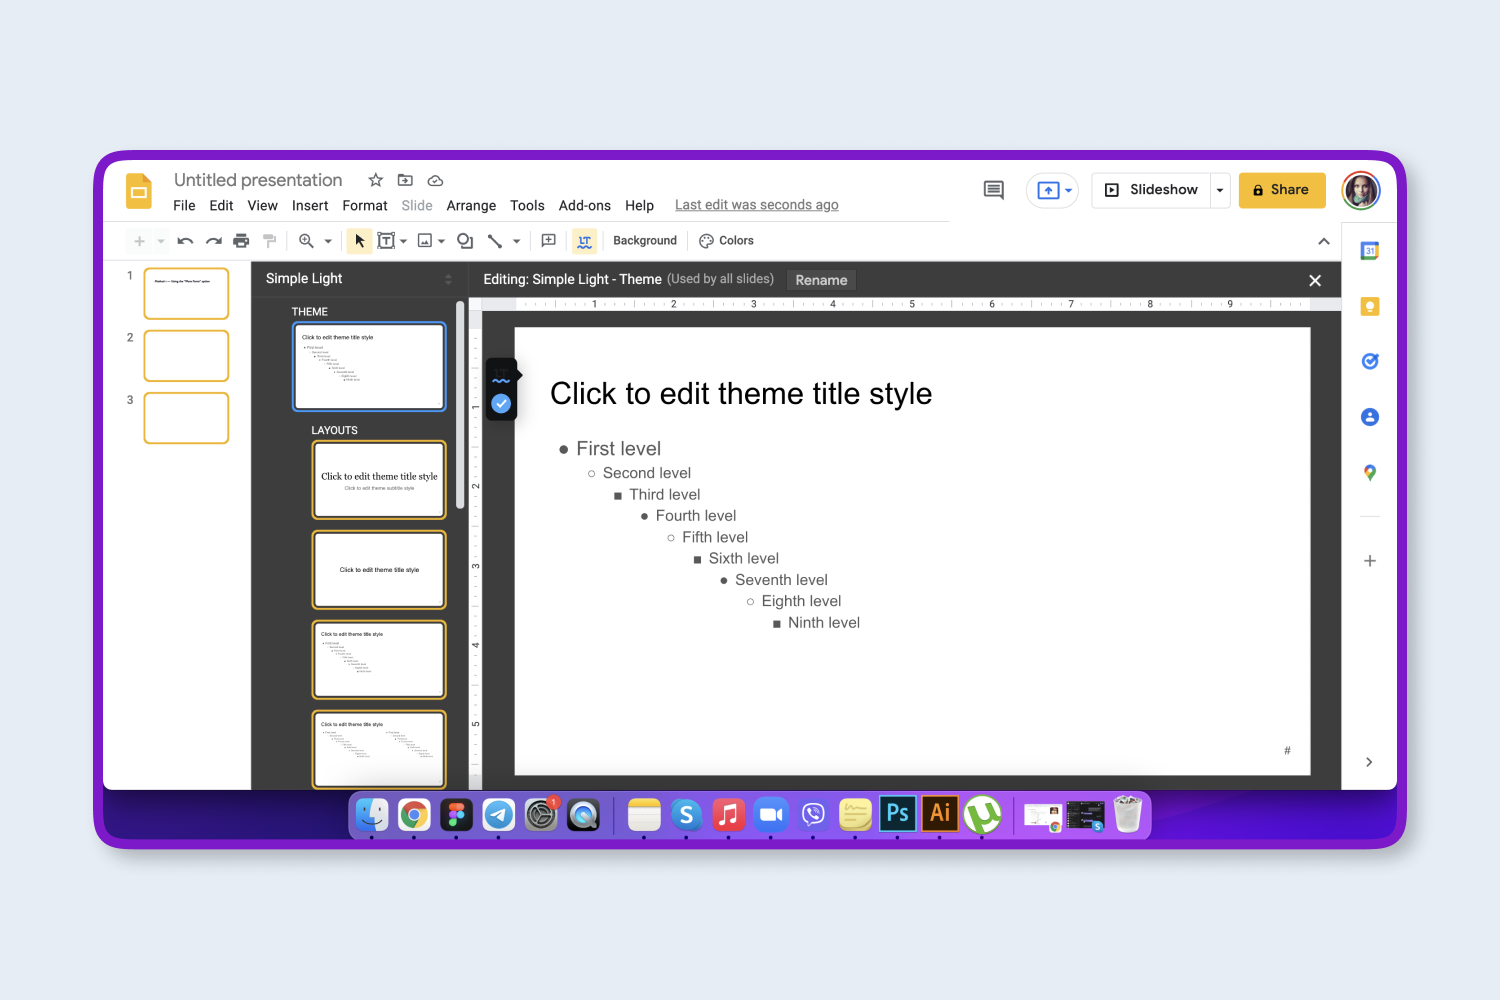
Click the type of text that uses the script you want to change.
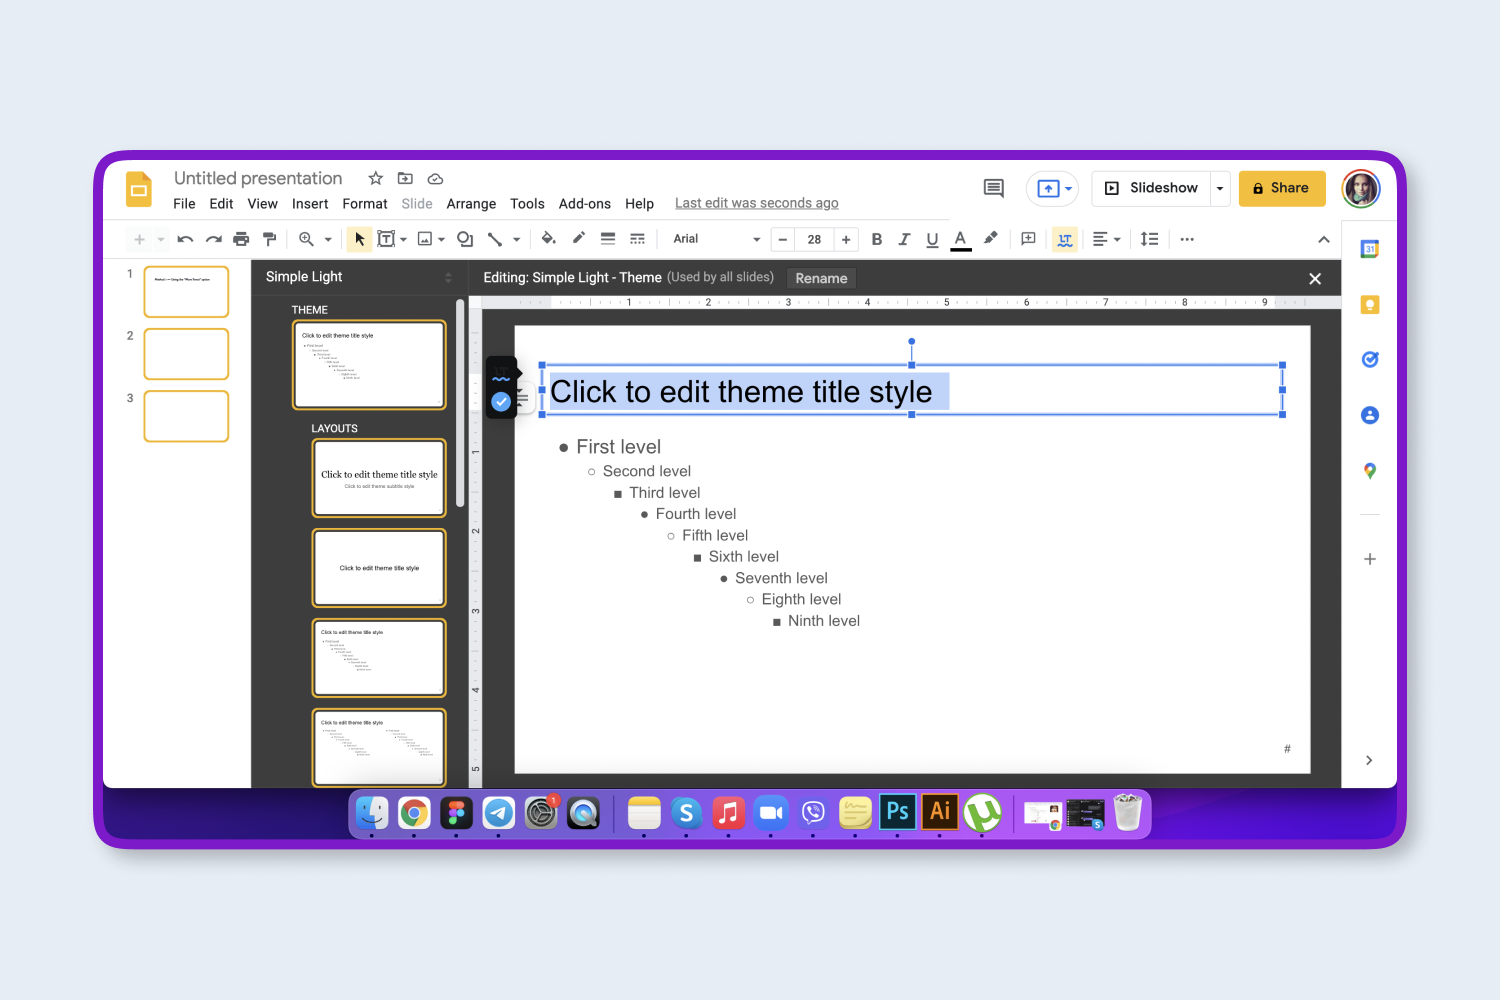
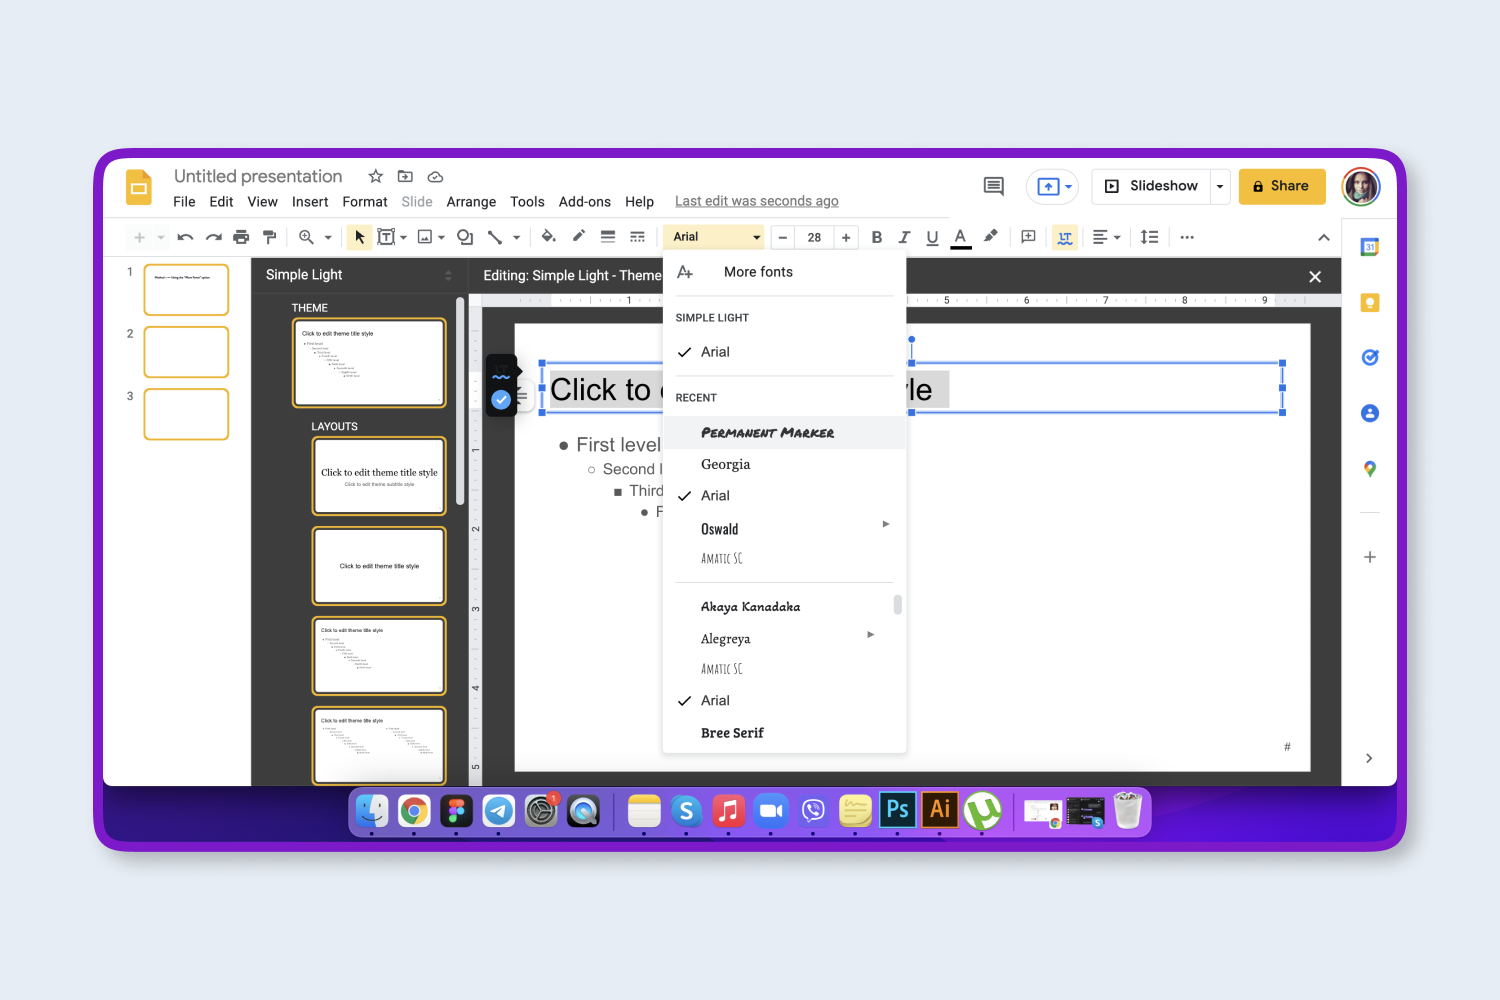
Select the text, and then click the Font drop-down menu and select a new product.
Now, you will be able to choose one of your slides in the column on the left side of the window and see how it looks with the newly selected lettering. Other slide locations that have this type of text will also be modified.
Please note that every presentation has multiple types of slides, so you may need to set up more than one master slide if you want to have the same script in every part of the slide.
Final words
We can conclude that text and formatting are very important in different projects. Often, even though most programs are easy to work with, there is a problem with a lack of unique fonts.
Now you fully understand how to change or add different typefaces in Google Docs or Google Slides. As it turns out, it is pretty easy to do, and the selection of scripts is quite large, especially if you use the Extensis Fonts add-on.
Please take a moment to pin this post to Pinterest
What are your concerns?
Thanks for your response!
Disclosure: MasterBundles website page may contain advertising materials that may lead to us receiving a commission fee if you purchase a product. However, this does not affect our opinion of the product in any way and we do not receive any bonuses for positive or negative ratings.


